Learn how to create a report in the Bookipi Invoice mobile app
How to create a report
Learn how to create reports in the Bookipi Invoice mobile app with our simple tutorials:
-
Customize your view of Reports
Explore how to create a report on the Bookipi Invoice mobile app by following our detailed step-by-step video guide below:
How to access and print your reports as a PDF
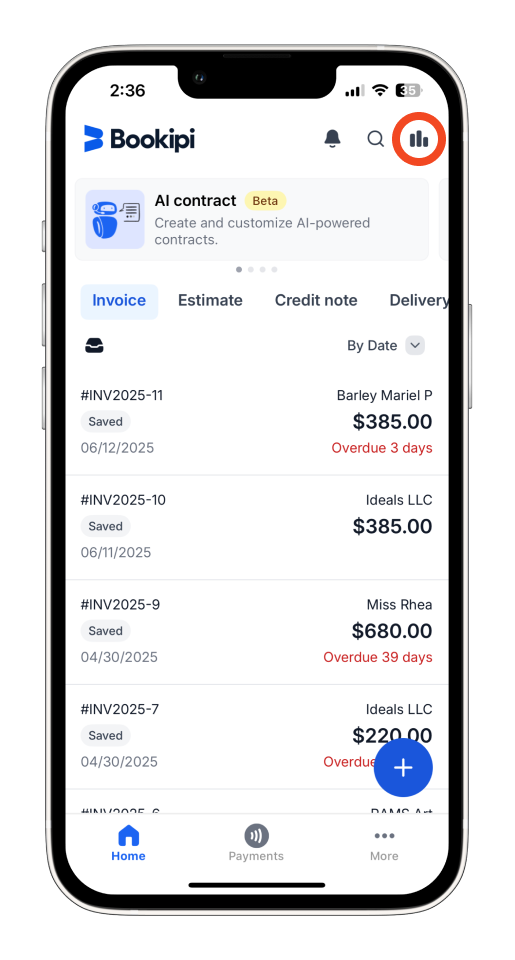
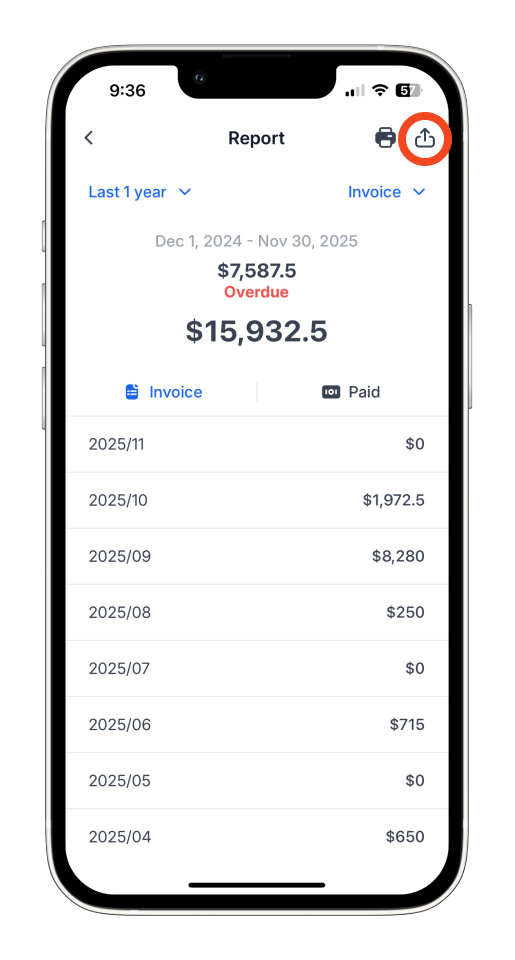
Step 1: Select the ‘Graph’ Icon
On your ‘Invoice’ category, tap the ‘Graph’ icon at the top right of the screen.
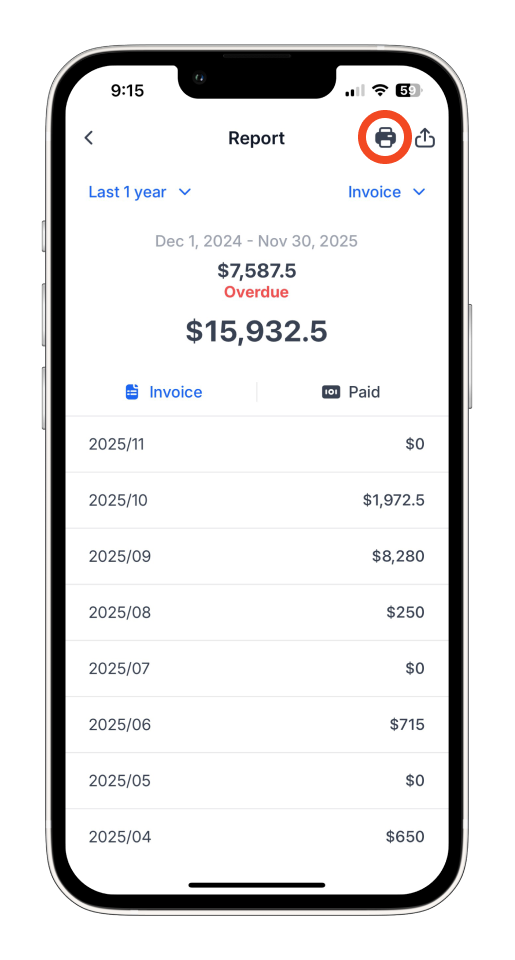
Step 2: Download or Print a Summary Report
Tap the ‘Printer’ icon to download or print your summary report for the past year.
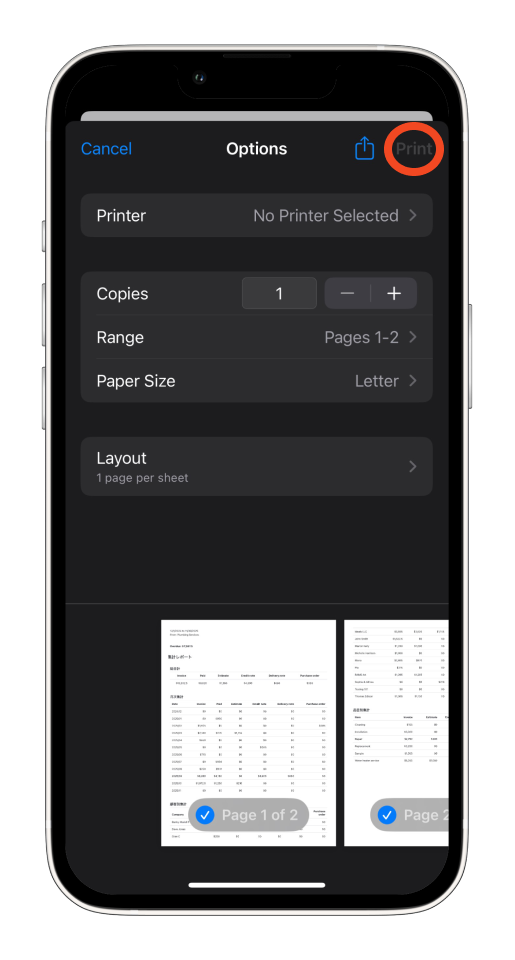
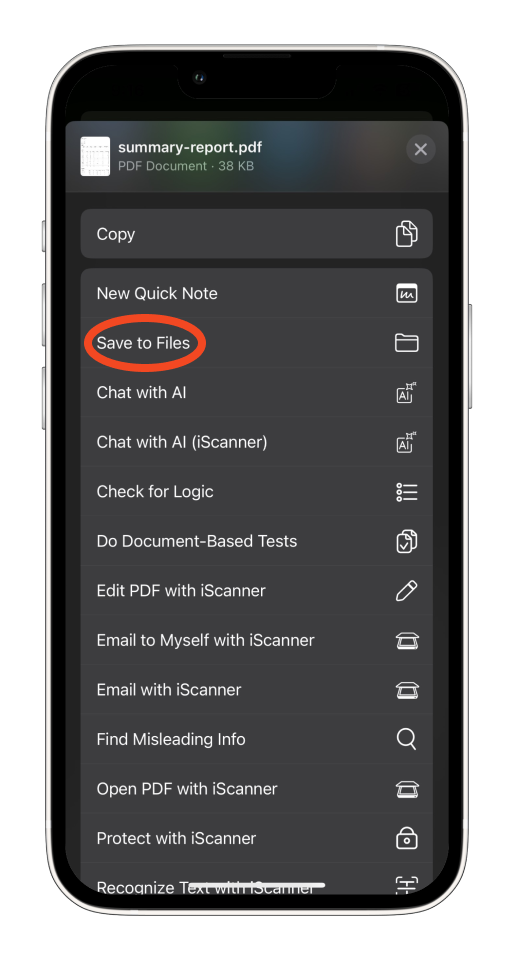
Step 3: ‘Print’ or ‘Send’
Select ‘Print’ to print the summary report as a PDF.
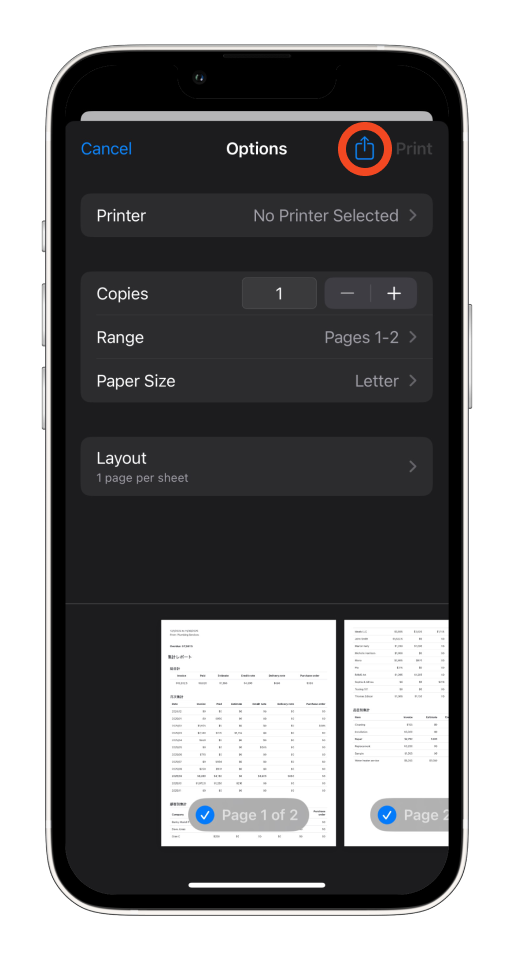
Or tap the ‘Share’ icon to save a PDF copy of the report.
How to export your reports as a CSV and send them in an email
Learn how to export your reports as a CSV file and easily send them via email by following these easy steps.
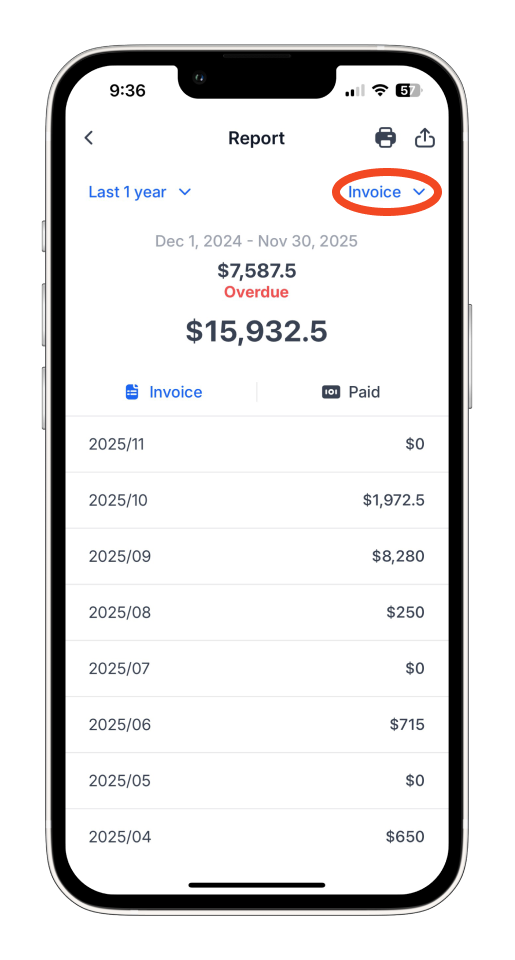
Step 1: Select the ‘Export’ Icon
From the Report screen, tap the ‘Export’ icon.
Ensure ‘Invoice’ is selected.
Step 2: Select Email Method
Choose the method (e.g., Gmail, Outlook) you’d like to use for sending the CSV file.
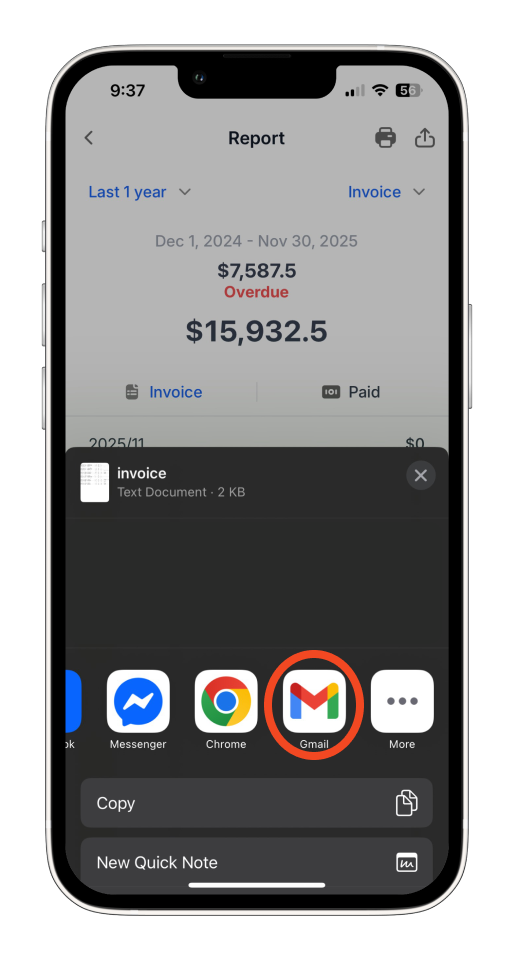
Step 4: Send the CSV
A new email will be generated with the CSV attachment. Verify the recipient’s email address, and tap ‘Send’ to send the email.
How to customise your view of Reports (by document type, customer, or item)
Learn how to view reports by Document type (invoice, estimates, and more), Customer, or Item with these easy steps.
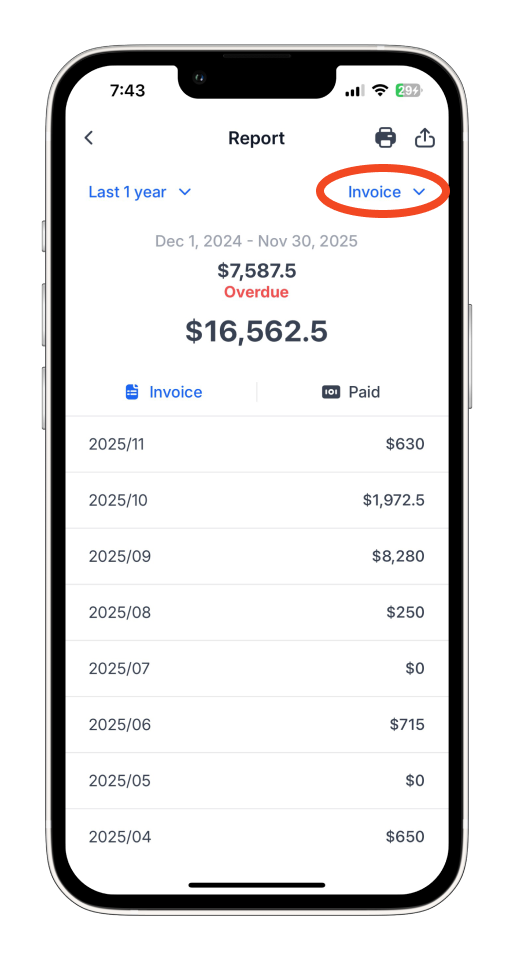
Step 1: Select ‘Invoice’
From the Reports screen, tap on ‘Invoice’.
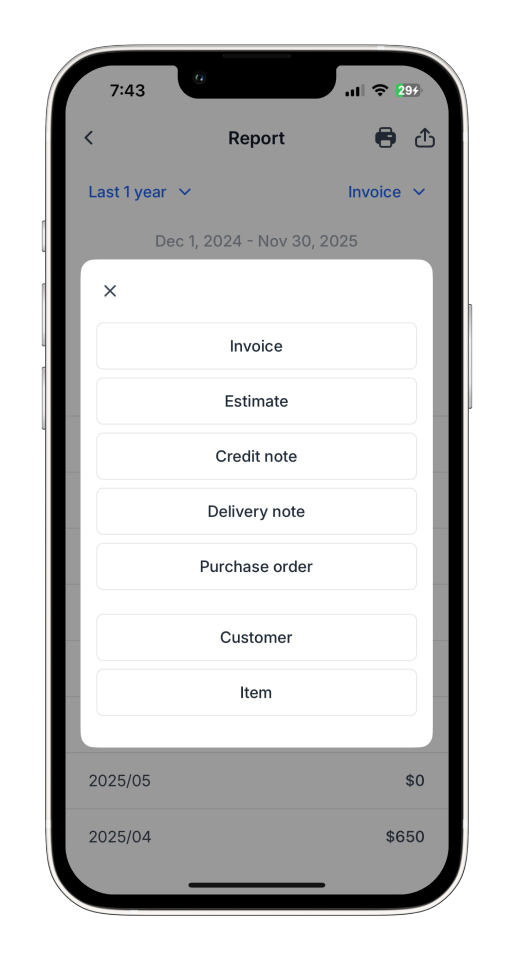
Step 2: Choose Document Type, Customer, or Item
Select the Document type, Customer, or Item you want to view reports for.
Customising how you view your reports will not affect the summary reports that are downloaded or exported.
How to customize the period for your reports
Learn how to view reports for specific dates and customize your date range with these simple steps.
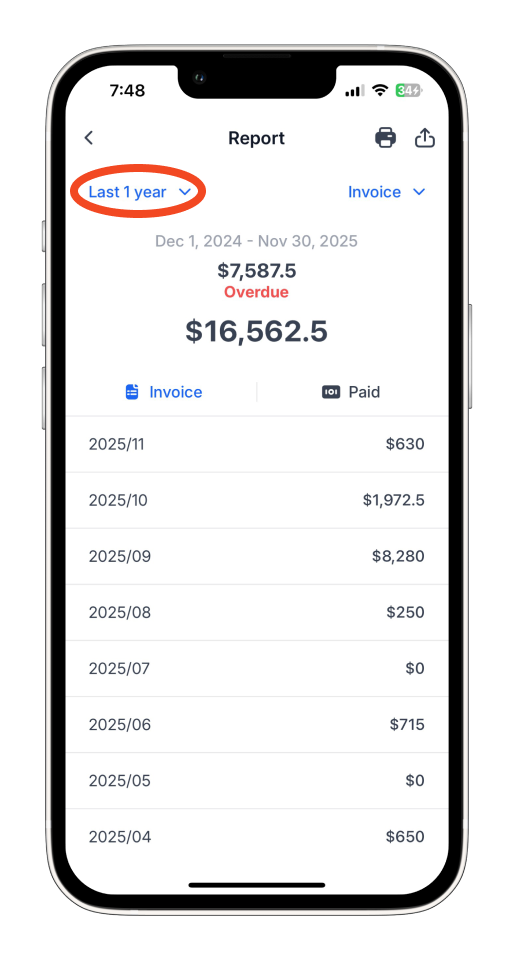
Step 1: From the Report screen, select ‘Last 1 year’
Tap ‘Last 1 year’ to start customizing.
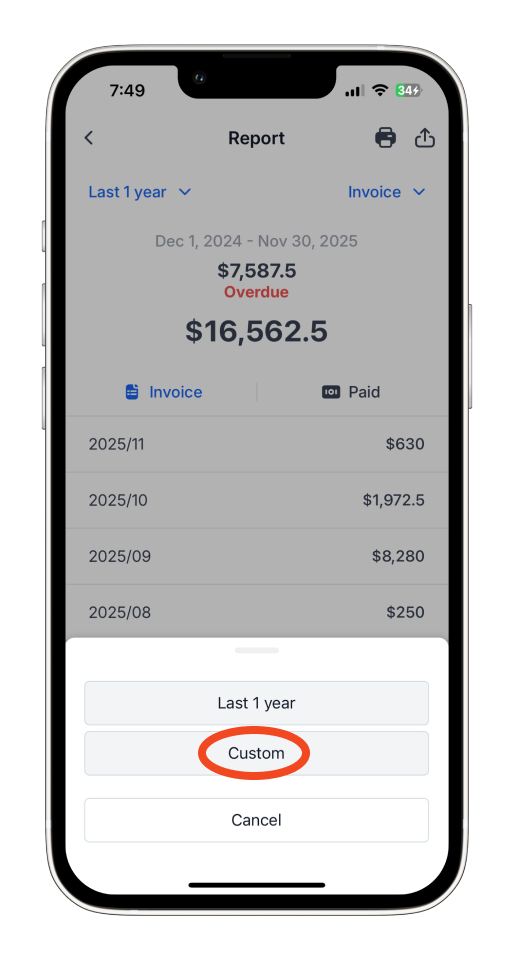
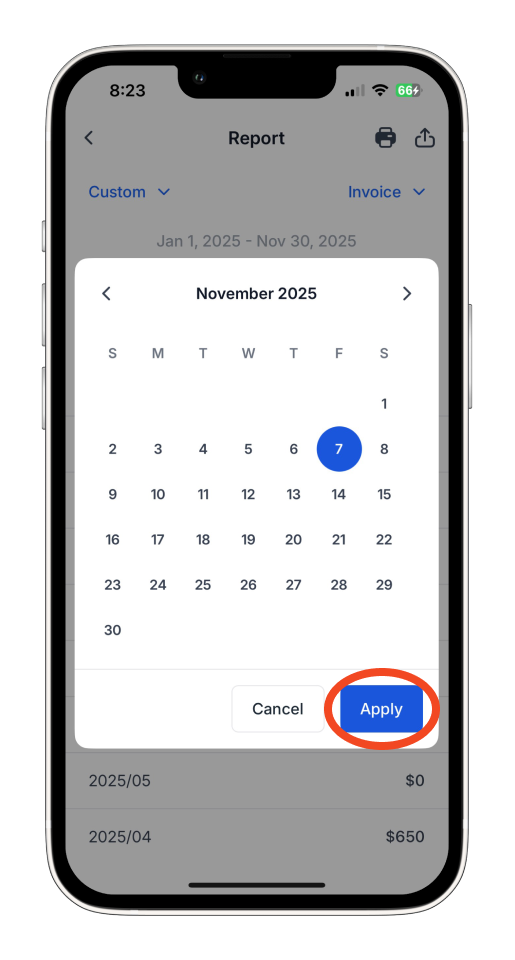
Step 2: Select ‘Custom’
Choose ‘Custom’ to adjust the date period.
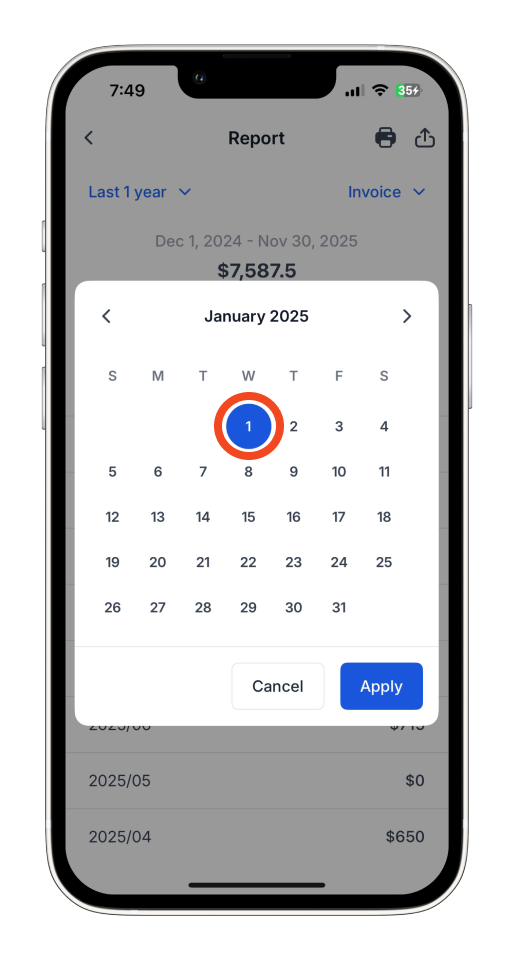
Step 3: Select ‘Start Date’ and ‘End Date’
Tap the left arrow (◀) to move to the previous month.
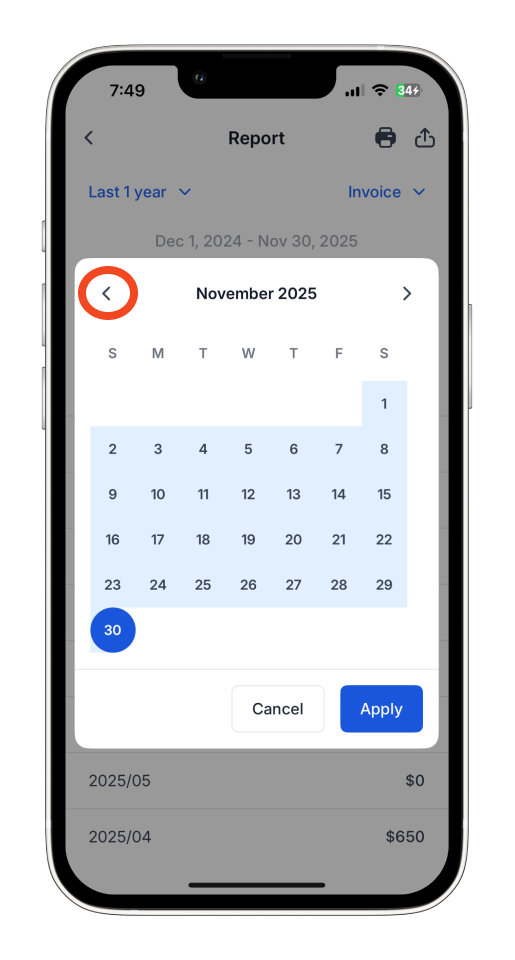
Select your preferred start date.
Tap the right arrow (▶) to move to the next month.
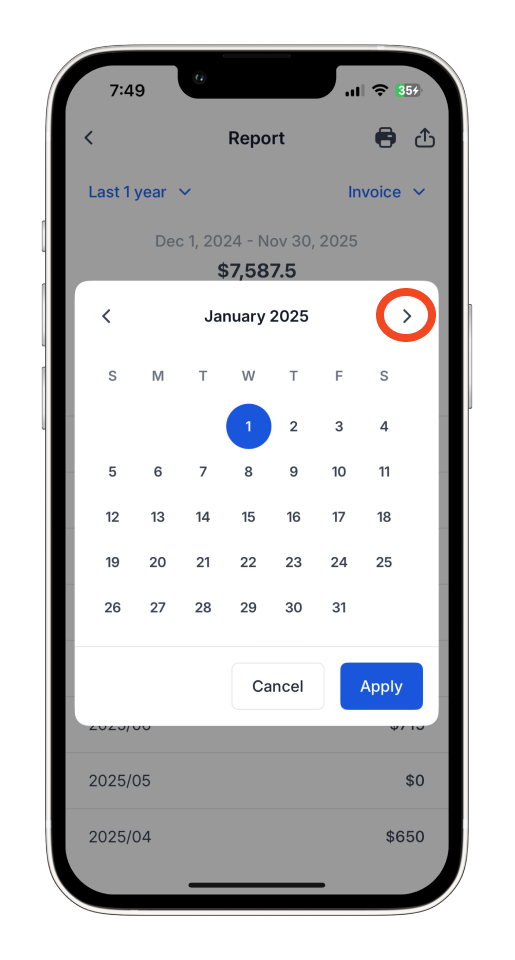
Select your preferred end date for the report.
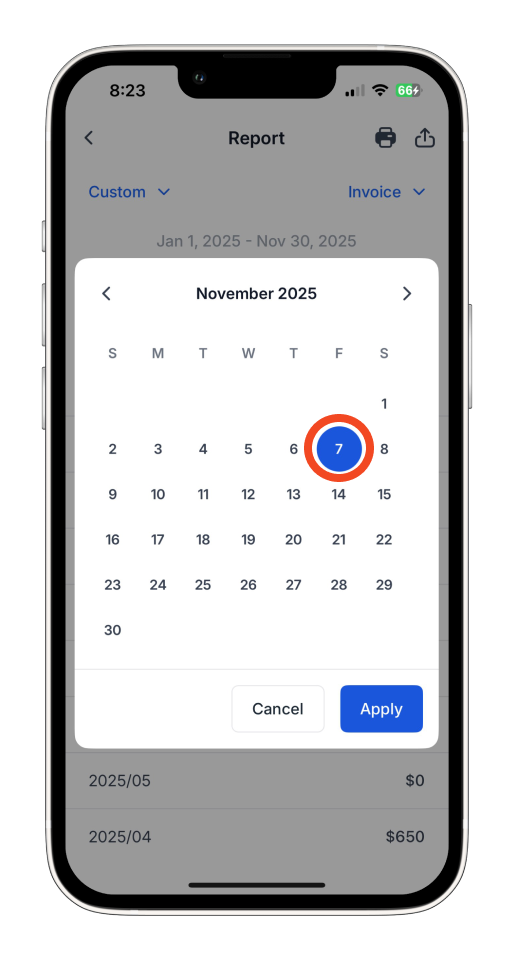
Once done customizing the date period, tap ‘Apply’ to confirm.
You have now customized the date period on your CSV report.
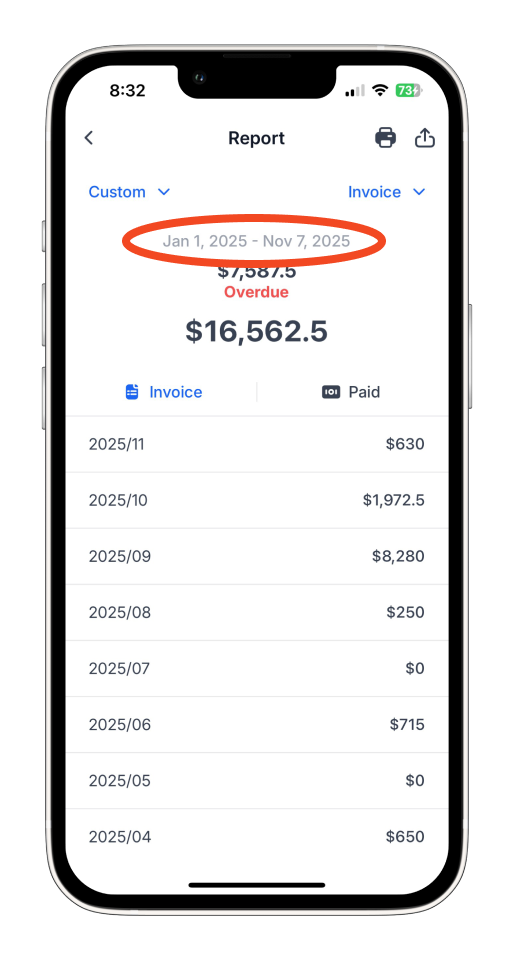
Customising the dates on Reports will also adjust the date range for any summary reports that you download or export.
Frequently asked questions:
Q: Can I choose or pre-select specific data fields to include in my report?
A: No, customization of export fields is not currently supported. All details will be included in the exported report.
Q: Is the feature available on all platforms?
A: This feature is currently available on the Bookipi Invoice mobile app for both Android and iOS. It is not yet available on the web version. If you’d like to see this functionality on the web, we encourage you to submit a request via our [feature request page].
Q: Will customizing the report view or date affect what I export or download?
A: For Custom View, no — it only changes the on-screen display. However, for Custom Date Range, yes — it impacts the data shown in both the PDF and CSV reports.
Discover more tutorials for Bookipi Invoice on the mobile app
Creating and sending invoices is even easier with the Bookipi Invoice mobile app.
Discover more tips on how to get the most out of Bookipi Invoice with our mobile app guides.
By signing up for a Bookipi Invoice Web subscription, you’ll gain access to all features on both the web platform and mobile app. For more details, visit our Subscription FAQs.


