Learn how to add a photo of a receipt in Bookipi Invoice mobile app using the cash flow feature.
How to add a photo of a receipt
Follow these simple steps to learn how to add a receipt photo for your income and/or expense transactions using the cash flow feature in the Bookipi Invoice mobile app.
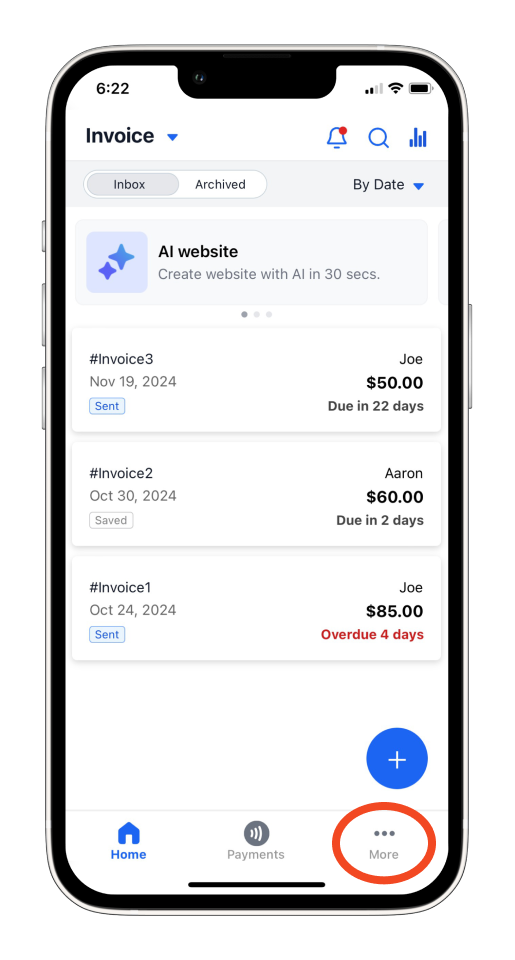
Step 1: Tap ‘More’.
Tap ‘More’ in the bottom right corner of your screen.
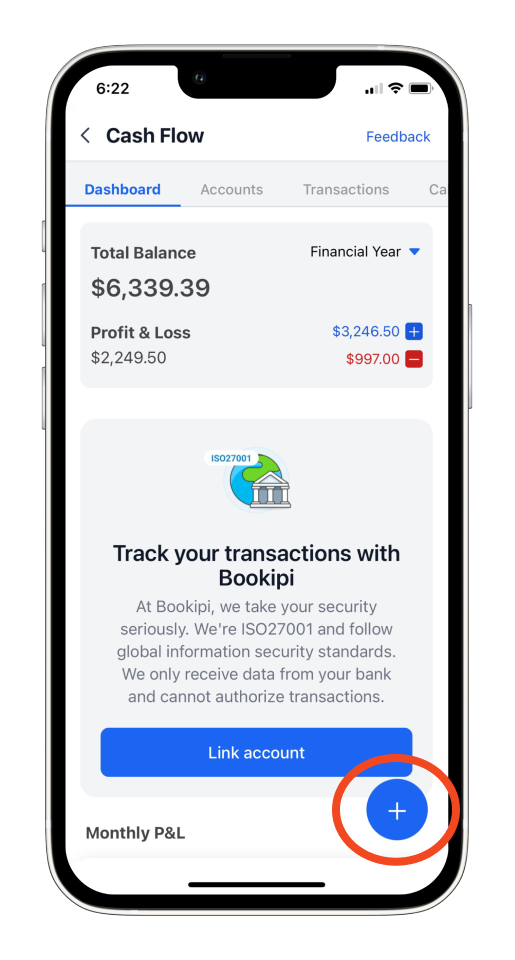
Step 2: Select ‘Cash flow’.
Select ‘Cash flow’ from the Others section.

Step 3: Create a transaction.
Tap the blue ‘+’ button in the lower right corner to create an income or expense transaction.
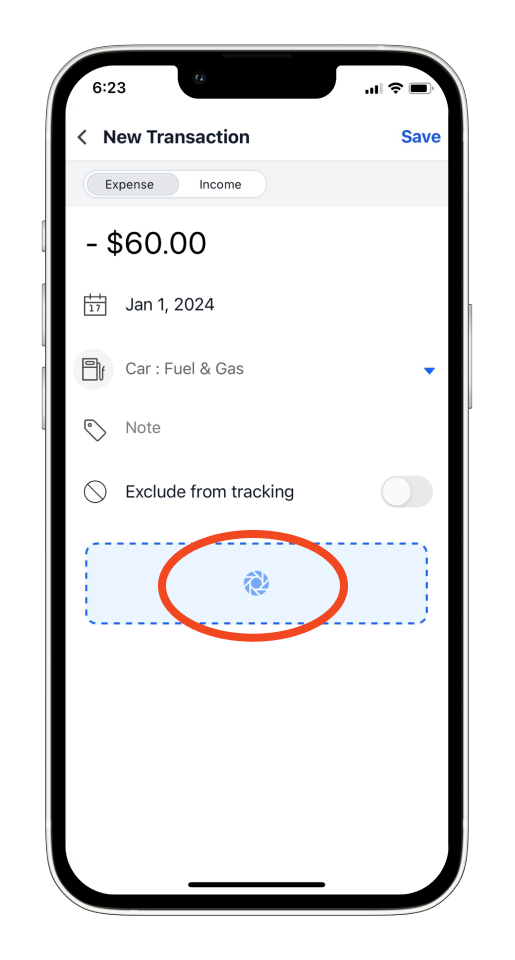
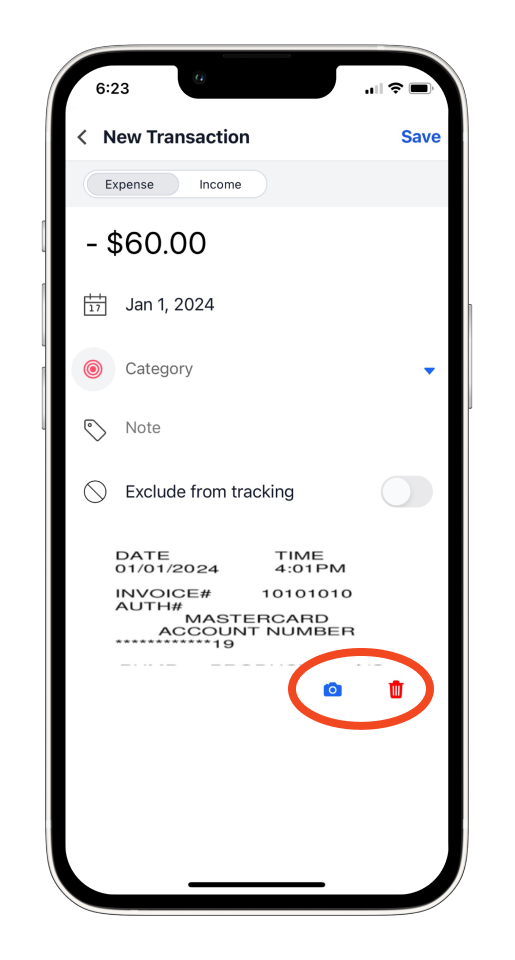
Step 4: Tap the camera icon.
Tap the camera icon below to snap or upload a photo.
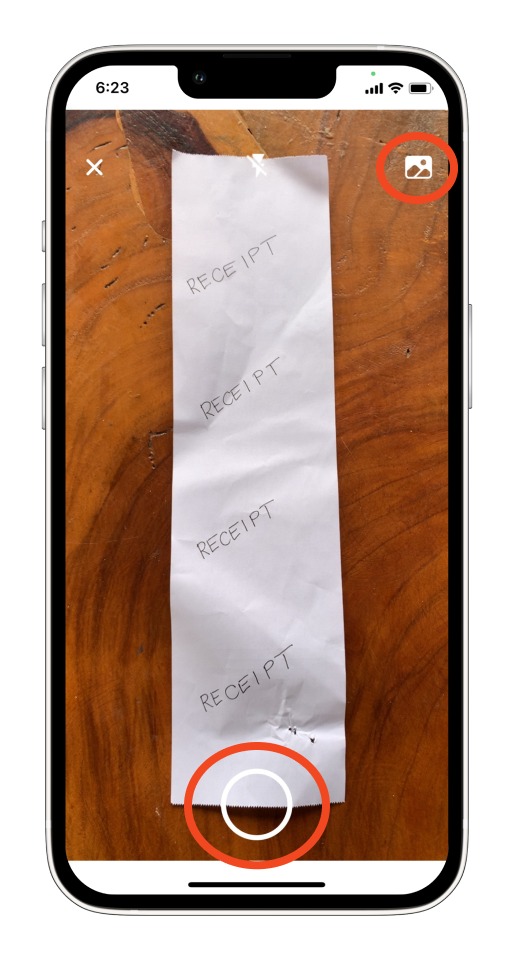
Step 5: Take a photo or choose a picture of the receipt.
Capture a photo of the receipt by tapping the button at the bottom center, or select an image by tapping the icon at the top right, making sure the photo and details are clear.
If you are uploading a photo, ensure that the Bookipi Invoice app has permission to access your photos. Once the permission is granted, you should be able to add a photo without any issues.
If you’re not satisfied with the photo, you can retake, replace, or delete it whenever needed.
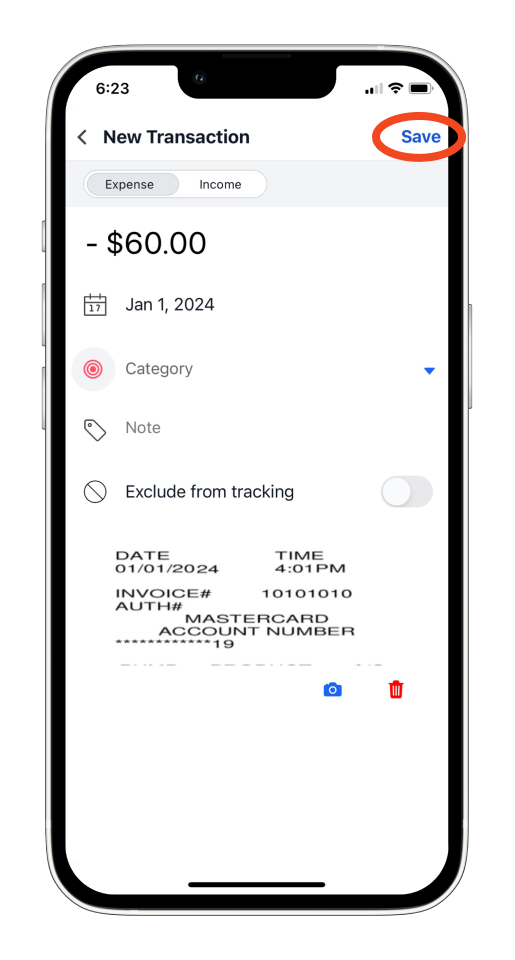
Step 6: Tap ‘Save’.
Tap ‘Save’ in the top right corner of the screen to save the transaction with the attached photo.
Note: You can only attach one photo per transaction.
Discover more tutorials for Bookipi Invoice on mobile app
Creating and sending invoices is even easier with the Bookipi Invoice mobile app.
Find more tips on how to get the most out of Bookipi Invoice with our mobile app guides.


