Learn how to set up your company on the Bookipi Invoice mobile app.
How to set up your company
Follow this simple guide to easily set up your company on the Bookipi Invoice mobile app and create professional-looking invoices and documents.
Step 1: Tap ‘More’.
Tap ‘More’ in the bottom right corner of your screen.

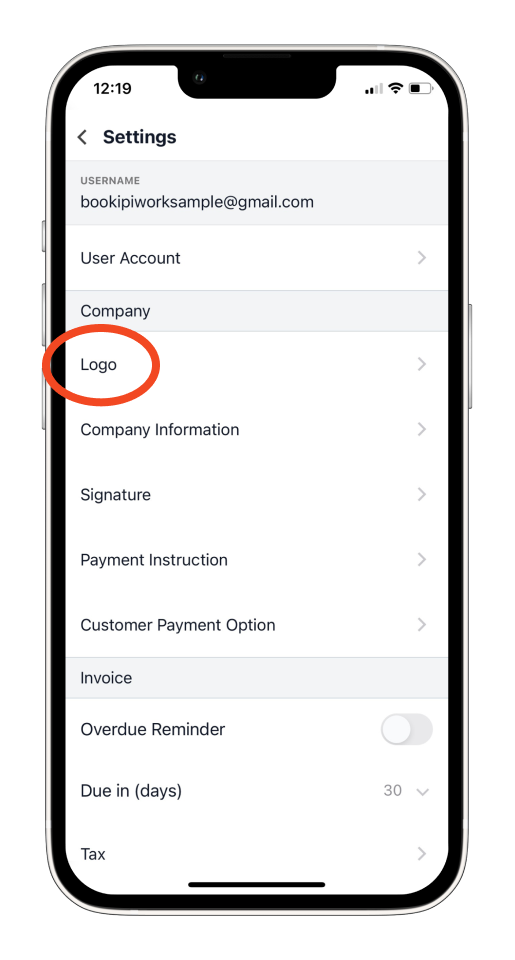
Step 2: Select ‘Settings’.
Scroll down and tap on ‘Settings’.

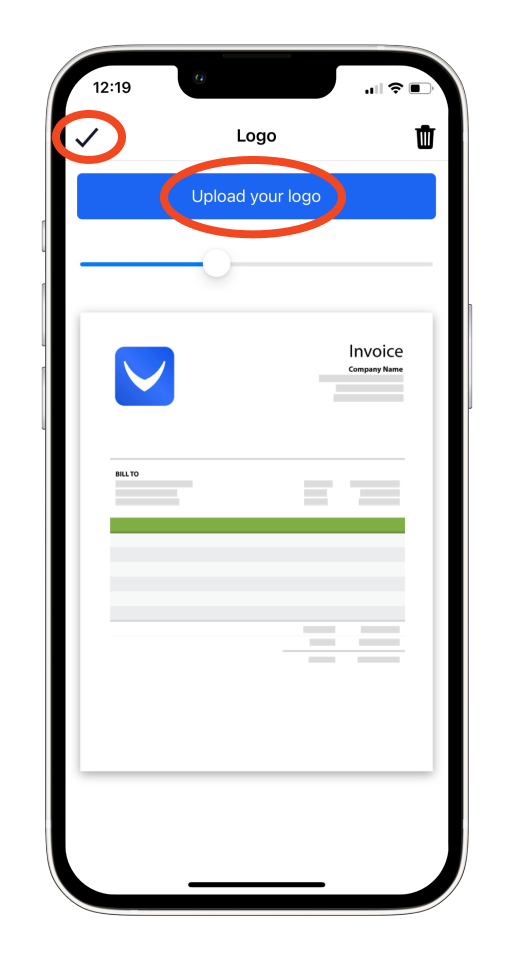
Step 3: Upload a logo.
Under the Company section, choose ‘Logo’ to upload your company logo.
Tap ‘Upload your logo’ and ensure that the Bookipi Invoice app has permission to access your photos. Once the permission is granted, you should be able to add a photo without any issues. Then tap the check mark in the upper left to save your logo.
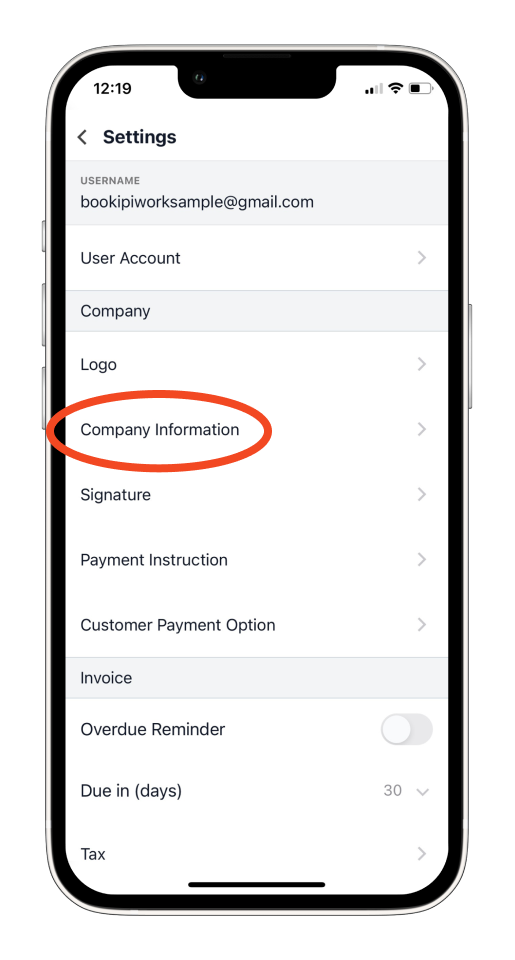
Step 4: Add your company information.
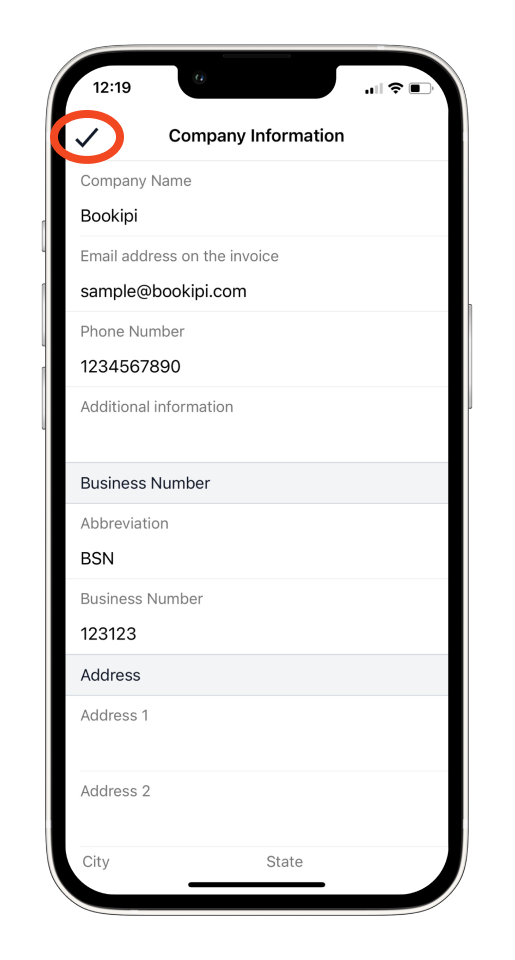
Go back to Settings and select ‘Company Information’ to enter your company name, invoice email address, phone number, business number, address, and any other necessary details.
Please note that the Company Name is a required field to prevent any issues with your account. If you don’t have a company, you can enter your name instead.
Then, tap the check mark in the upper left to save.
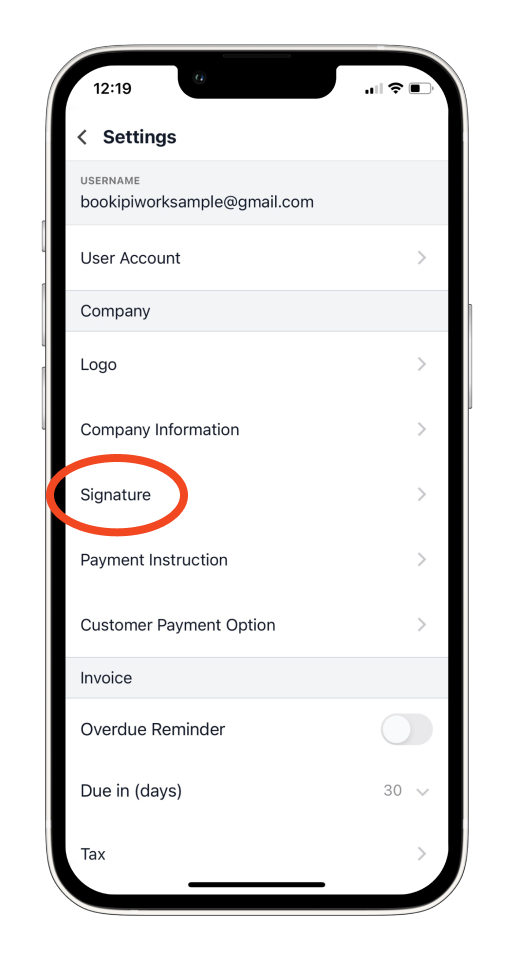
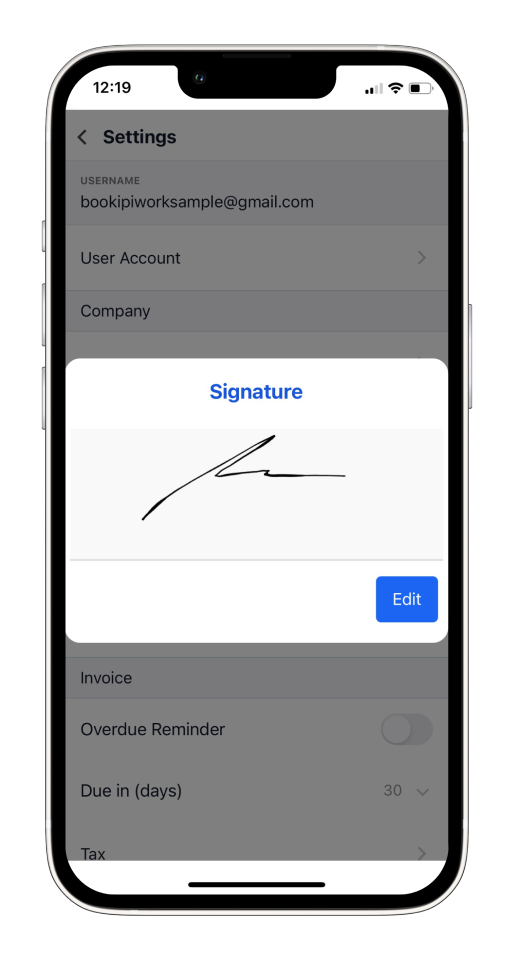
Step 5: Set up your signature.
From Settings, select ‘Signature’ to set up your signature and apply it to any invoice, saving you time.
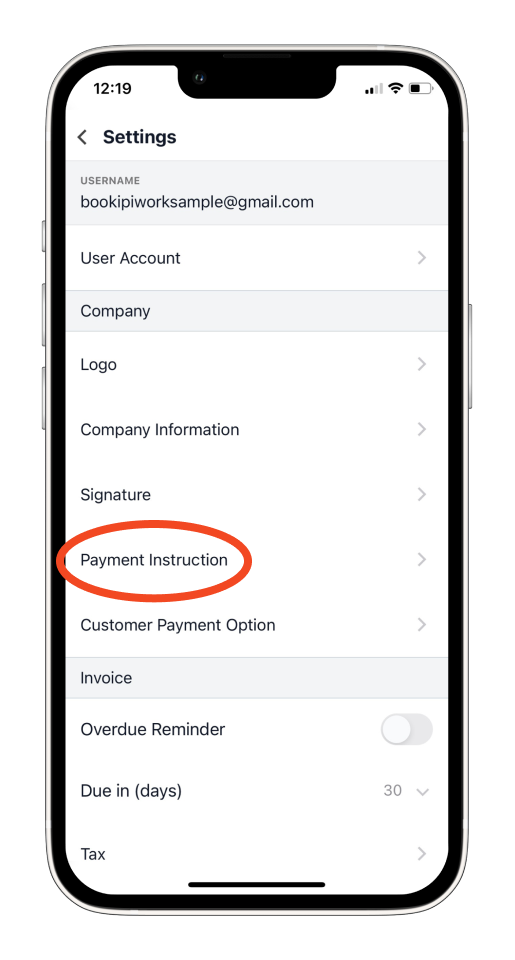
Step 6: Add your payment instruction or enable card payment.
Under Settings, select ‘Payment Instruction’ if you prefer to receive payments through your chosen method.
Simply toggle on ‘Display payment instruction’ and enter your bank or payment details in the available fields to include them on your invoices.
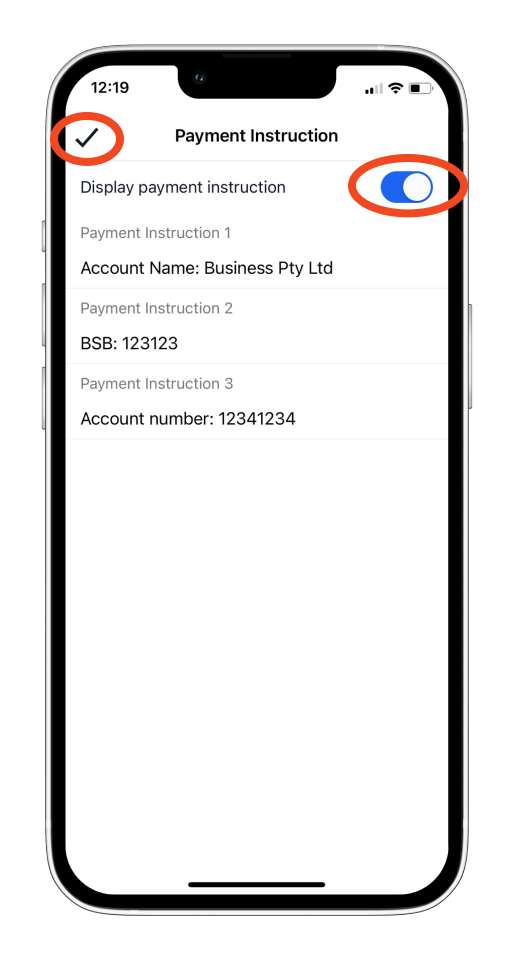
Please note that the Payment Instruction feature will only be shown on your invoices and will not be available for other document types.
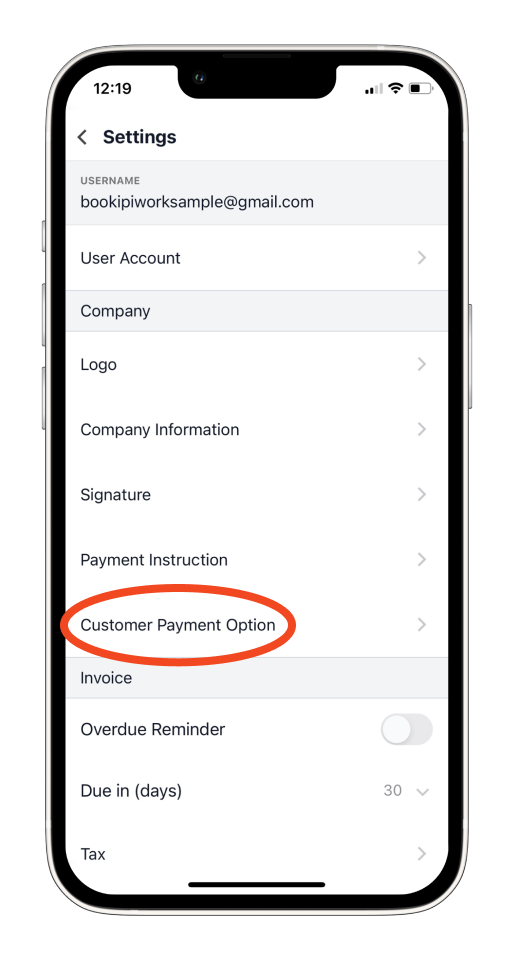
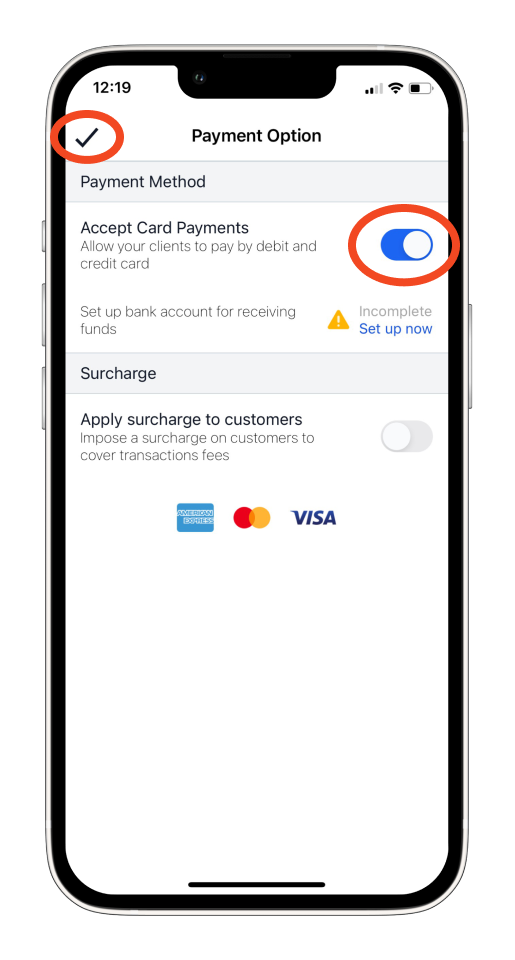
If you prefer to be paid by card, go to ‘Customer Payment Option’ in your Settings.
Enable ‘Accept Card Payments’ then tap the check mark in the upper left to save.
Step 7: Add other details to your invoice and documents.
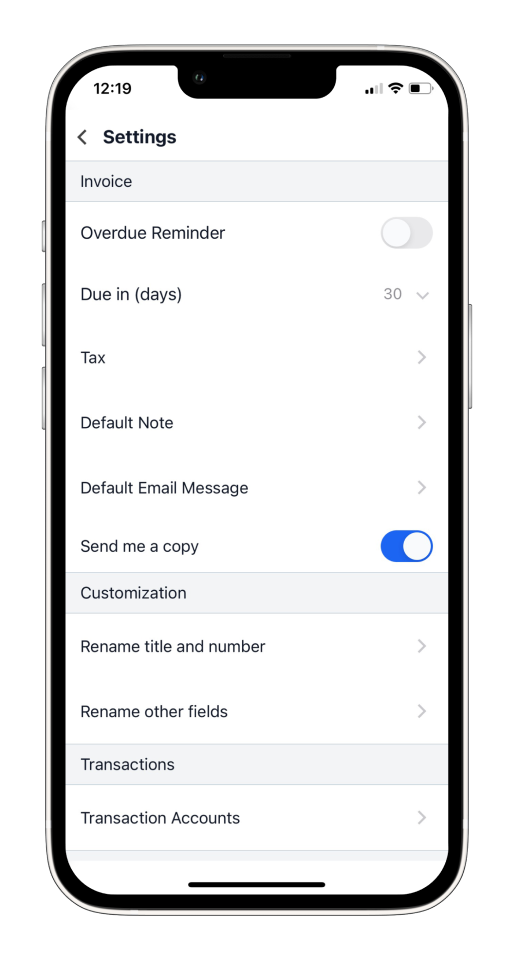
You can also configure additional information by scrolling down in your Settings. Set up details for your invoice and other documents under the Invoice, Customization, Transactions, and General sections of your account settings.
That’s it! You can now start creating your documents with ease, using the settings you’ve configured for your company.
Discover more tutorials for Bookipi Invoice on mobile app
Creating and sending invoices is even easier with the Bookipi Invoice mobile app.
Discover more tips on how to get the most out of Bookipi Invoice with our mobile app guides.


