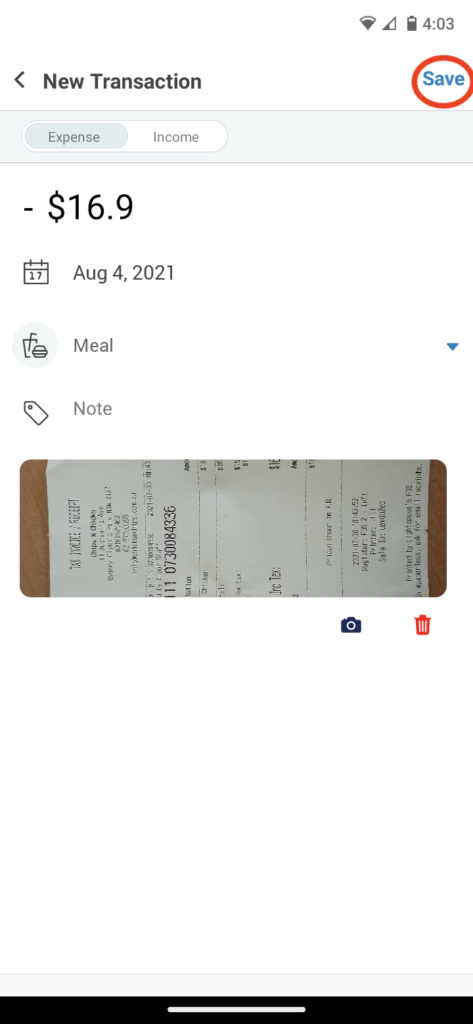
How to add photos of receipts in Bookipi mobile app
Learn how to add a photo of a receipt in Bookipi’s cash flow feature in mobile app, with our guide below.
Please note: that the cashflow feature is currently only available for users who are in the AU and US
Steps to add a photo of receipt in Bookipi mobile app
Step 1: Create a transaction in mobile app
Create an income or an expense transaction

Step 2: Select the camera button
Press the camera button

Step 3: Take a photo of the receipt
Take a photo or upload a photo of your receipt
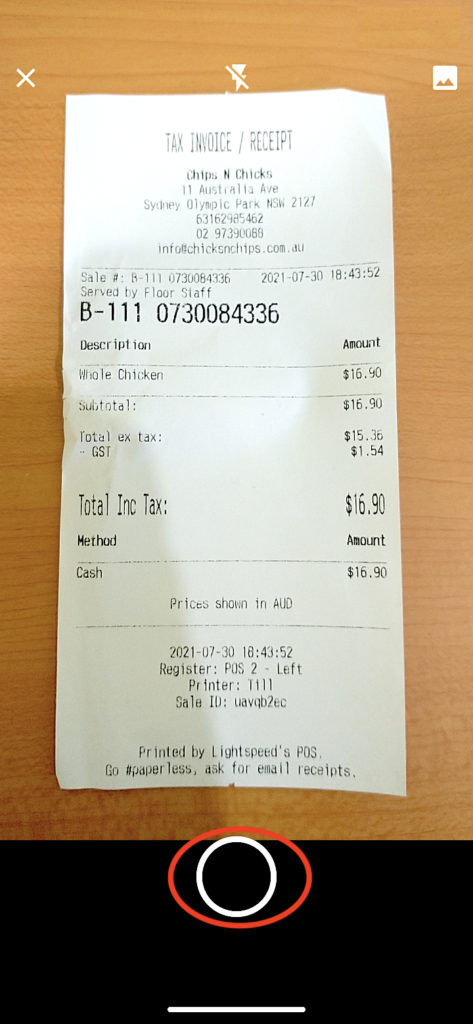
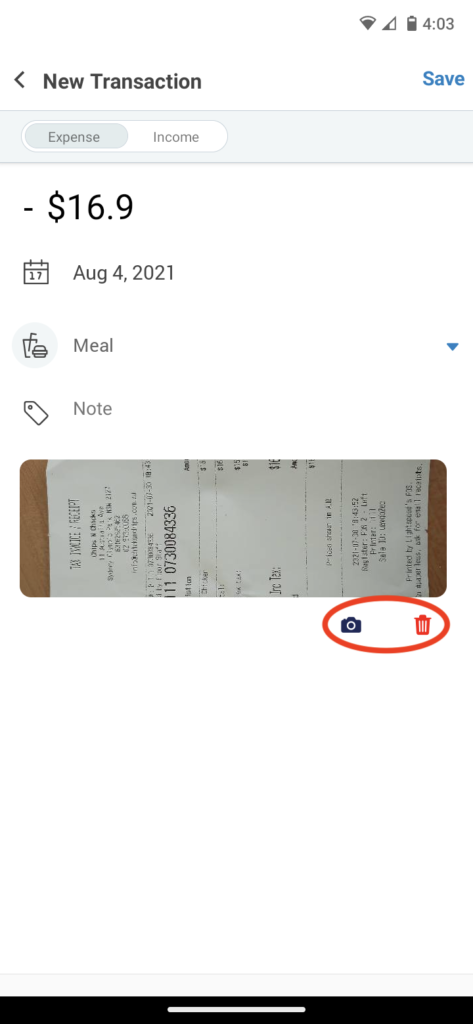
Step 4: Review your photo
Check that your photo is clear and you can read the information on it. Note: If you arent satisfied with the photo, you can always retake or delete the photo.
Then, click ‘Save‘
