How to turn on card payments on web app
Learn how to activate card payments on Bookipi Invoice web app v2 with these simple steps below.
Steps to enable credit card payments on web app
Step 1: Select ‘Turn on card payments’.
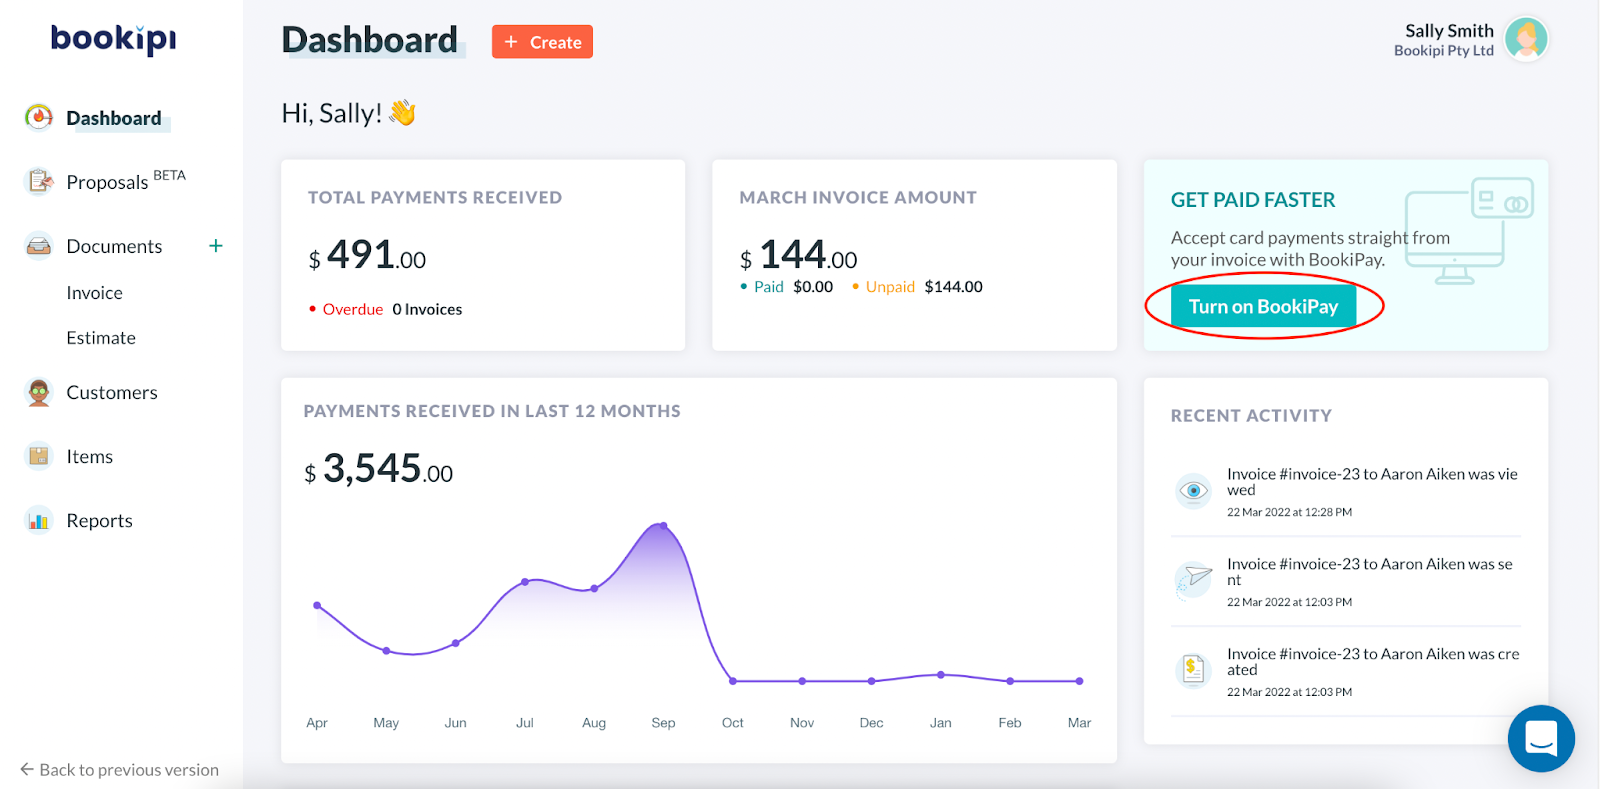
Step 2: Select ‘Enable Card Payments’.
Our integrated card payments feature is powered by Stripe.
Step 3: Sign in to Stripe or begin onboarding with Stripe
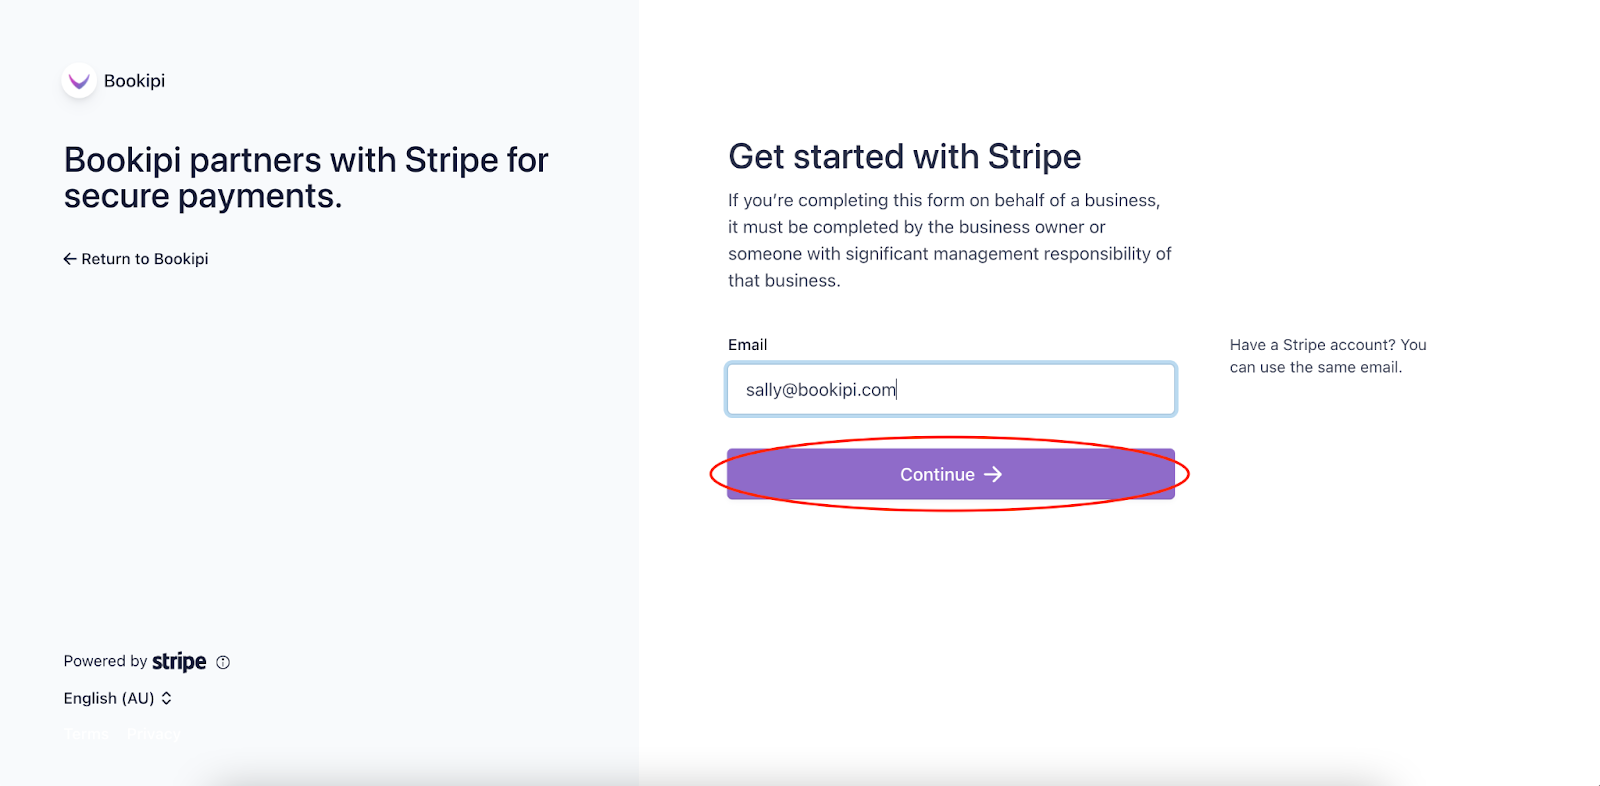
In the Stripe onboarding screen, your Bookipi Invoice email address will be automatically populated into the Email field.
You can enter an alternative email address: if you have an existing Stripe account or if you would like to create the Stripe account under a different email address.
Step 4: Select ‘Continue’.
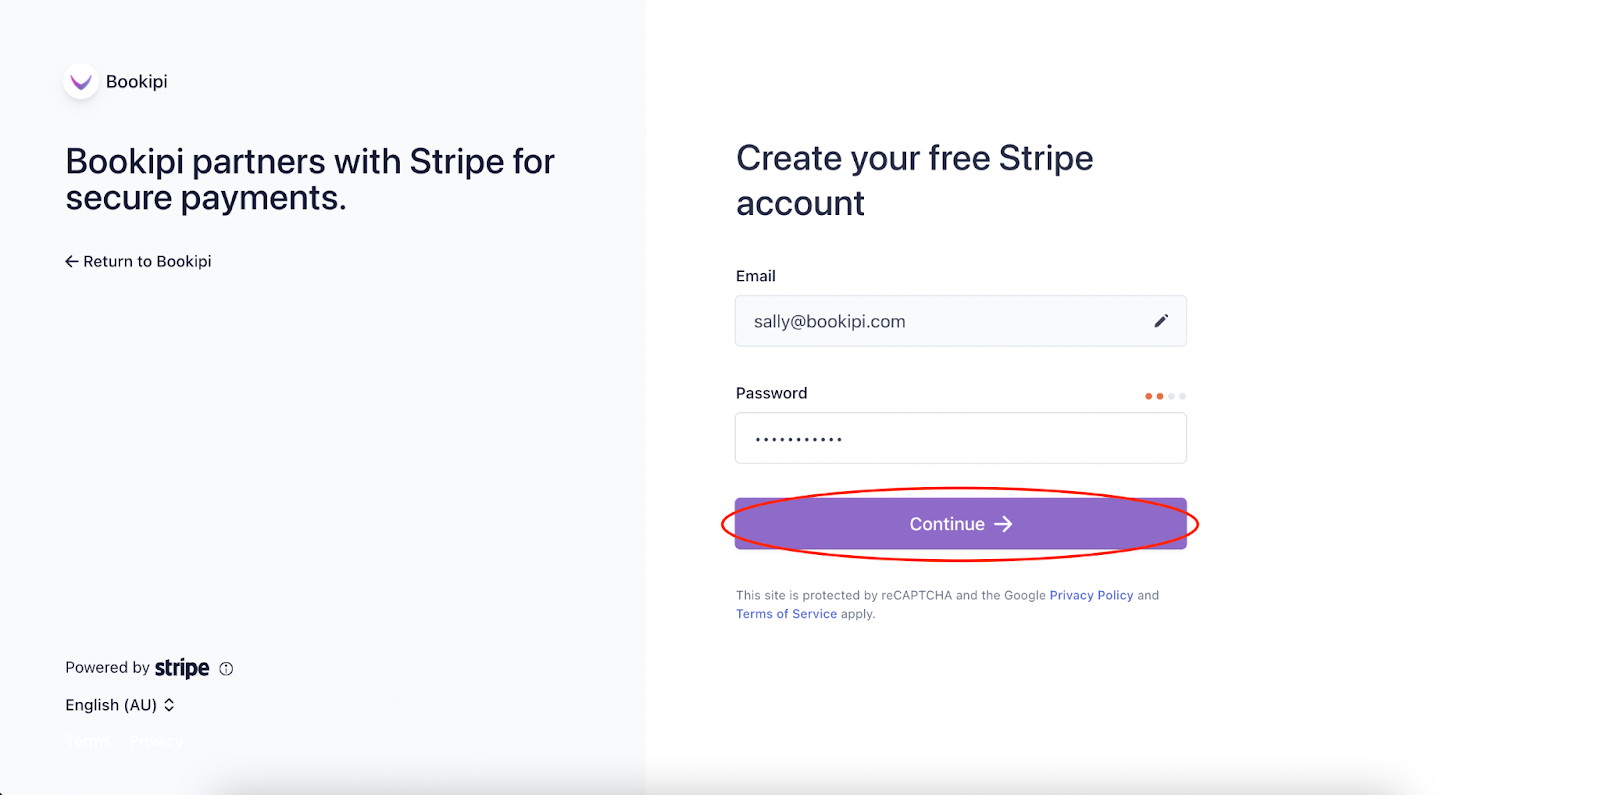
Create a password for your Stripe account and select ‘Continue’.
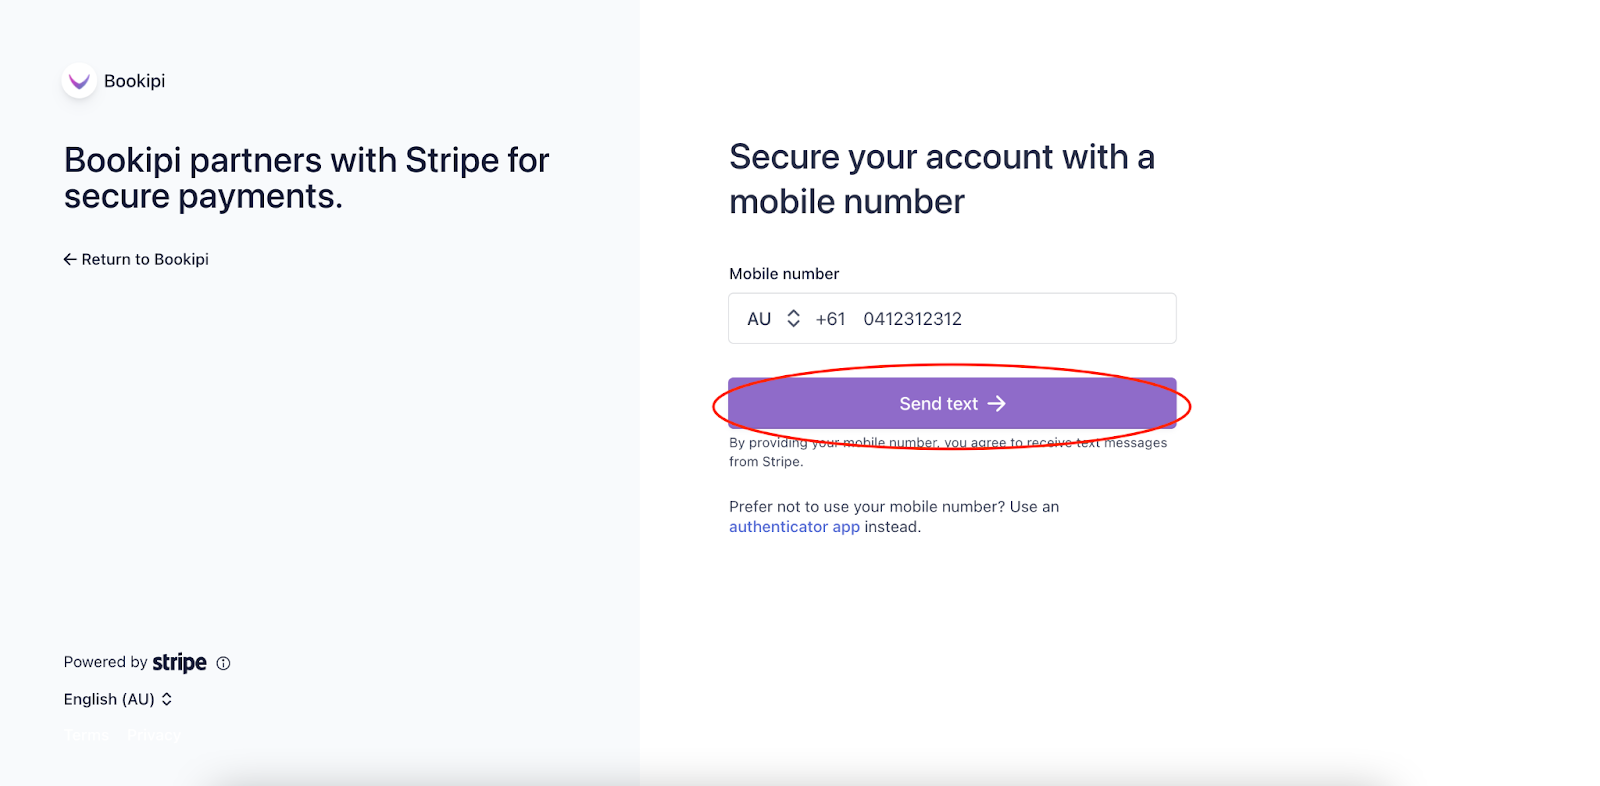
Step 5: Set up multifactor authentication (MFA) for Stripe
You can use an authenticator app or use your mobile number to receive a text message.
If you choose to enter your mobile number, select your country code, enter the mobile number and select ‘Send text’.
Enter the code that was sent to your mobile device.
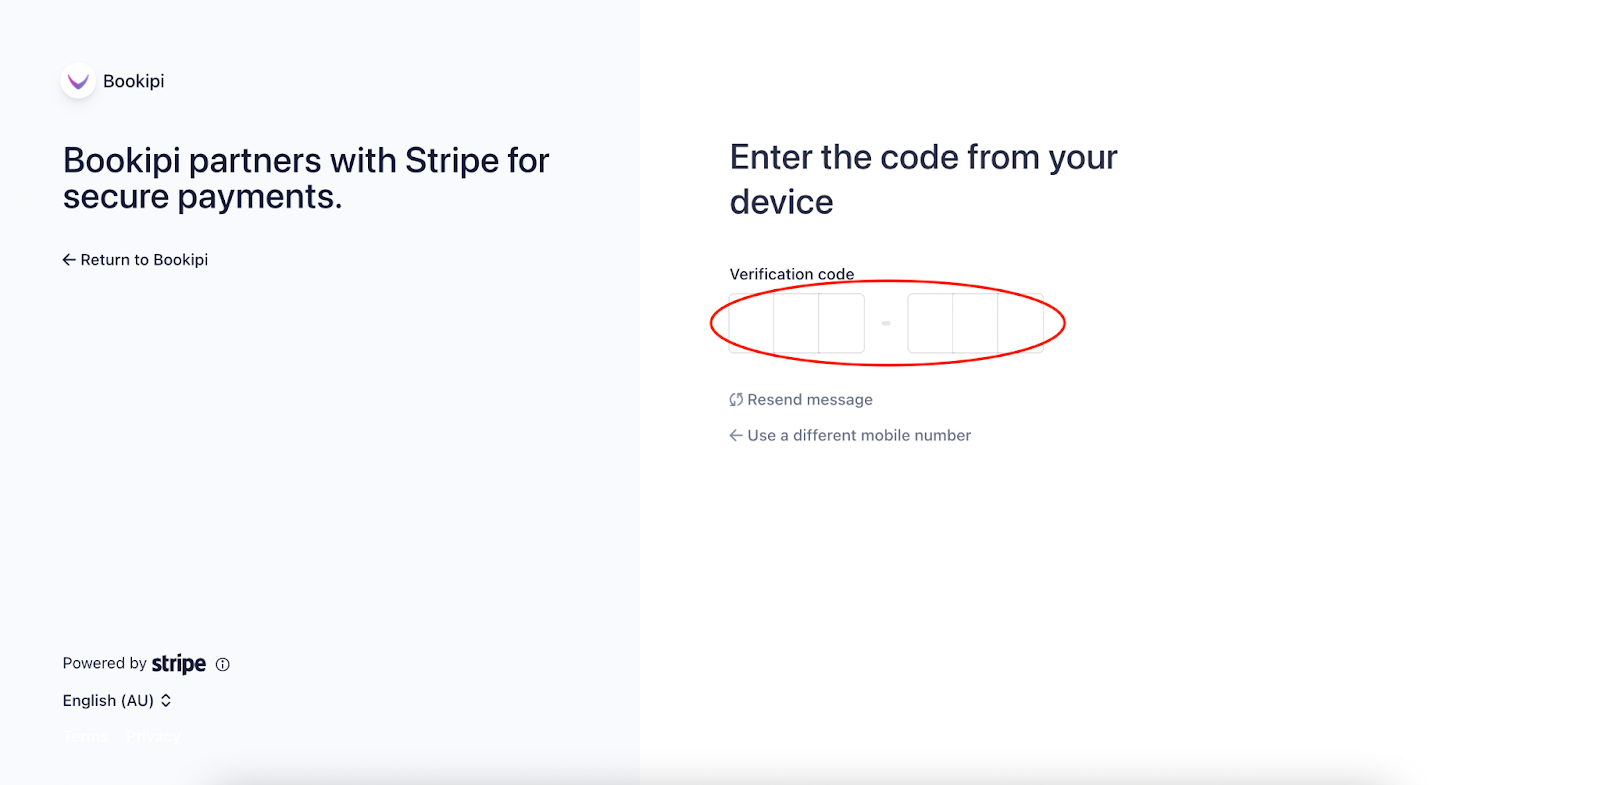
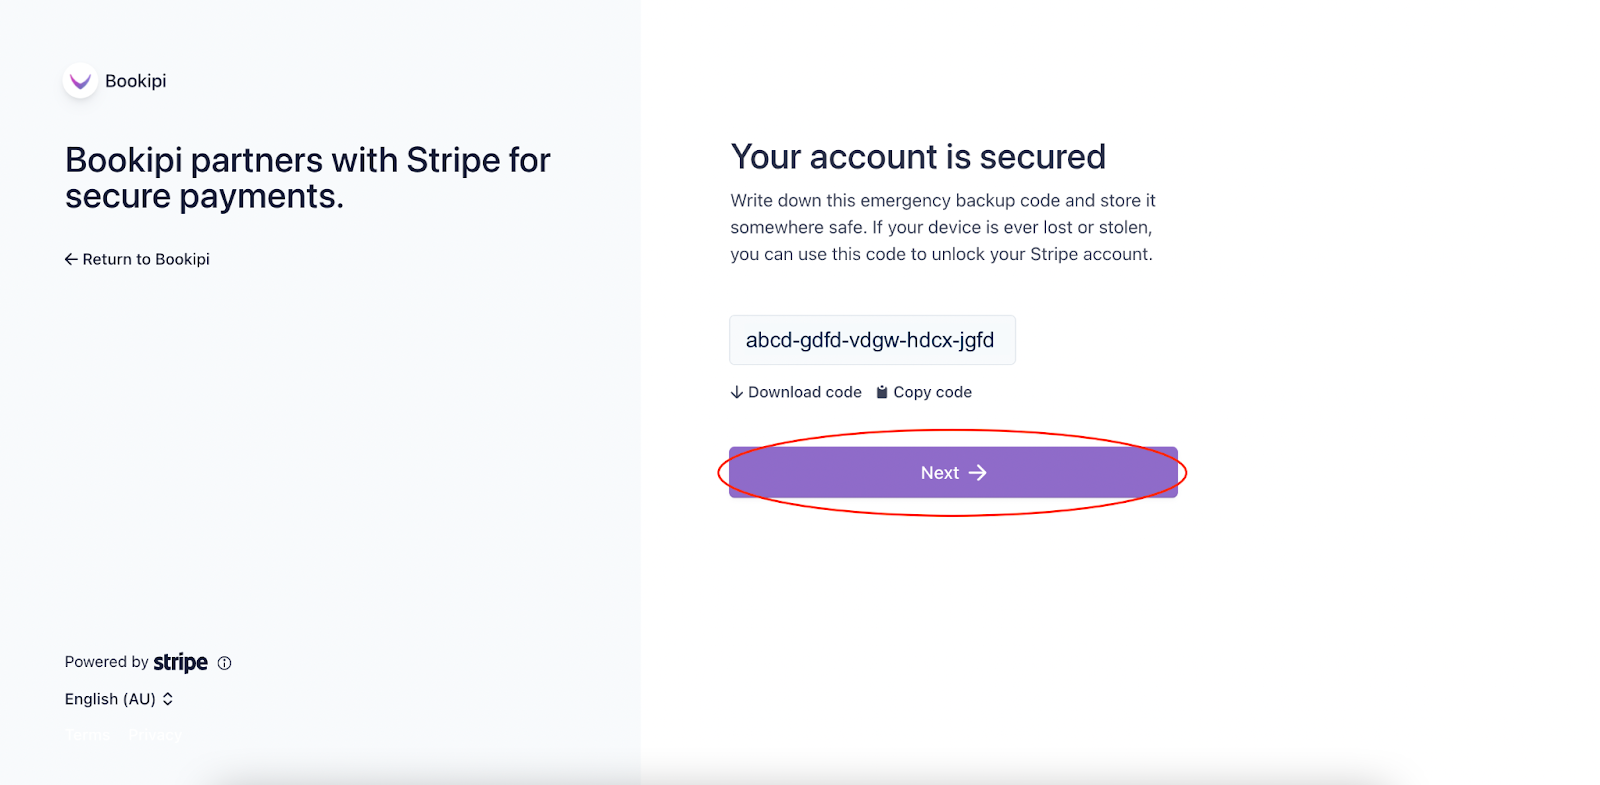
Please save the emergency backup code provided in case you lose your mobile device. Select ‘Next‘.
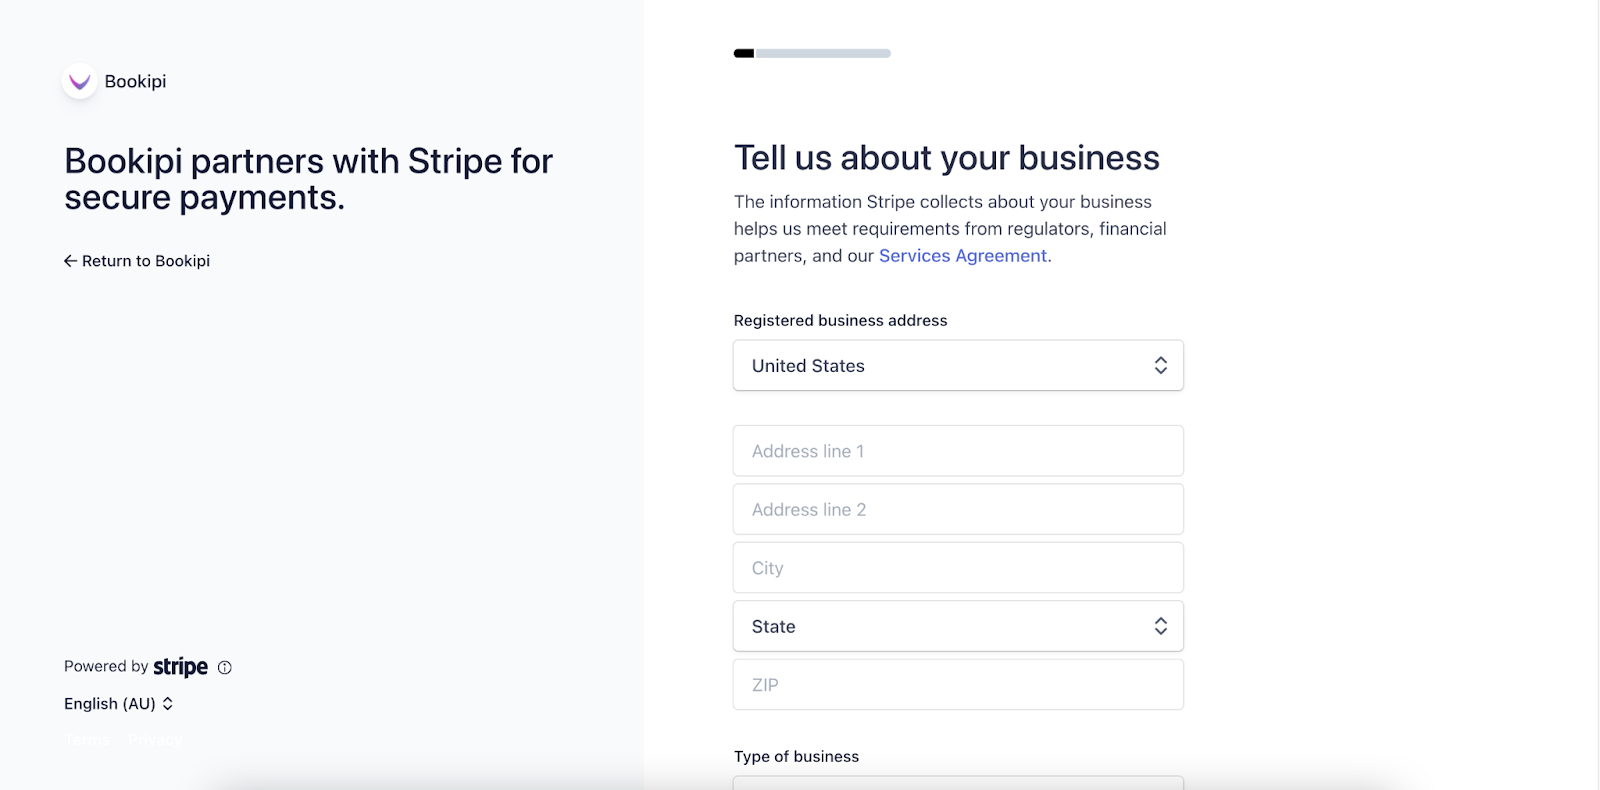
Step 6: Enter details about your business
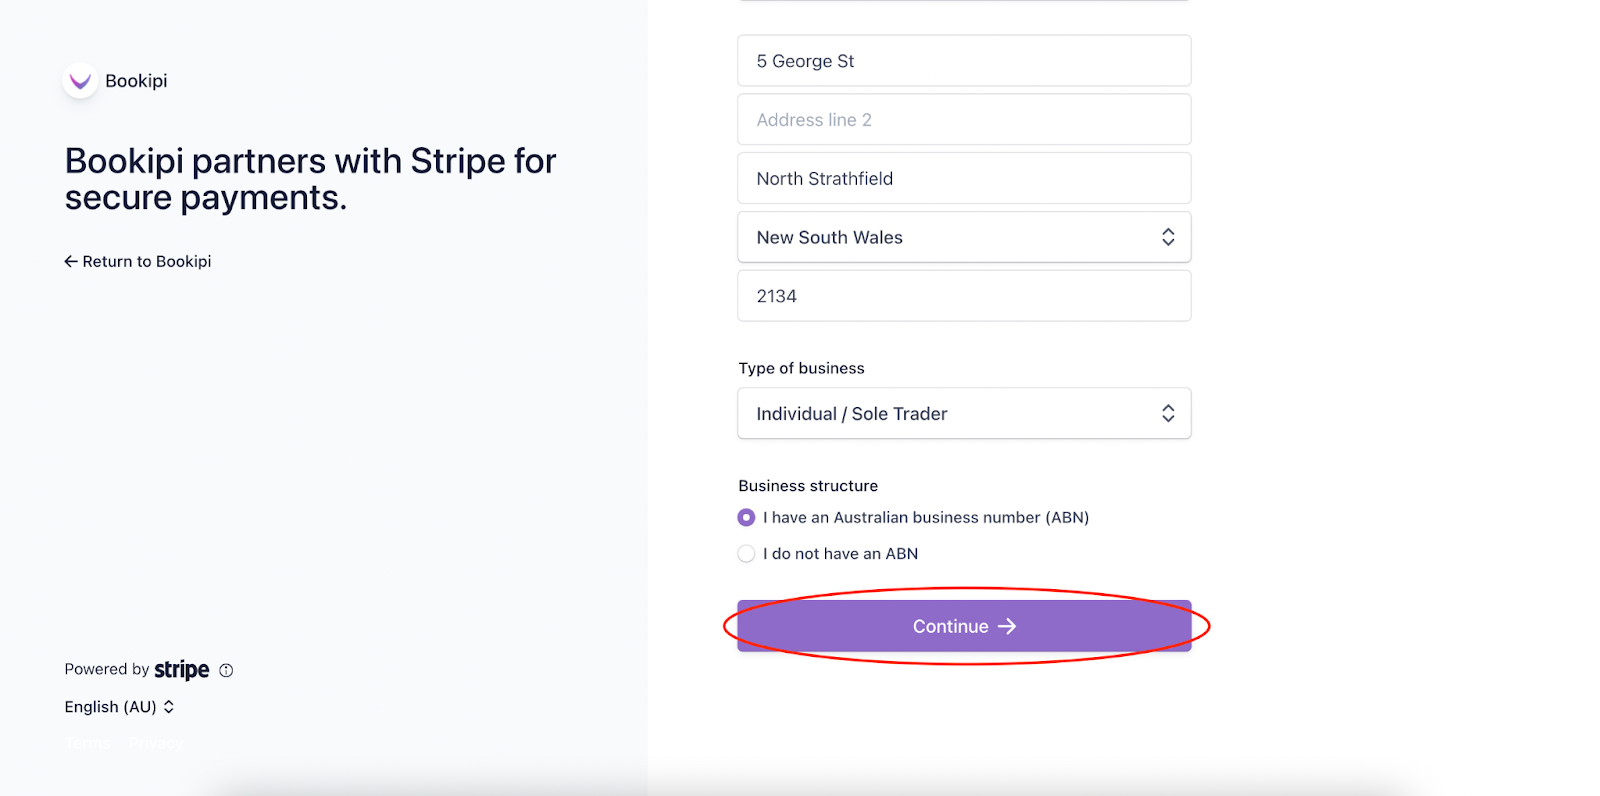
In the ‘Business Details‘ section, enter details including address, type of business and business structure.
Select ‘Continue’ once you have entered all your details.
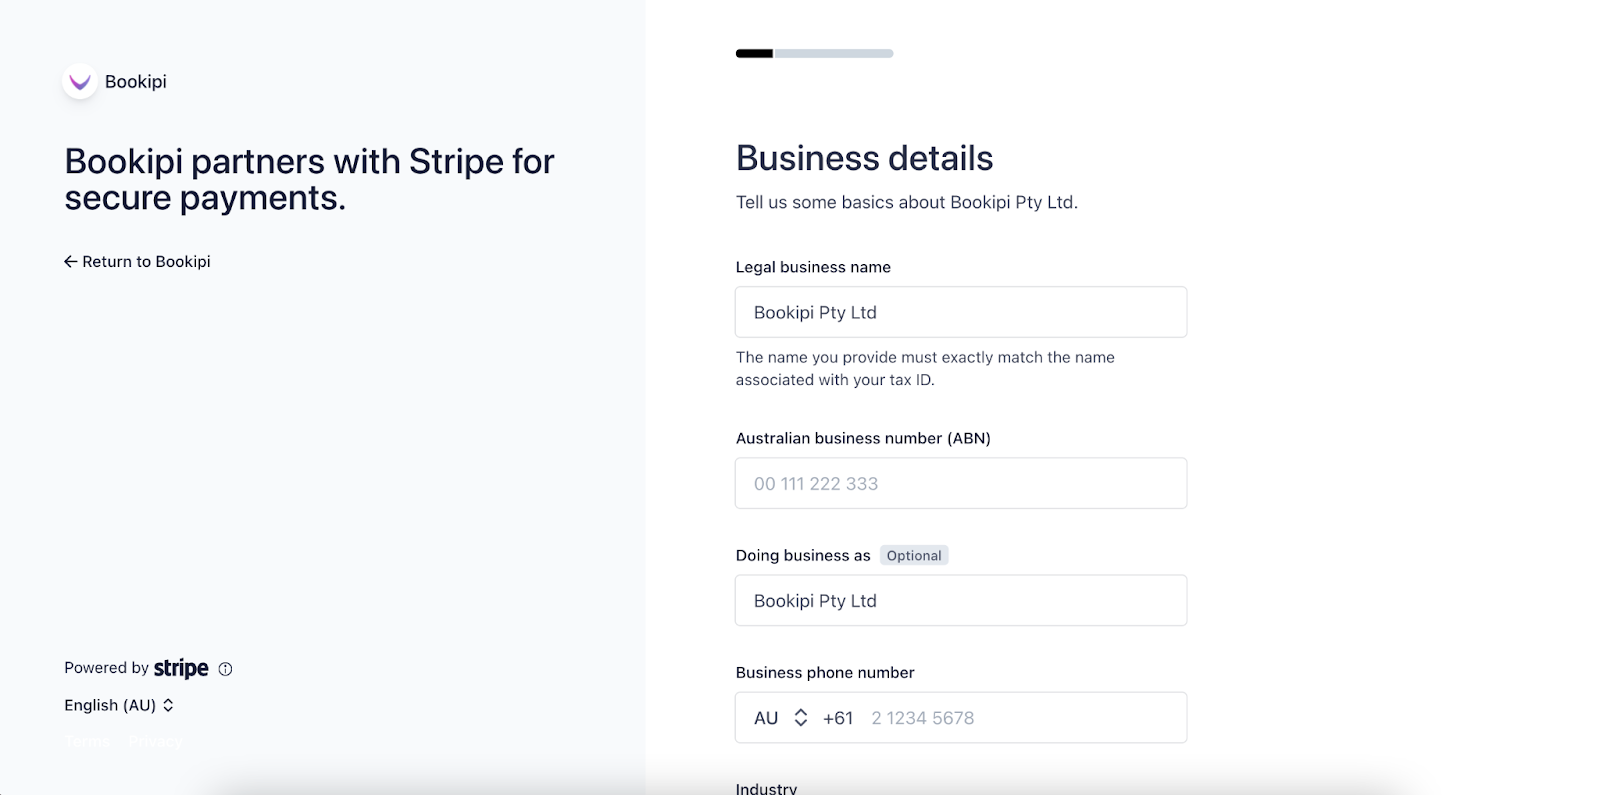
Step 7: Complete details required by Stripe
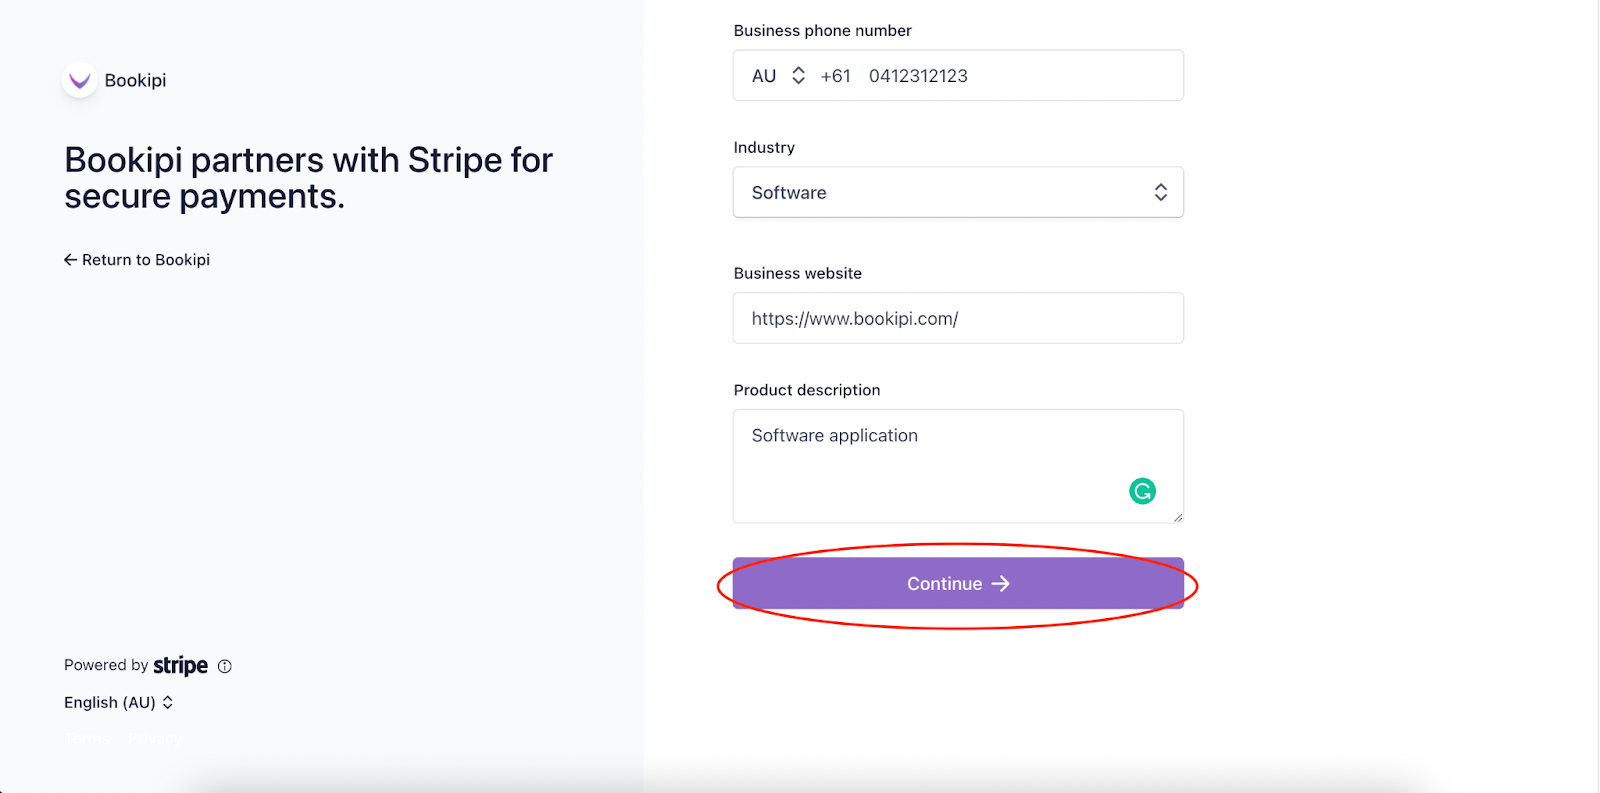
Enter Legal business name, business number, doing business as, business phone number, industry, business website, and the product description.
This fulfils Stripe’s Know Your Customer (KYC) requirements to protect against fraud.
These details may vary depending on the country you operate in.
If you do not have a business website you can also use a social media business page such as Facebook or Instagram.
Select ‘Continue’ once you have entered all your business details.
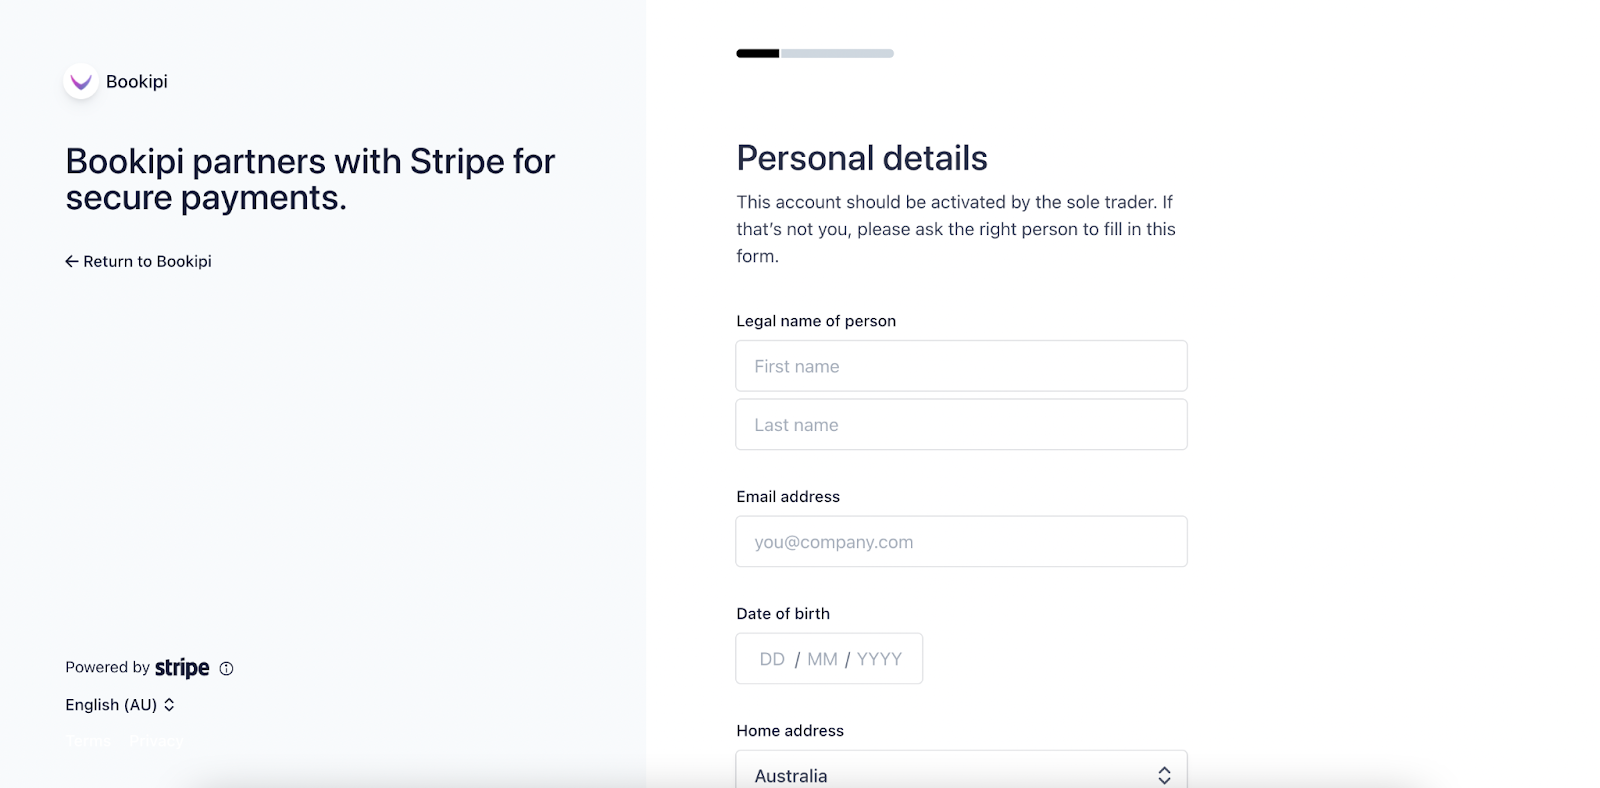
Step 8: Enter the personal details of people who have ownership over the business.
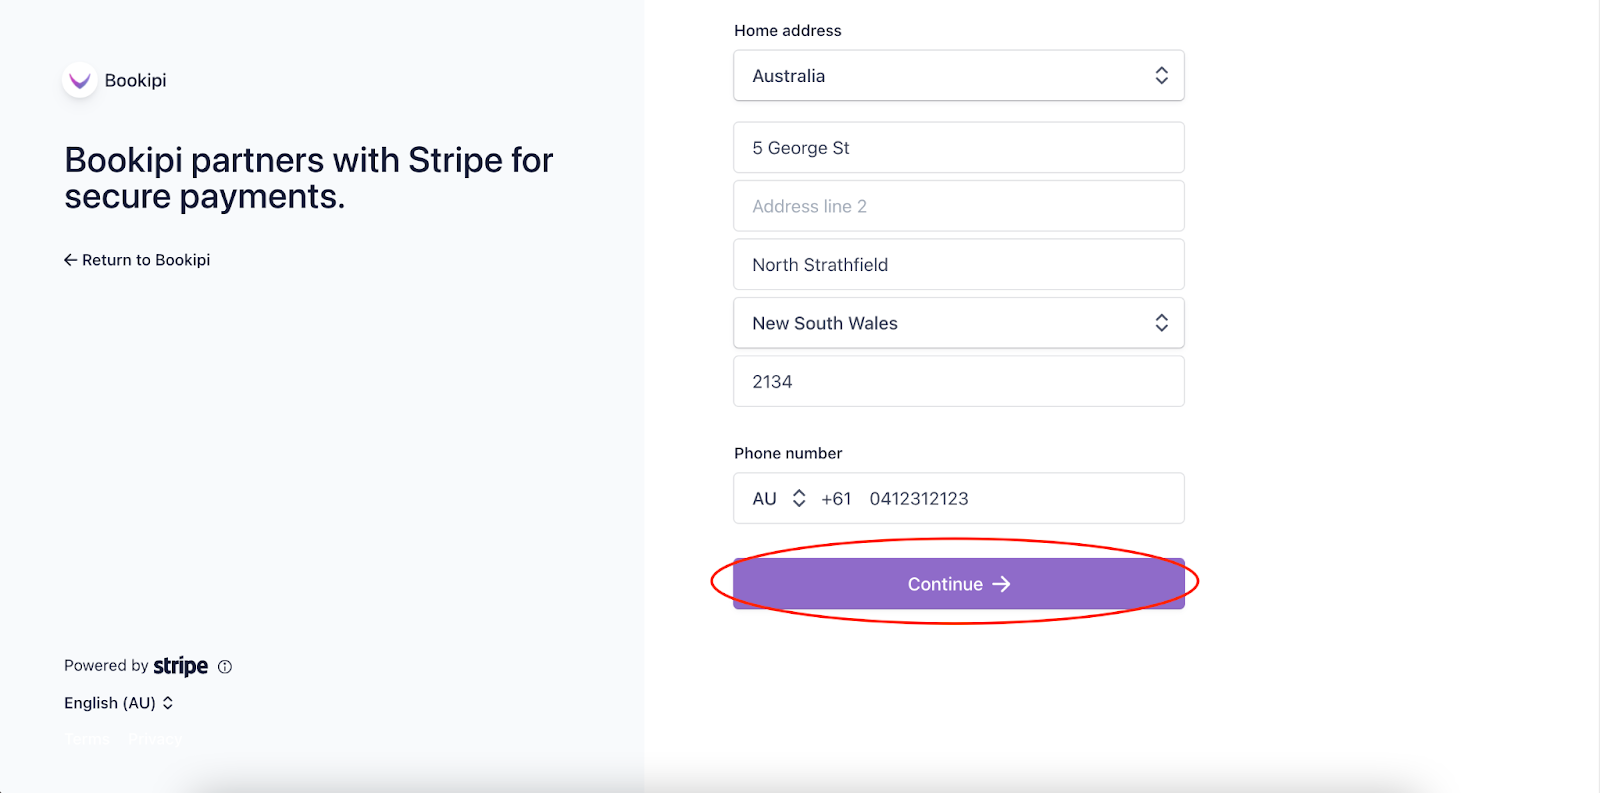
The details include name, email address, date of birth, address, and phone number.
Select ‘Continue’ once you have entered the personal details of the business owners.
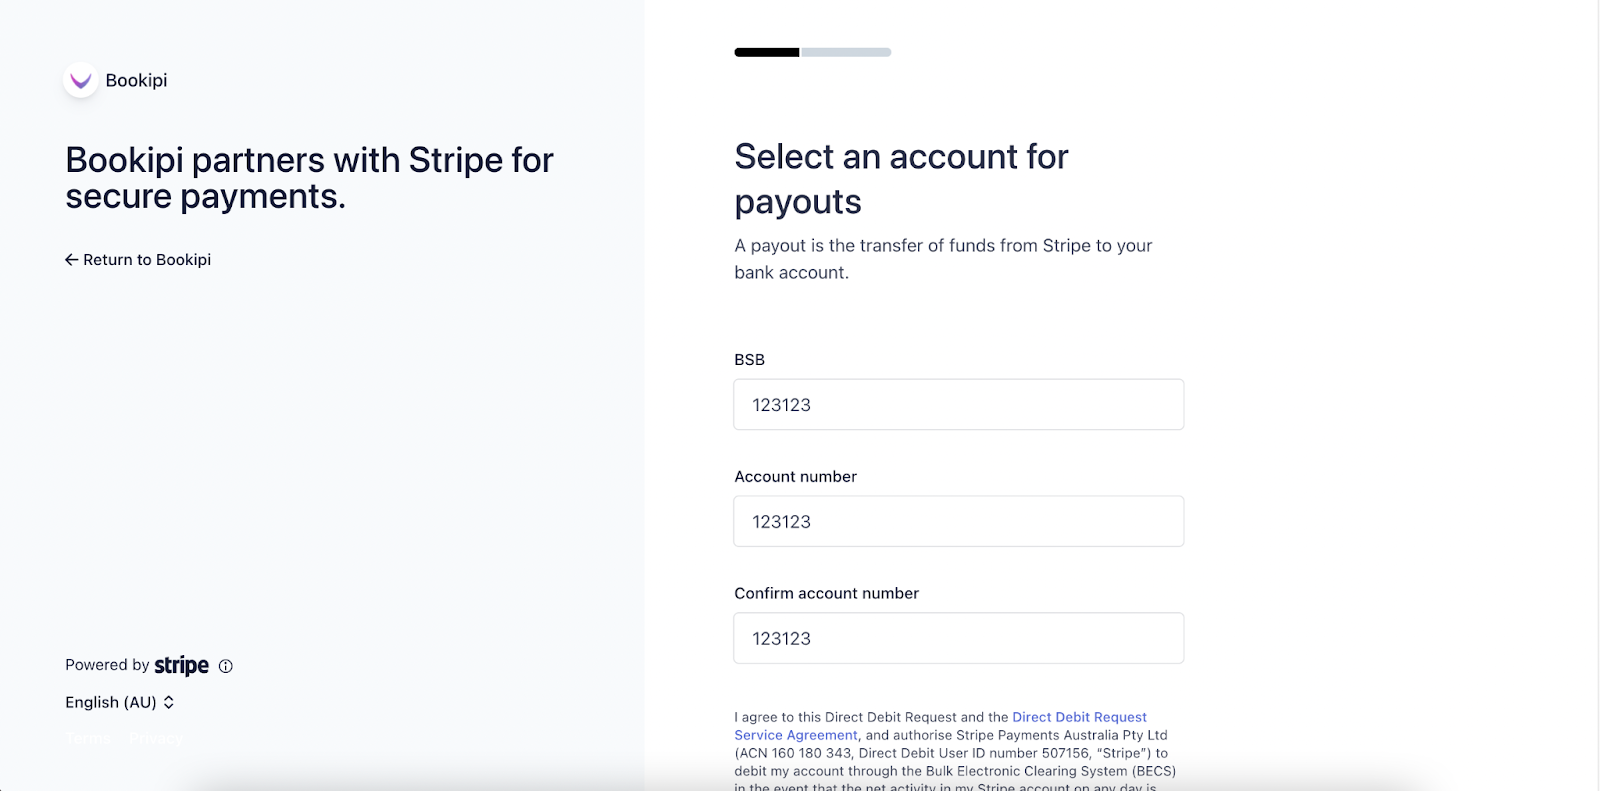
Step 9: Enter bank account details
Enter bank account details that you would like your funds to be paid into. Review to check that your account details are correct and select ‘Continue‘ to save changes.
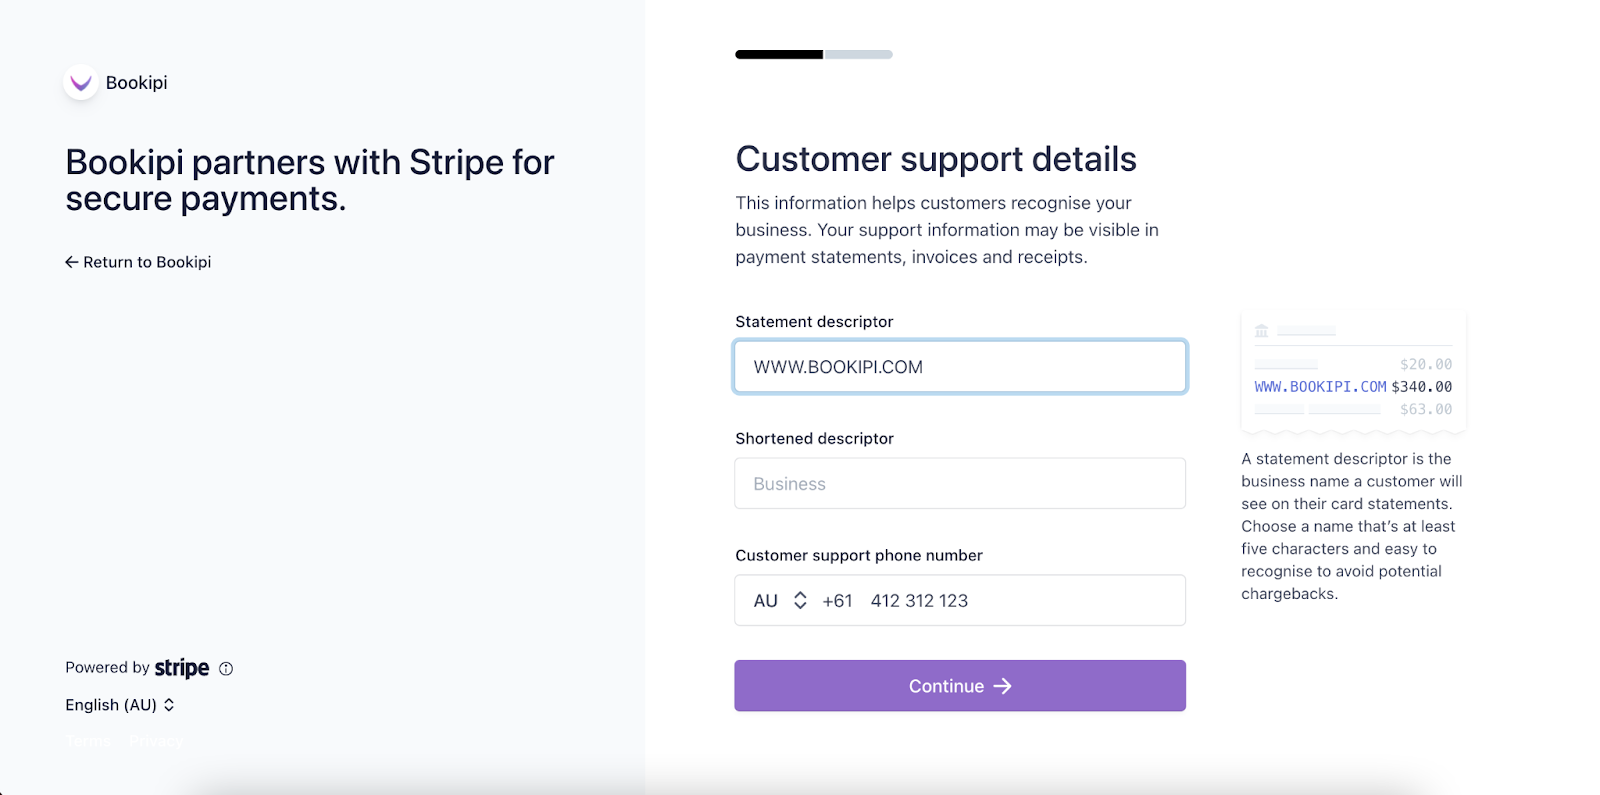
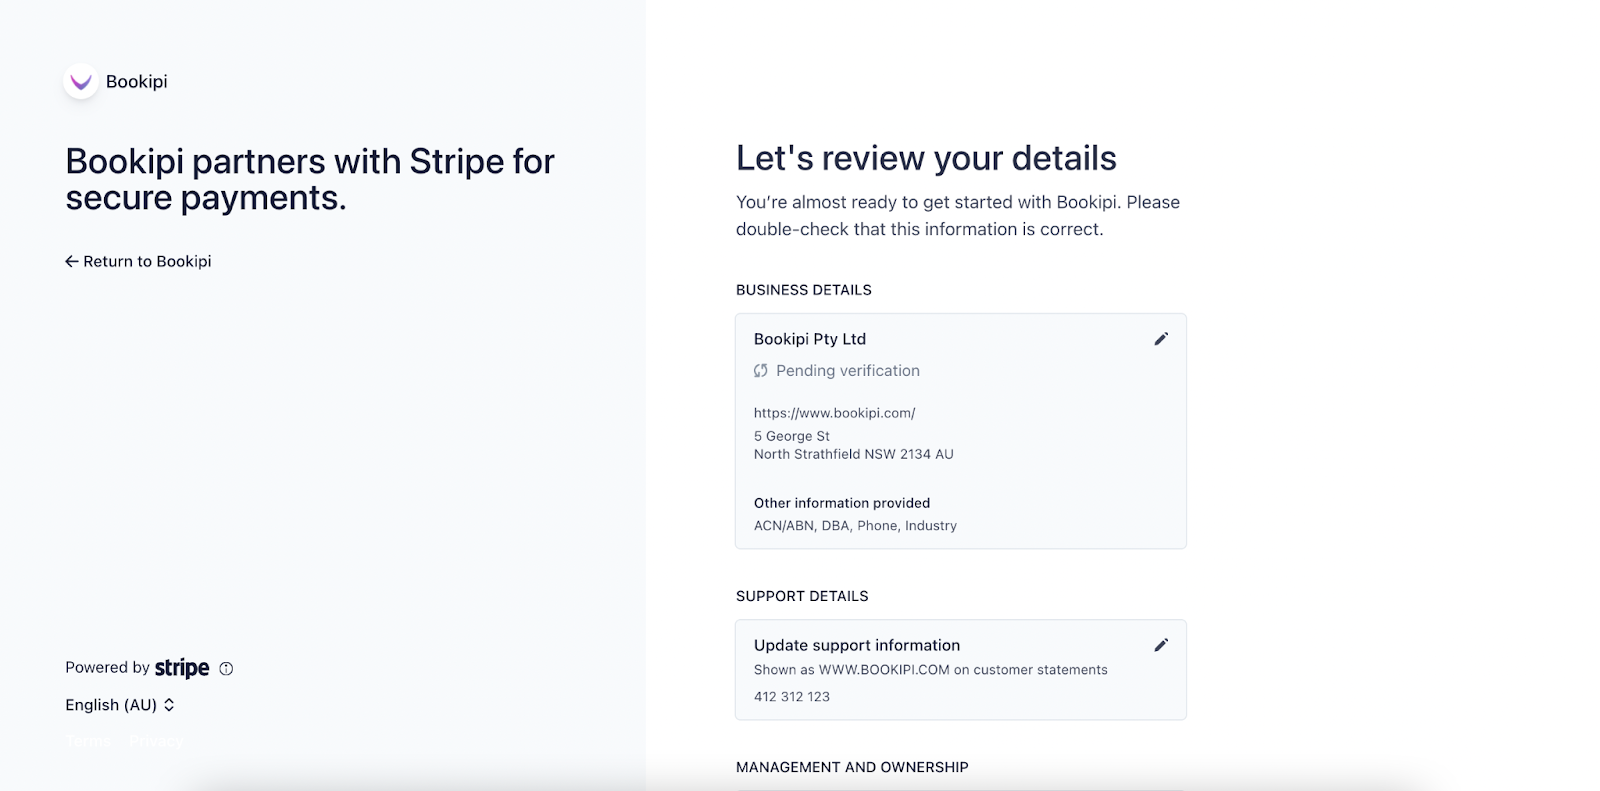
Step 10: Enter your business’ support details.
This allows customers to identify that they have been charged by your business.
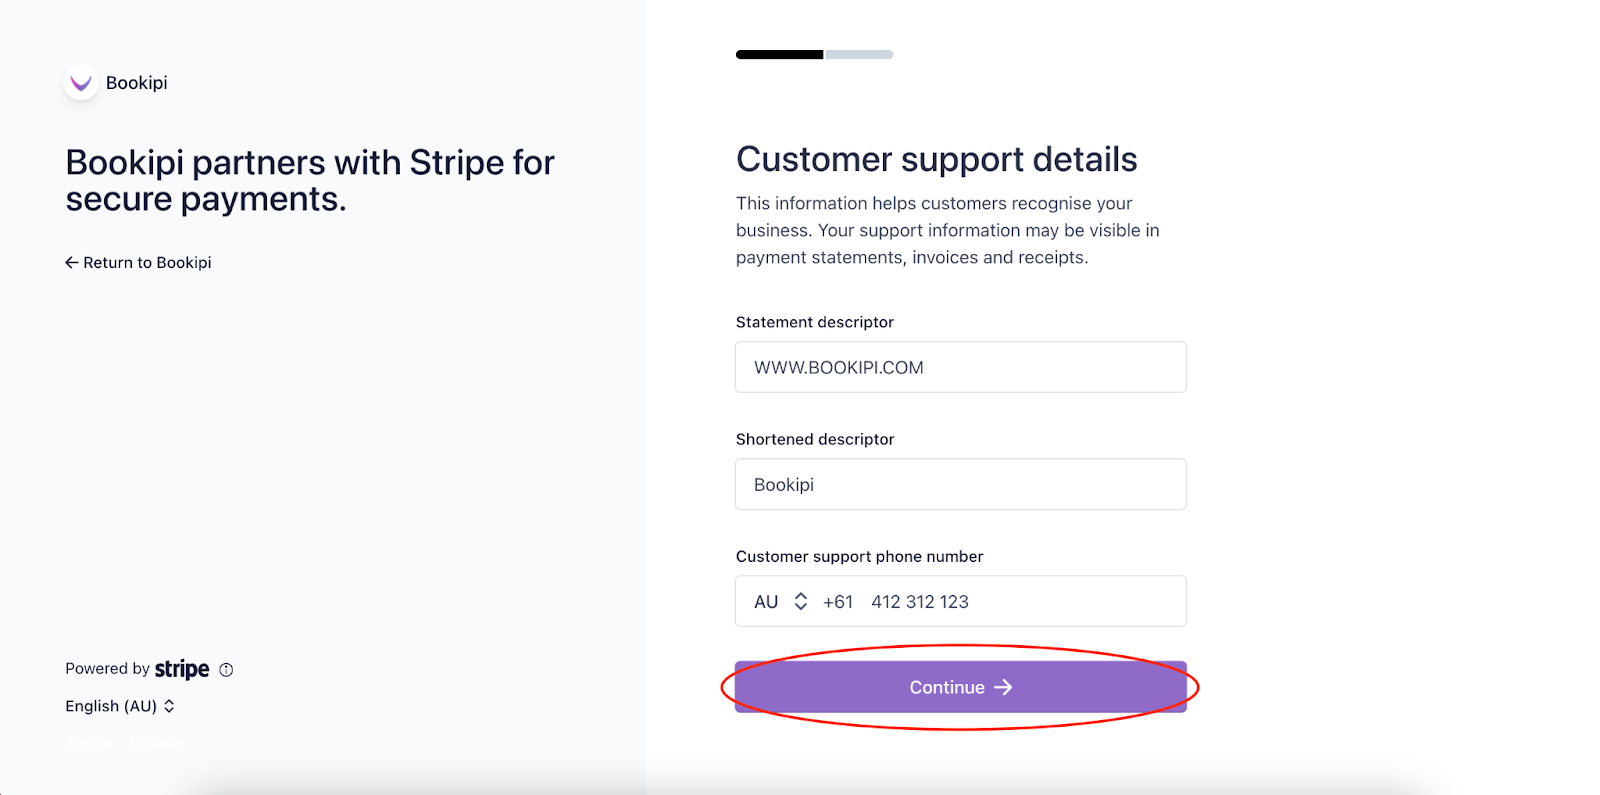
You can include a statement descriptor to be visible on payment statements, a shortened descriptor, and/or a customer support phone number.
Select ‘Continue‘ to save changes.

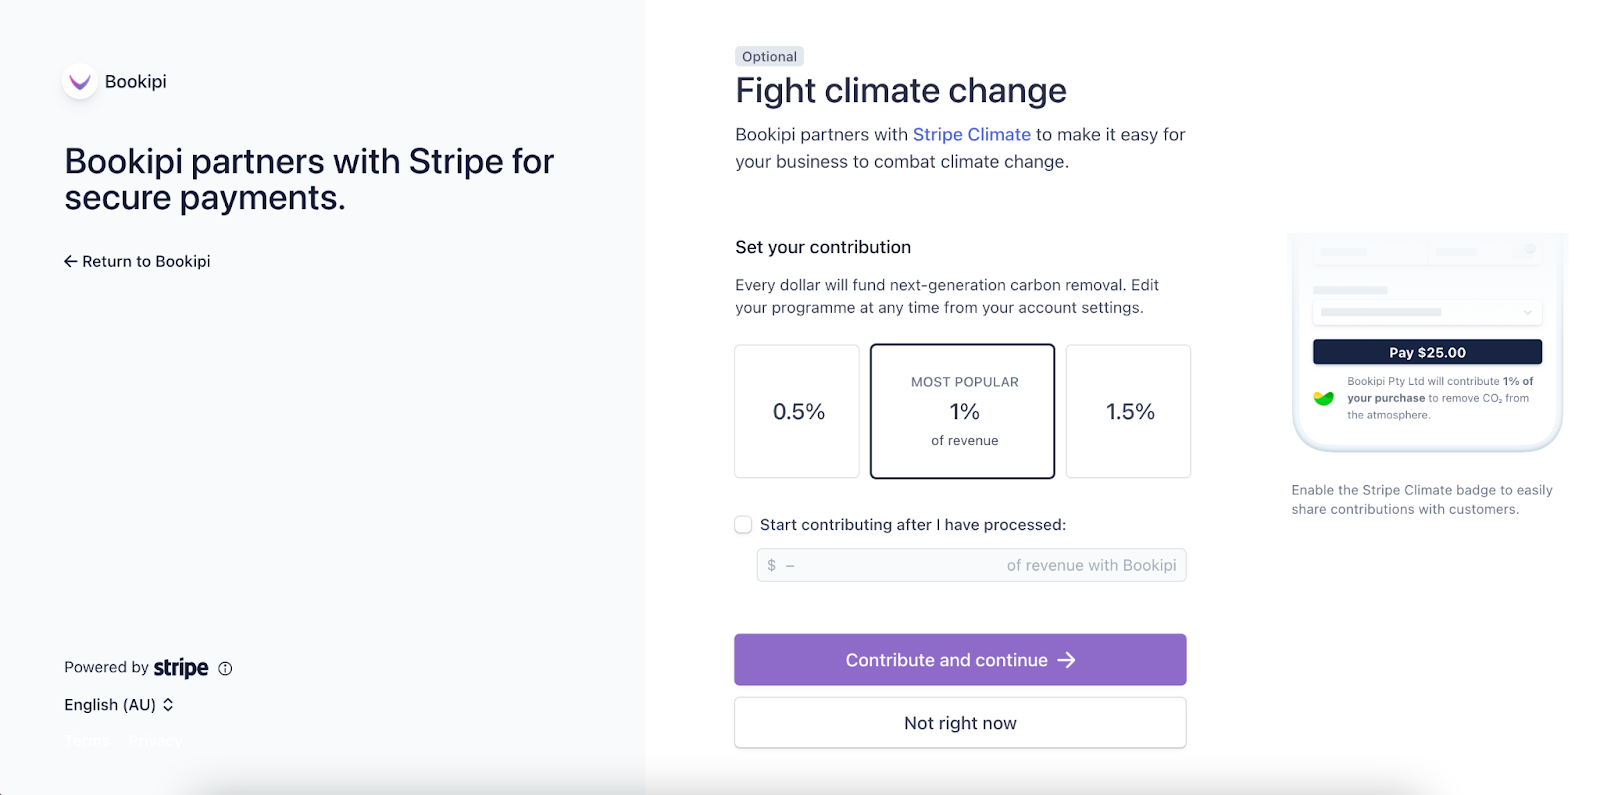
Step 11 (Optional): Make an optional selection
Add an optional contribution to fight climate change or select ‘Not right now’.
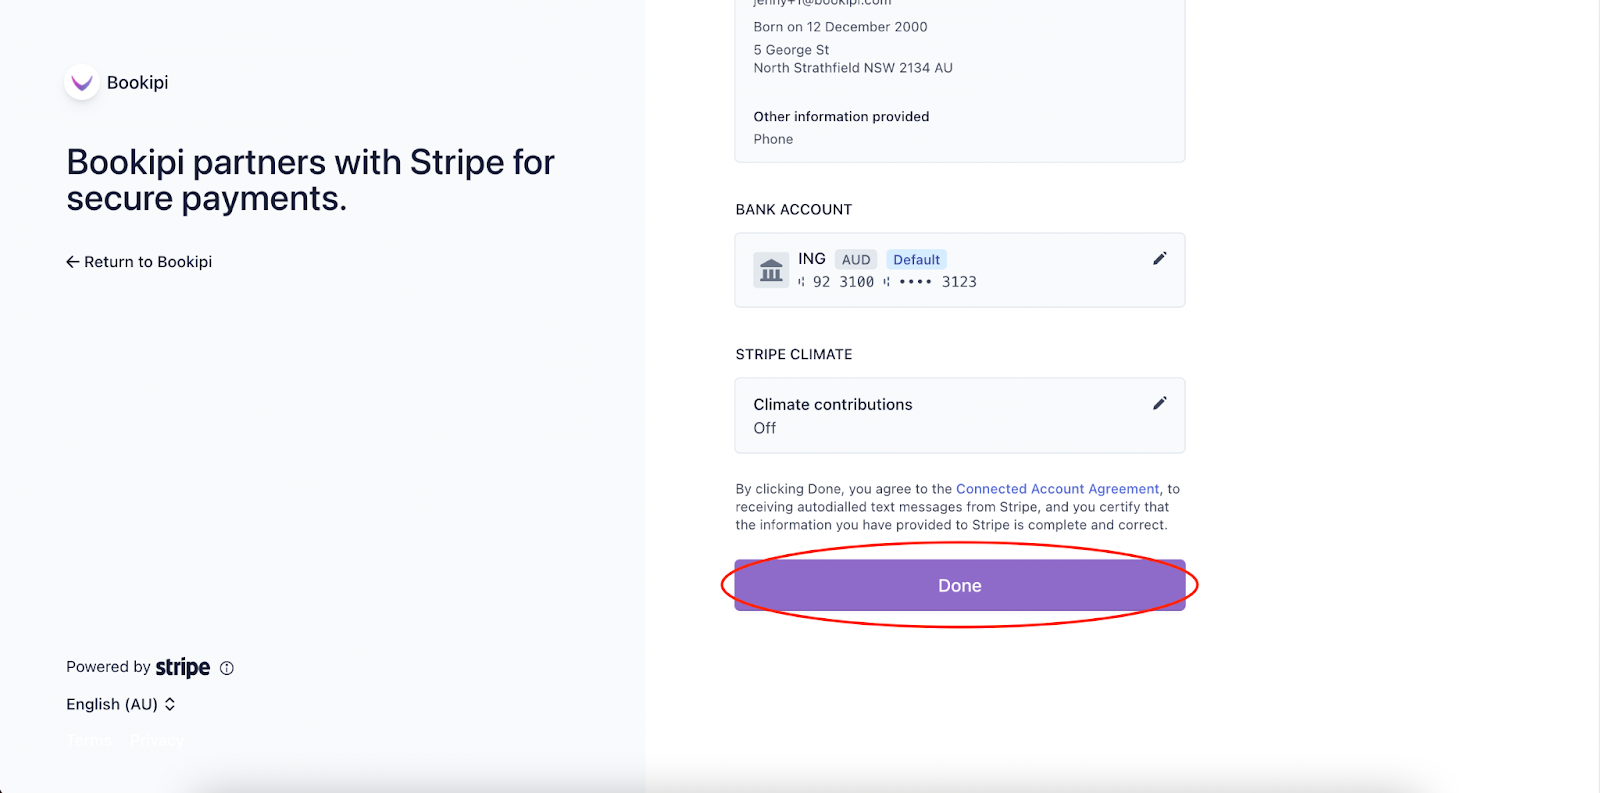
Step 12: Review all of your details.
If there is any information that needs to be corrected, select the Pen icon on the top right of each box.
Select ‘Done‘ when you’re ready to submit.
To check on the progress of the approval of your account, log in to the Stripe dashboard.
Stripe may send an email if additional information is required to verify your account.
Once you have verified your account, you can start using card payments in Bookipi Invoice.


