Set up your Bookipi AI Receptionist with this simple guide.
How to create your Bookipi AI Receptionist
Provide consistent, professional support day and night with Bookipi’s AI-powered Receptionist. From answering calls to transcribing messages, it’s all handled for you. Get started now with our simple setup guide.
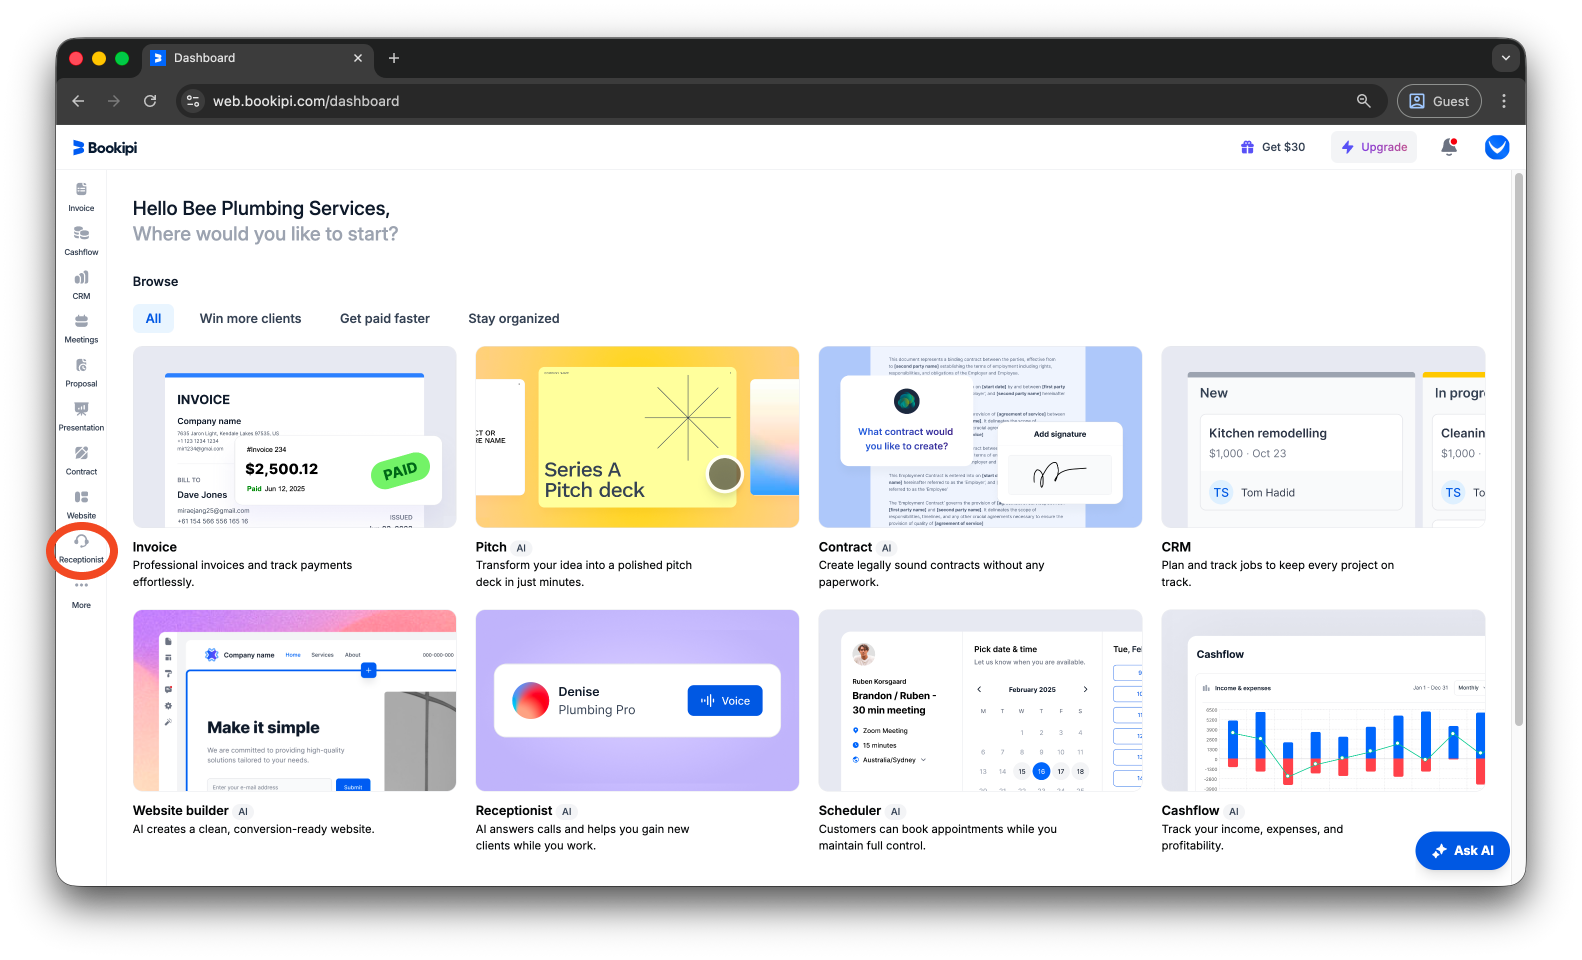
Step 1: Click ‘Receptionist’
Click ‘Receptionist’ from the left panel of your dashboard.
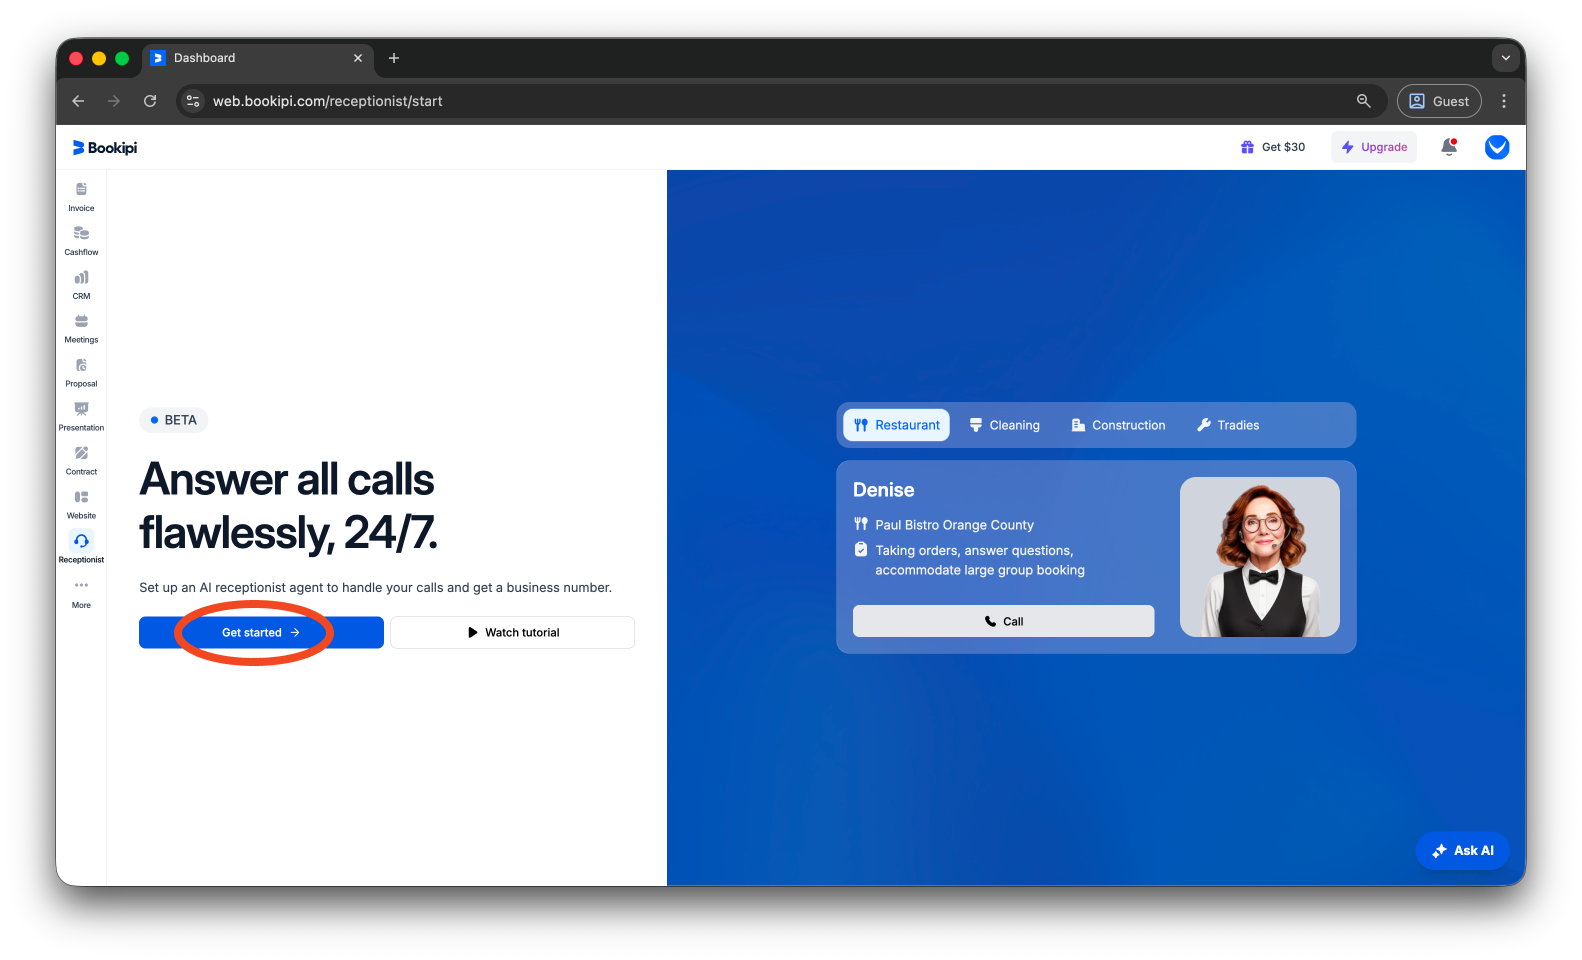
Step 2: Select ‘Get Started’
Click the ‘Get Started’ button to create your AI Receptionist.
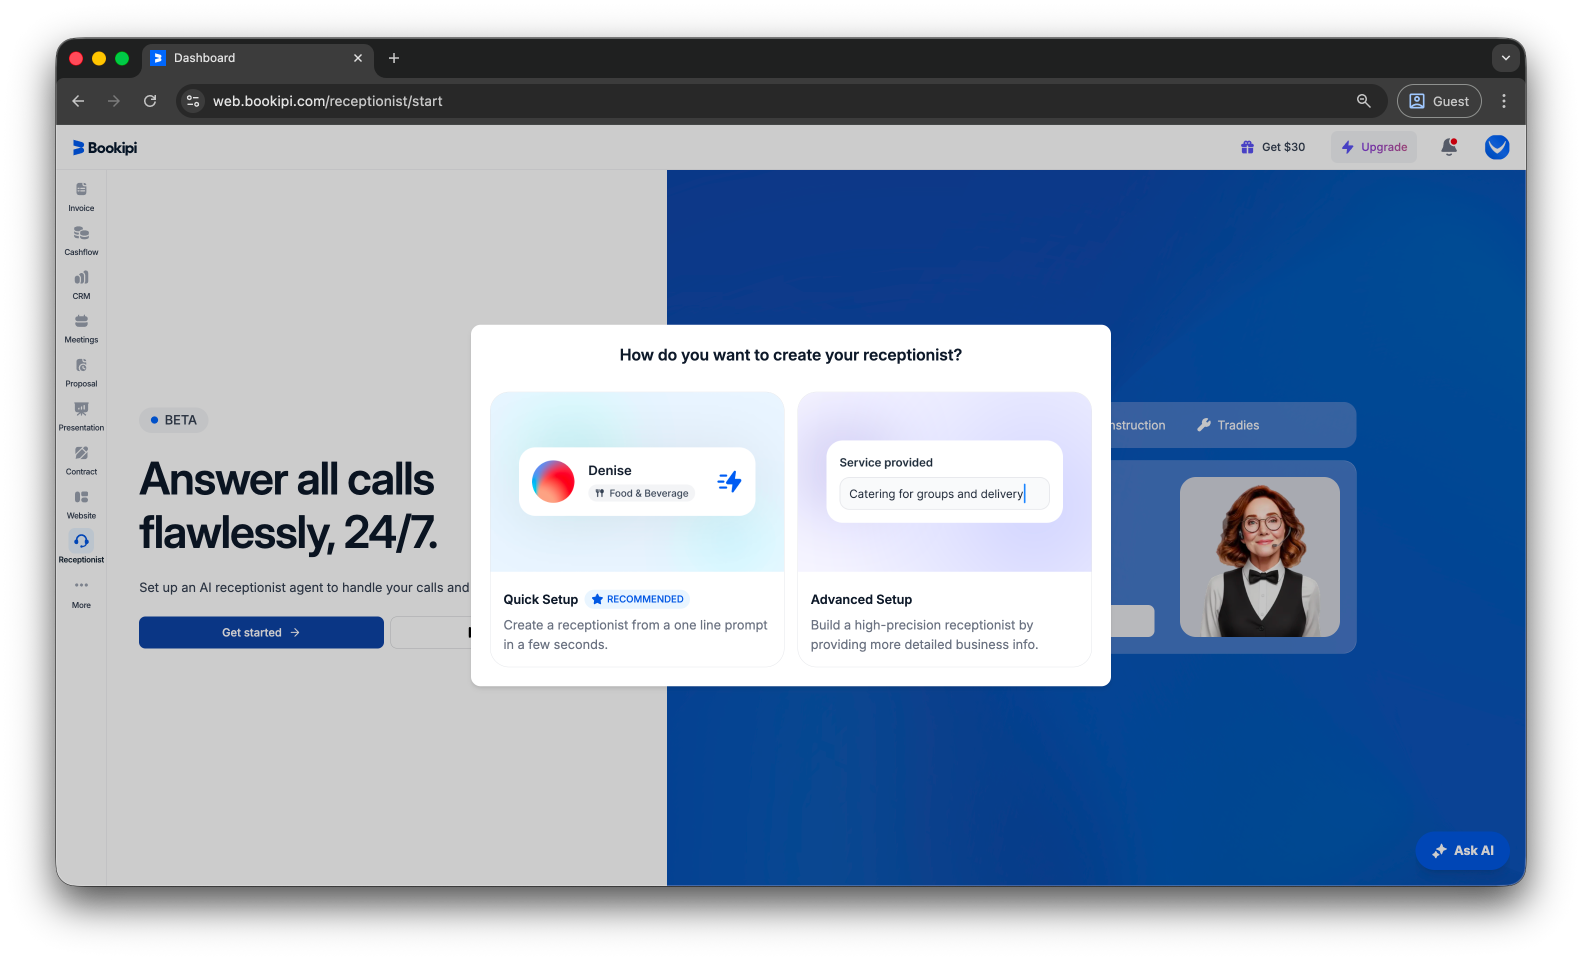
Step 3: Choose Setup Method
Select how you want to set up your receptionist. Choose ‘Quick Setup’ for a faster process, or ‘Advanced Setup’ to provide more detailed information.
Step 4: Select Receptionist Persona
Assign a name to your receptionist and choose your preferred voice and tone.

Step 5: Continue
Click ‘Next’ to proceed to the next step.

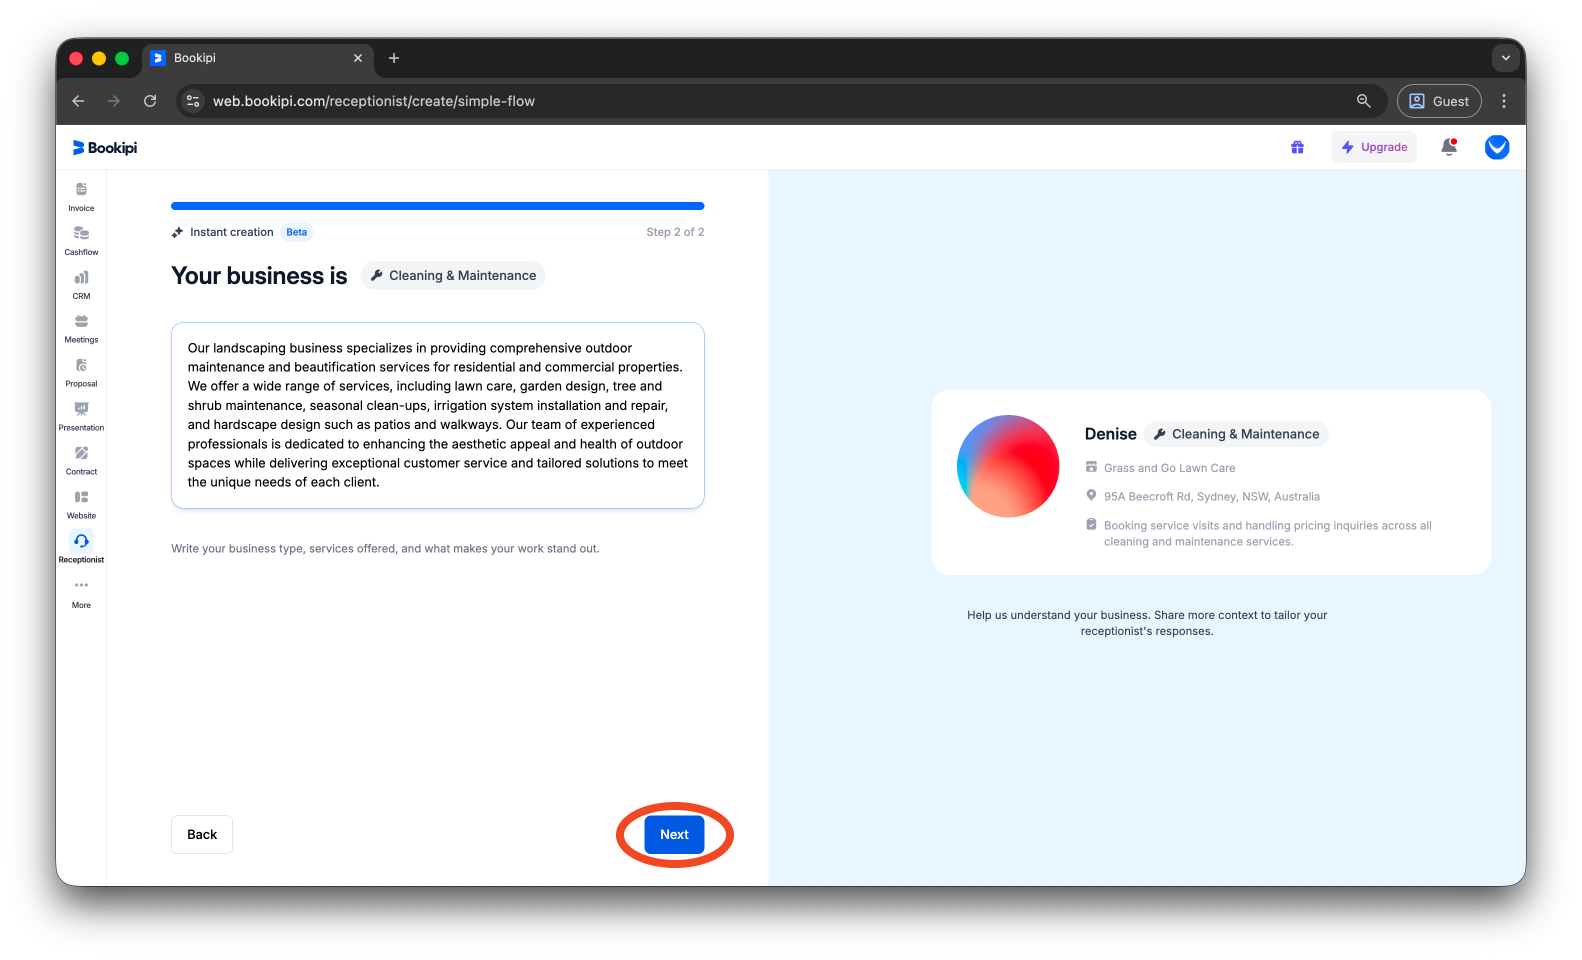
Step 6: Add Business Information
Select your business industry and optionally provide relevant details, then click ‘Next’.


If you leave the description field empty, the AI will automatically generate and fill it in. This description is then used to build your receptionist’s knowledge base.

Step 7: Continue
Click ‘Next’ to move forward.
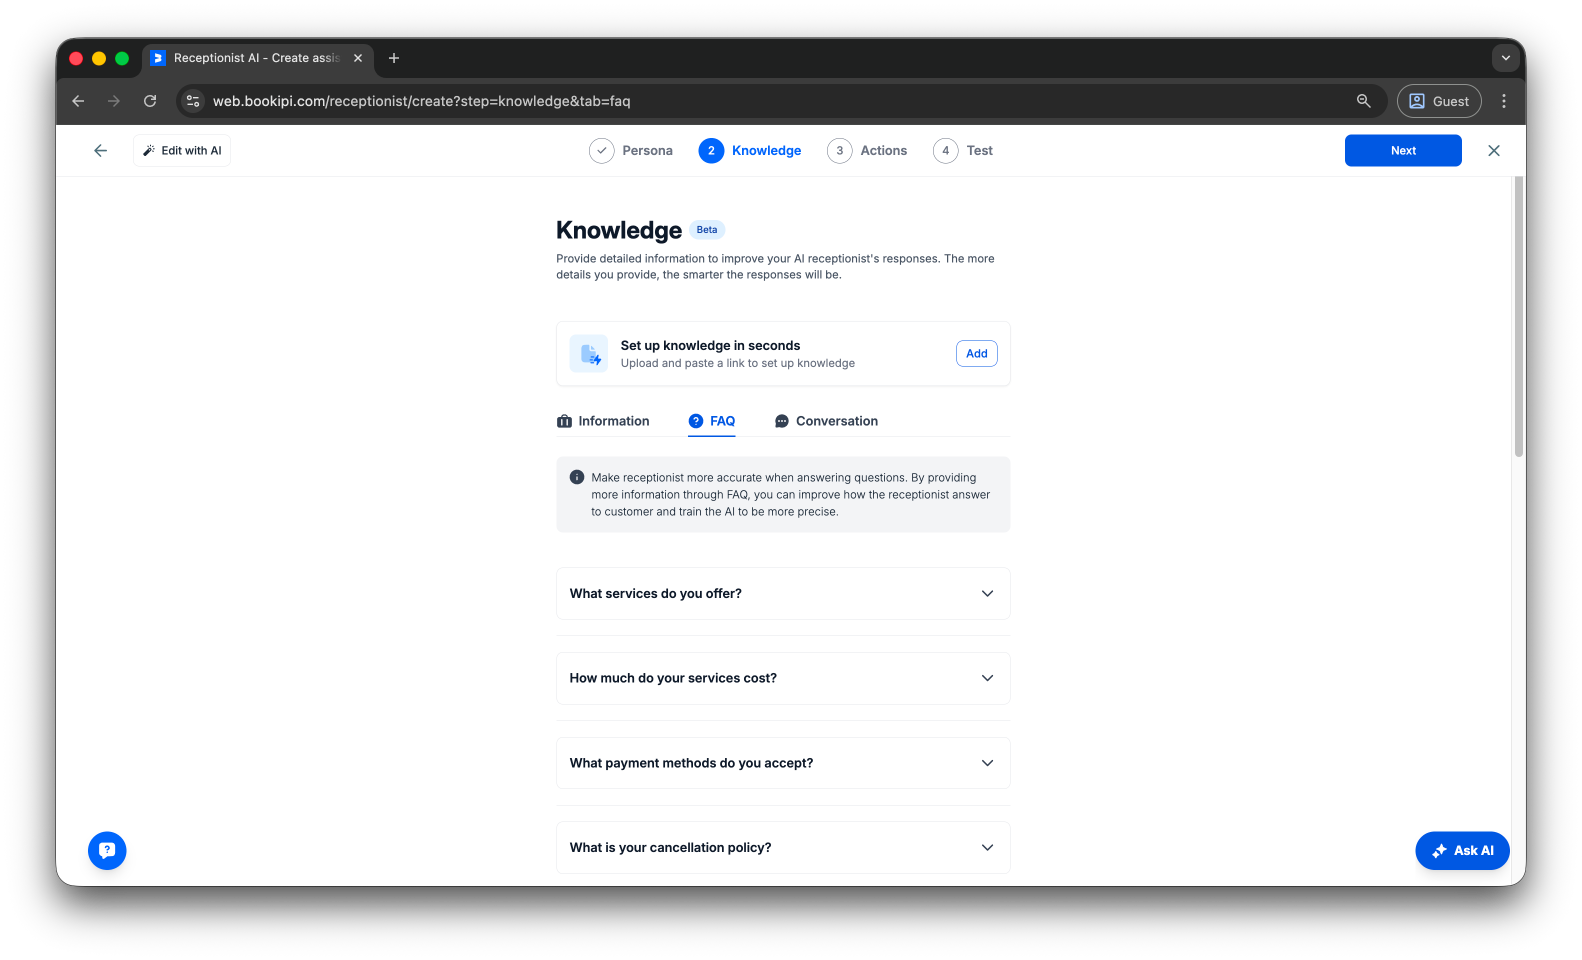
Step 8: (Optional) Advanced Setup
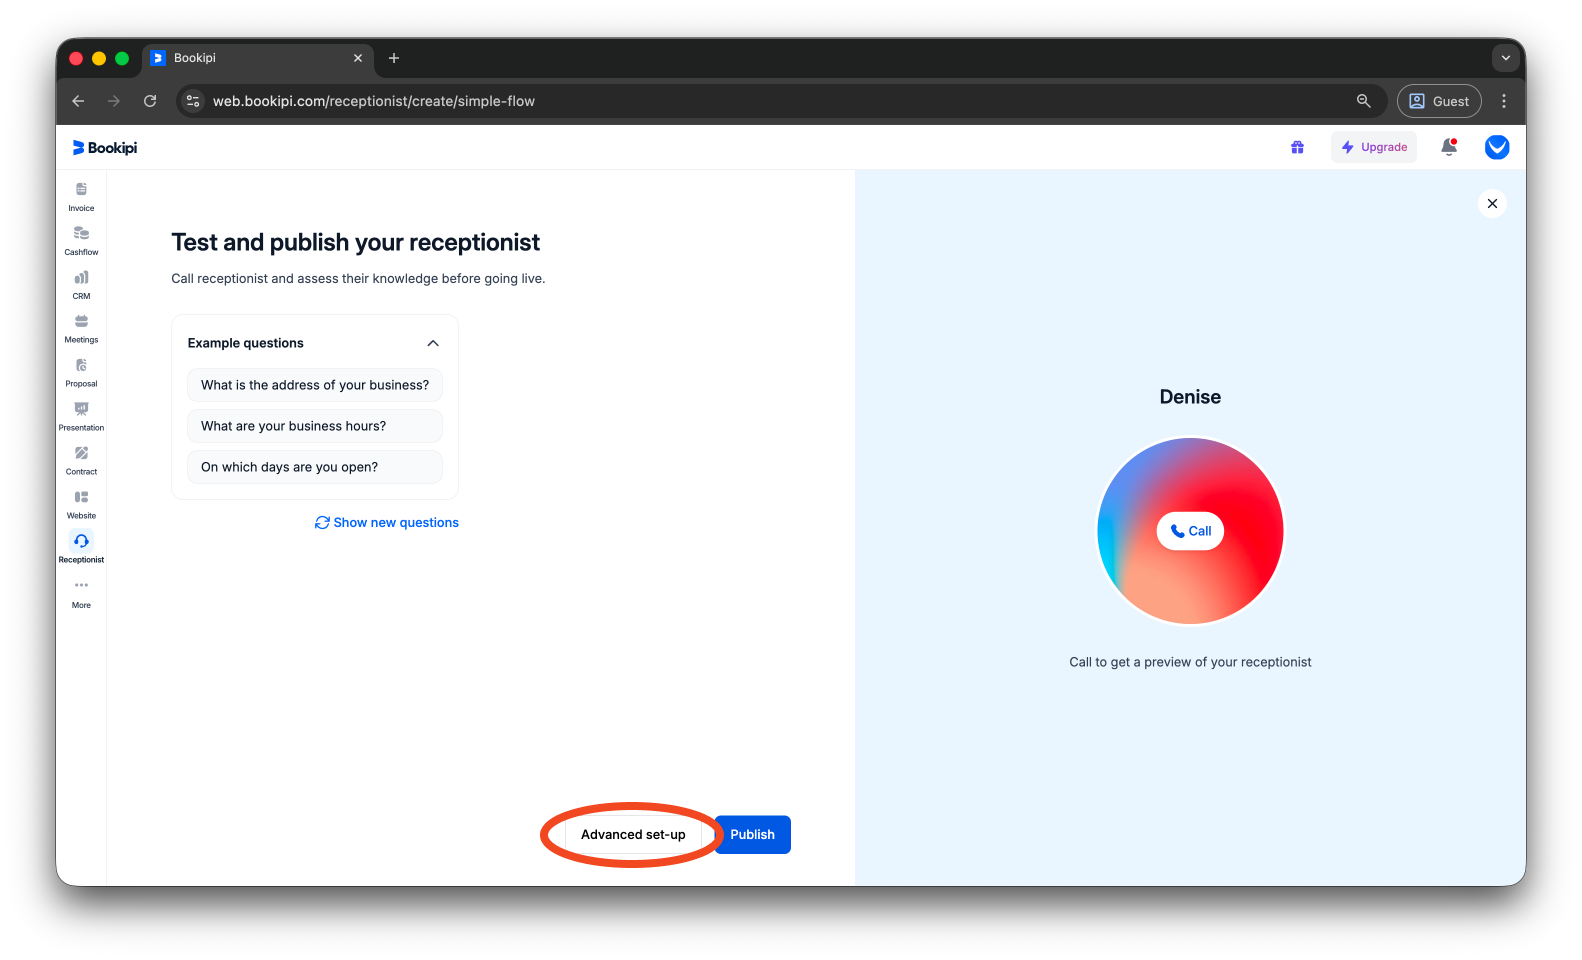
Enhance your receptionist by adding more detailed information by selecting ‘Advanced set-up’ before publishing.
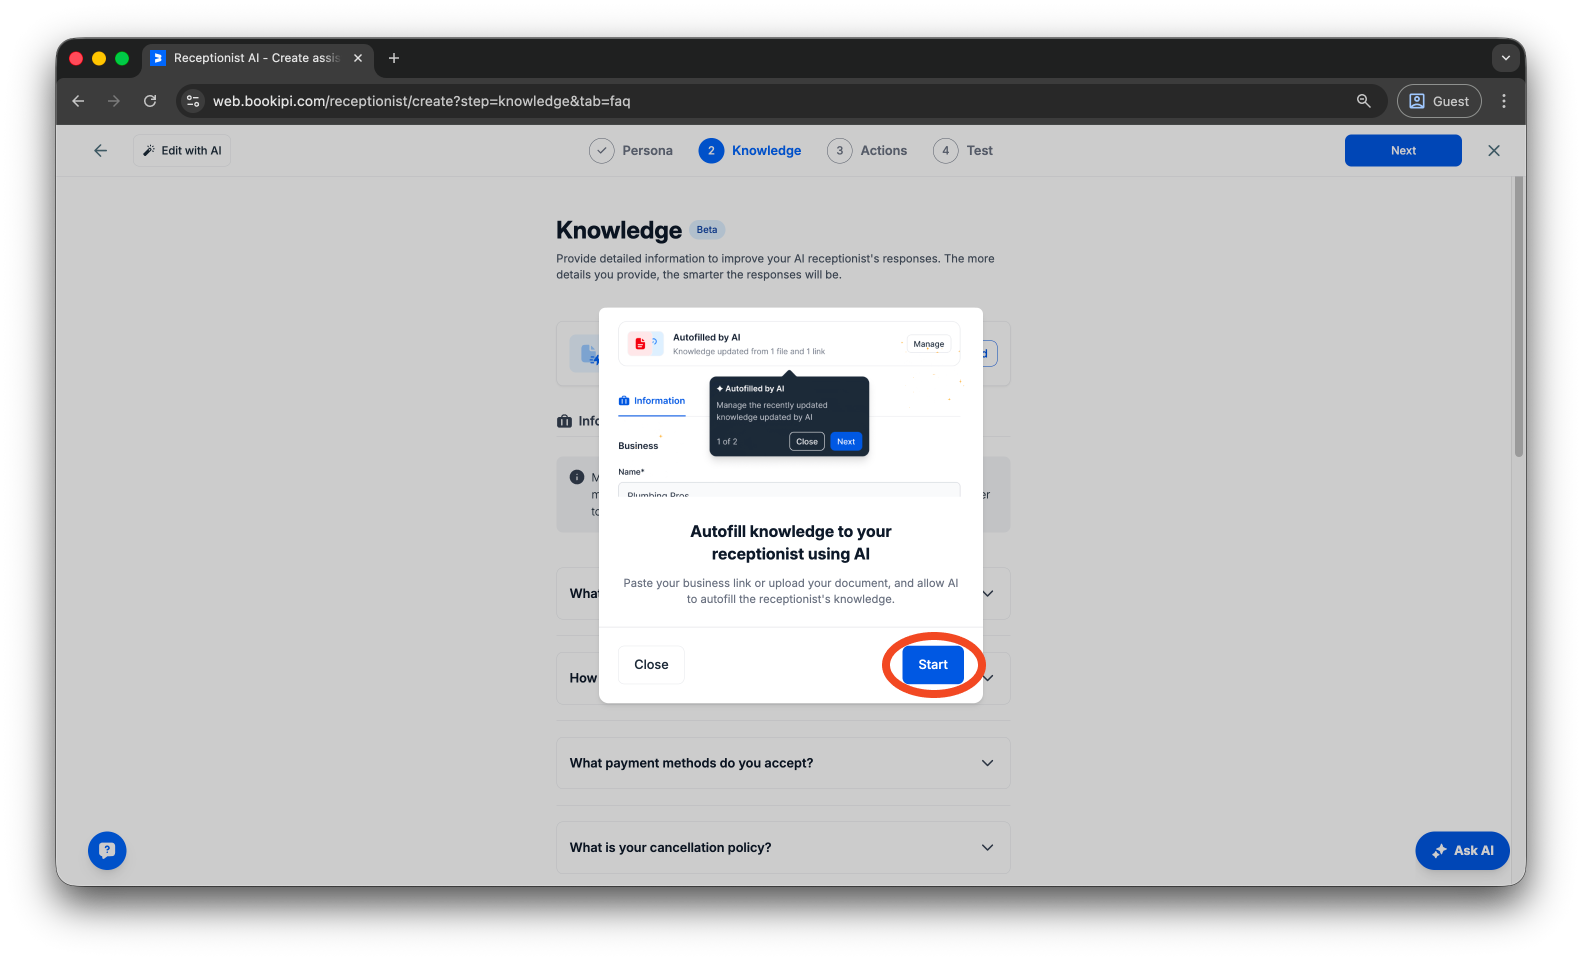
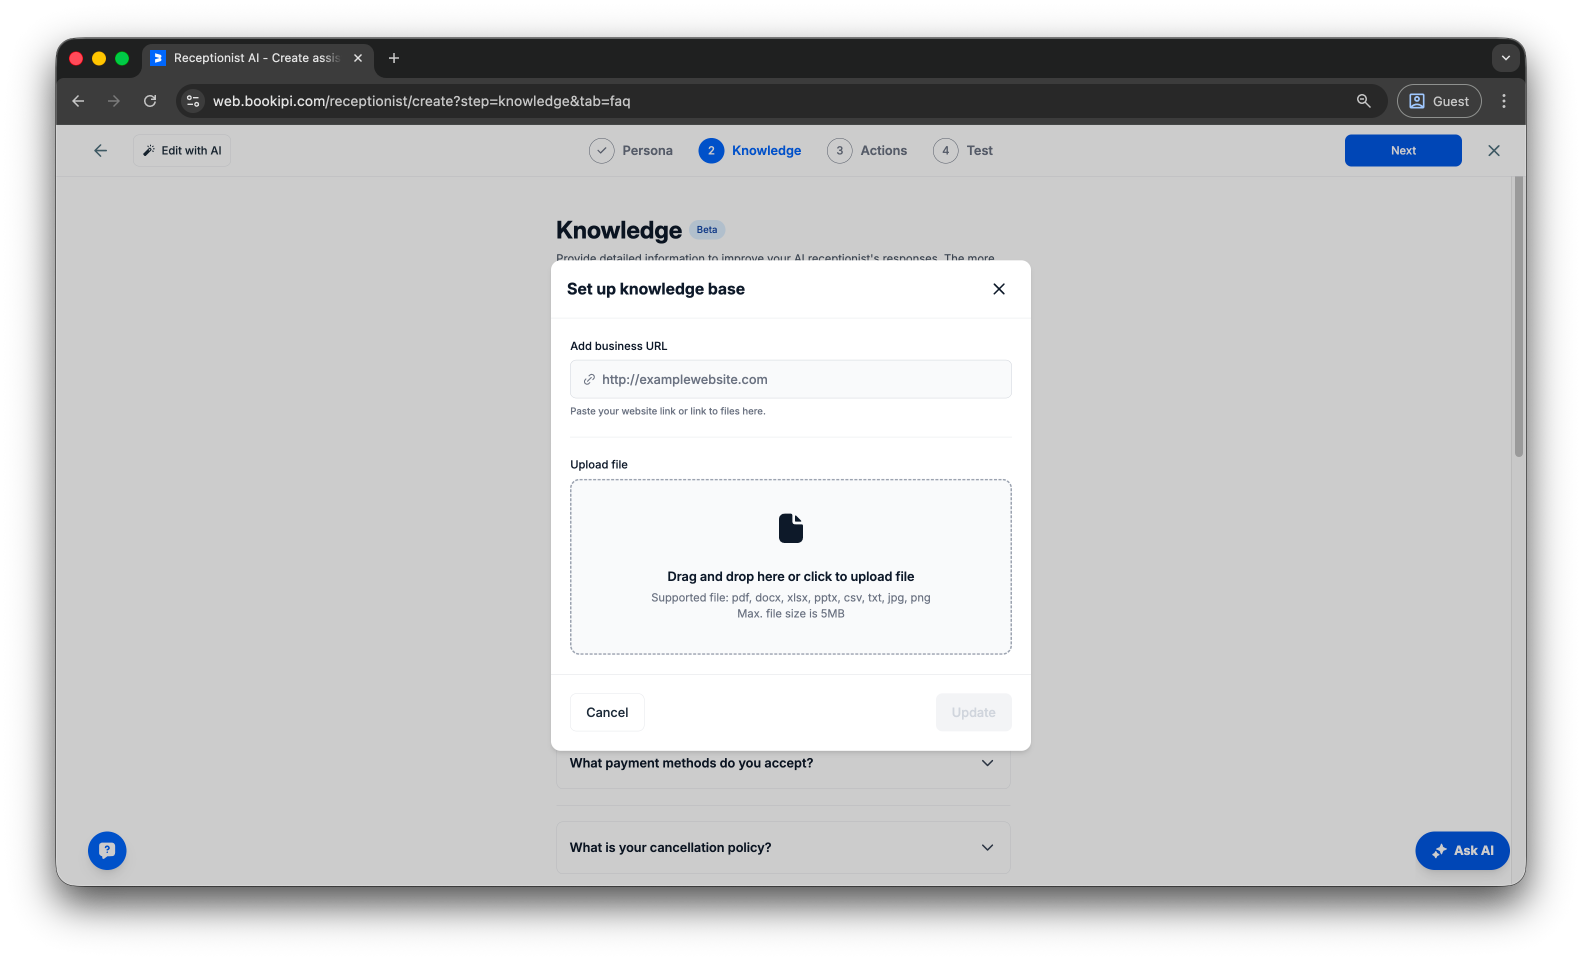
You can provide a website link or upload documents to allow the AI to automatically populate your receptionist’s knowledge base by clicking ‘Start’ on the prompt.
Alternatively, click ‘Add’ in the Knowledge Setup section.
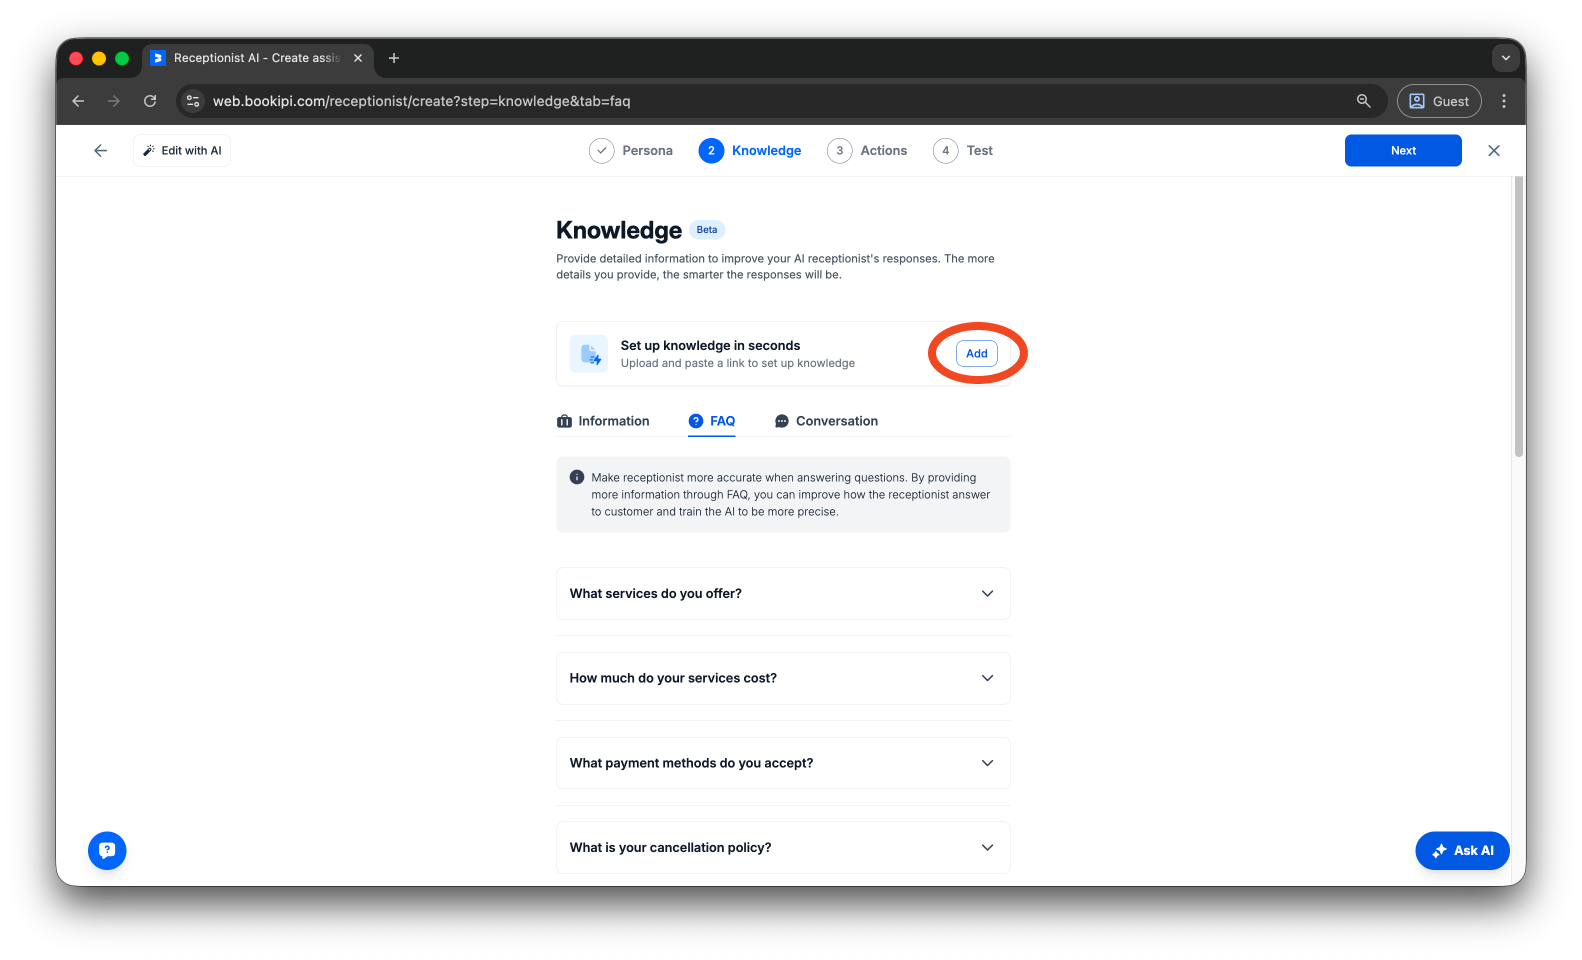
You can also manually enter details into the available fields to further improve accuracy.
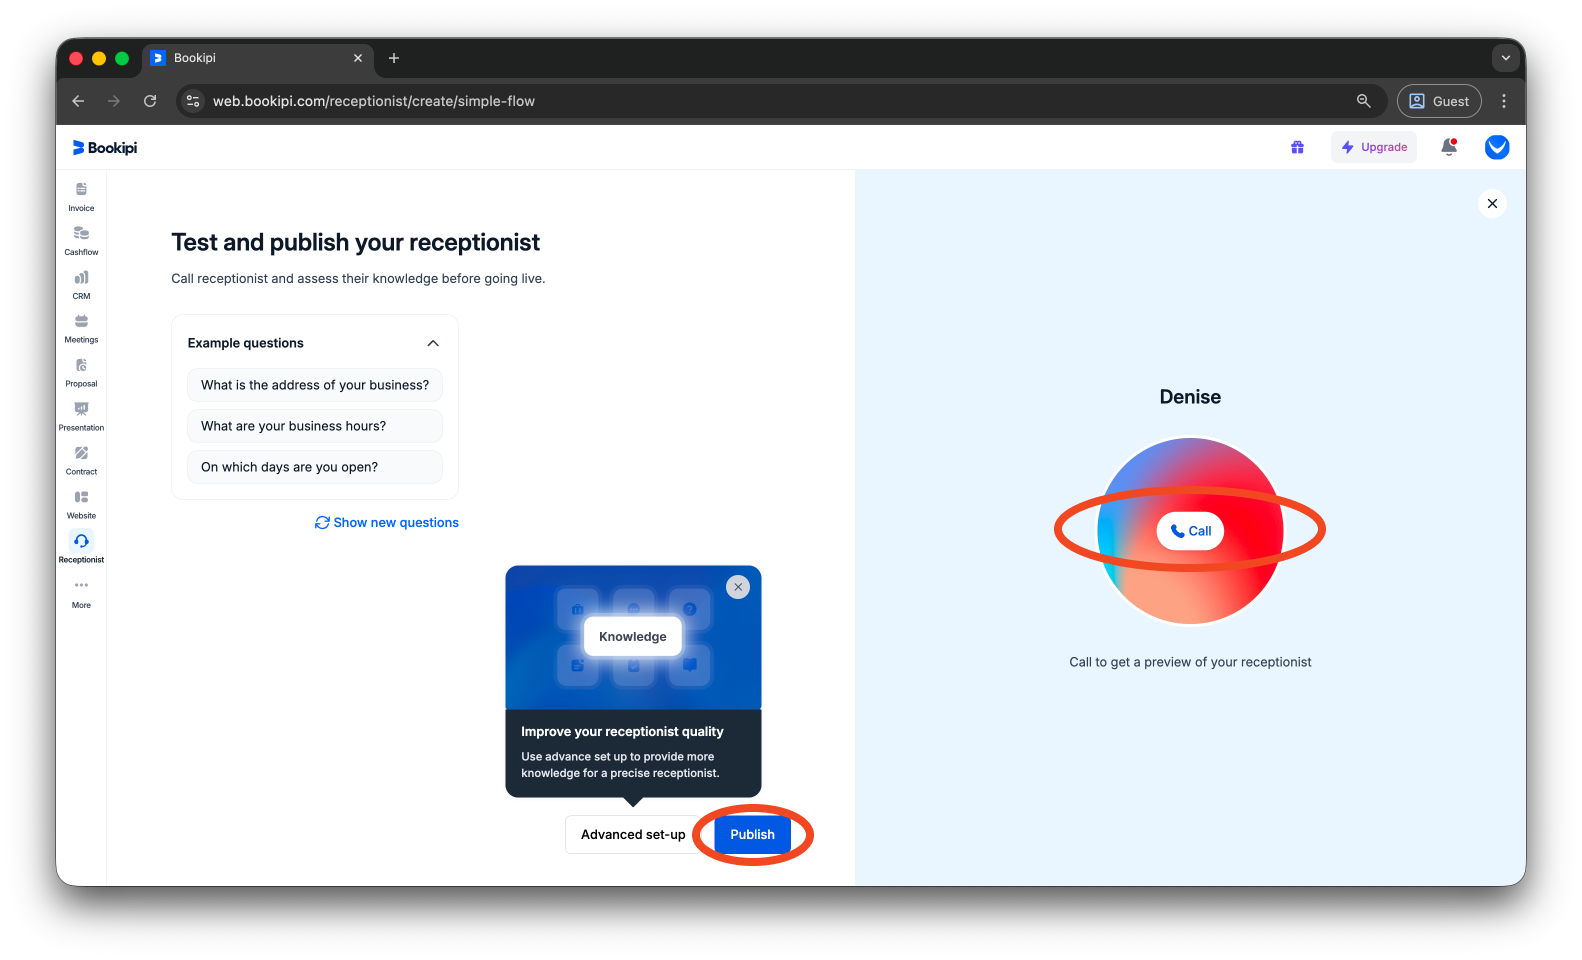
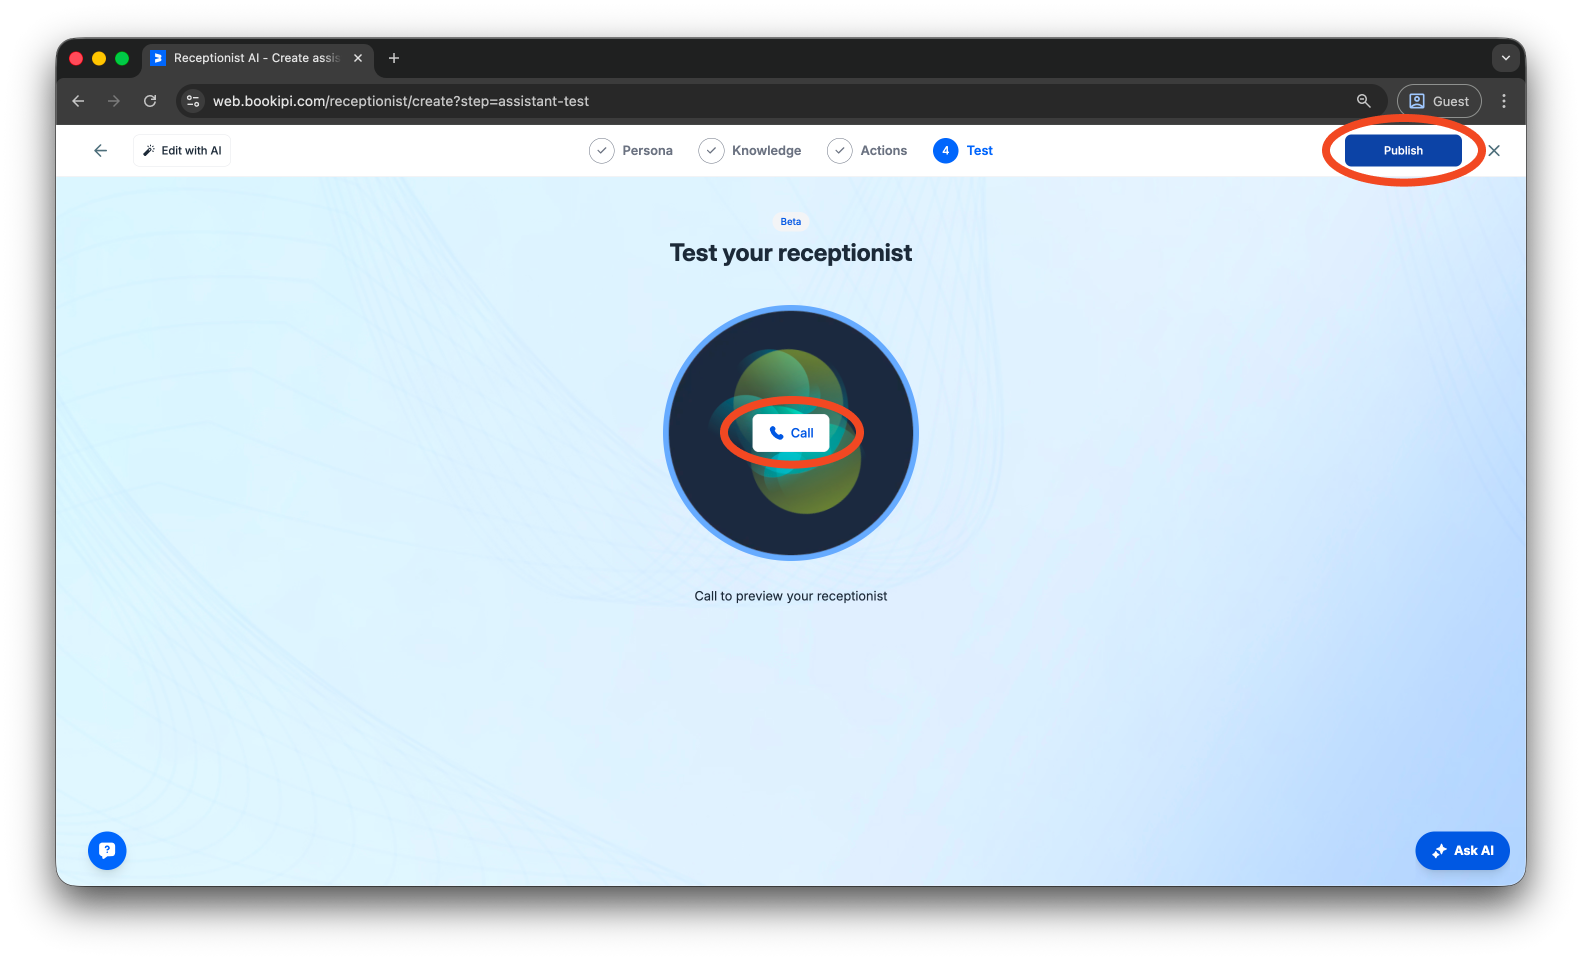
Step 9: Test & Publish
Test your receptionist to ensure everything works as expected. Once ready, publish it to make it live.
From the Quick Setup:
From the Advanced Setup:
FAQs about how to create your Bookipi AI Receptionist
Q: Is Bookipi AI Receptionist free?
A: AI Receptionist is a paid-tier tool, so you need to subscribe to publish and continue using the service.
Q: Why is the AI Receptionist providing incorrect information?
A: The AI Receptionist responds based on the information it has been given. For more accurate and helpful responses, please ensure to provide complete and accurate details for better results.
Q: Why does the AI Receptionist give different answers to the same question?
A: That’s expected. AI responses can vary slightly each time, but the overall meaning should remain consistent. If you notice conflicting answers, please review the information provided. If issues persist, please reach out to us at support@bookipi.com so we can help.
Q: Why can’t I see the Receptionist button in my dashboard?
A: This feature is currently available only in the US, UK, and Australia, with supported accents and phone numbers limited to these regions.
Discover more tutorials for Bookipi Invoice on Web v2
Discover more tips on how to get the most out of Bookipi Invoice on Web v2 with our Web v2 guides.
Make sending invoices anytime and anywhere even easier by downloading the Bookipi Invoice mobile app and check out our mobile app guides.


