Learn how to create, edit, copy and delete a customer in Bookipi Invoice Web v2.
How to create, edit, copy and delete a customer
This guide will walk you through the essential customer management actions in Bookipi Web, including how to create, edit, copy, and delete customer records. These features help you keep your customer database organized, accurate, and up to date.
Whether you’re adding new clients or maintaining existing records, these simple steps will help you efficiently manage customer information within your account.
In this tutorial, learn how to:
To create a customer
You can learn how to create a customer with these simple steps.
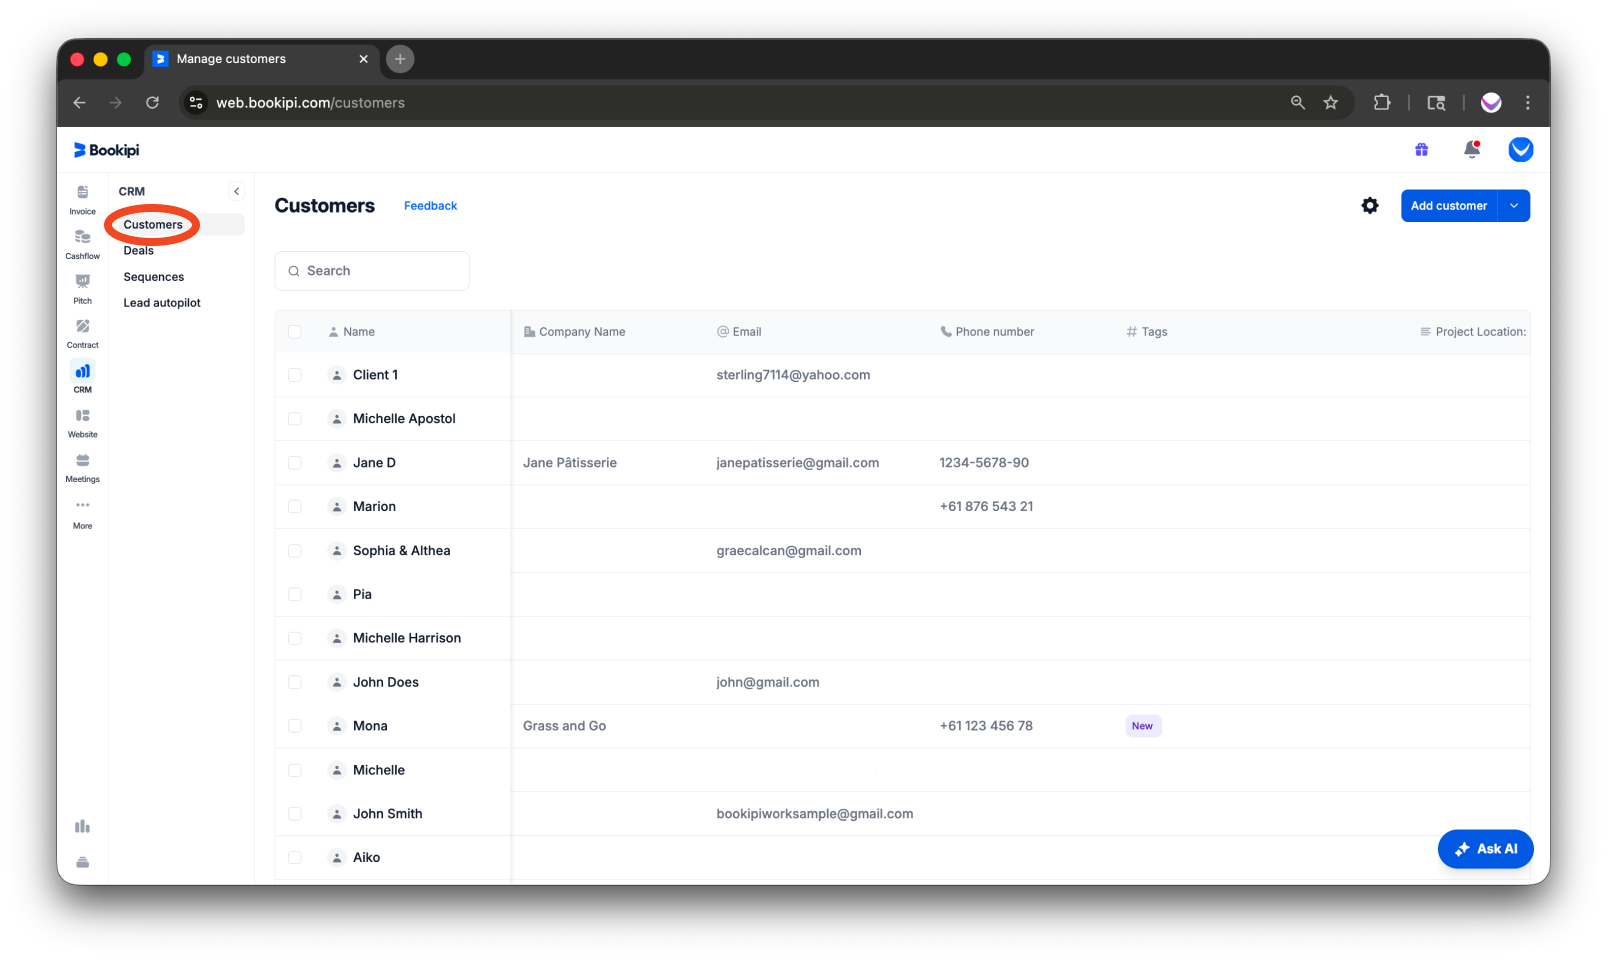
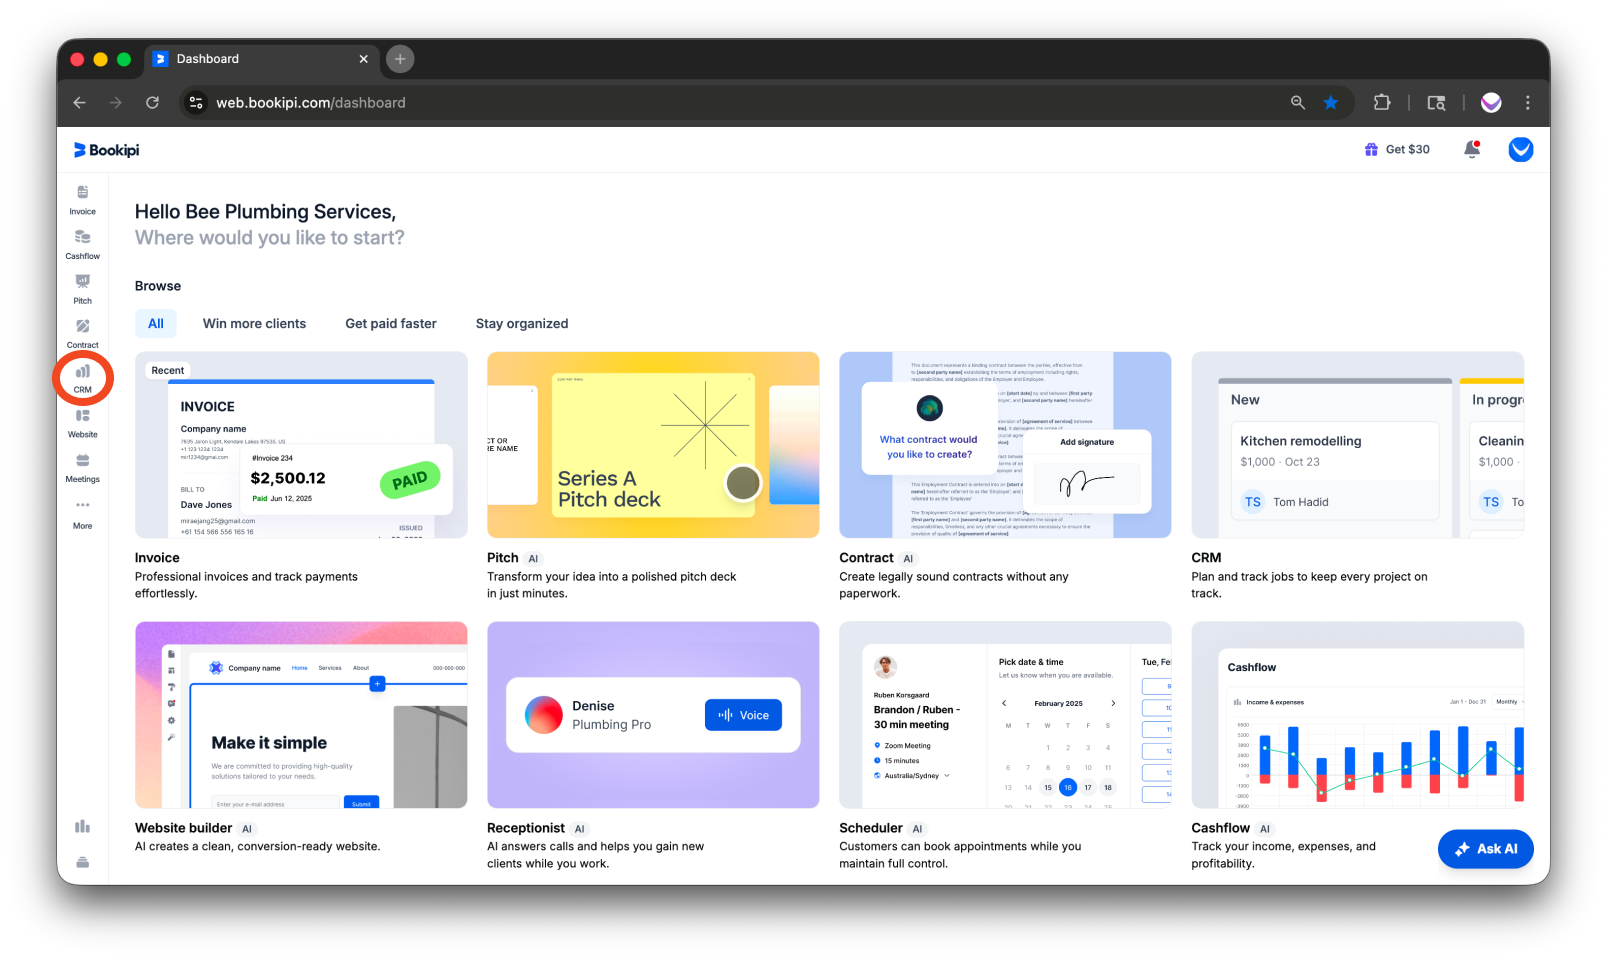
Step 1: Go to ‘CRM’
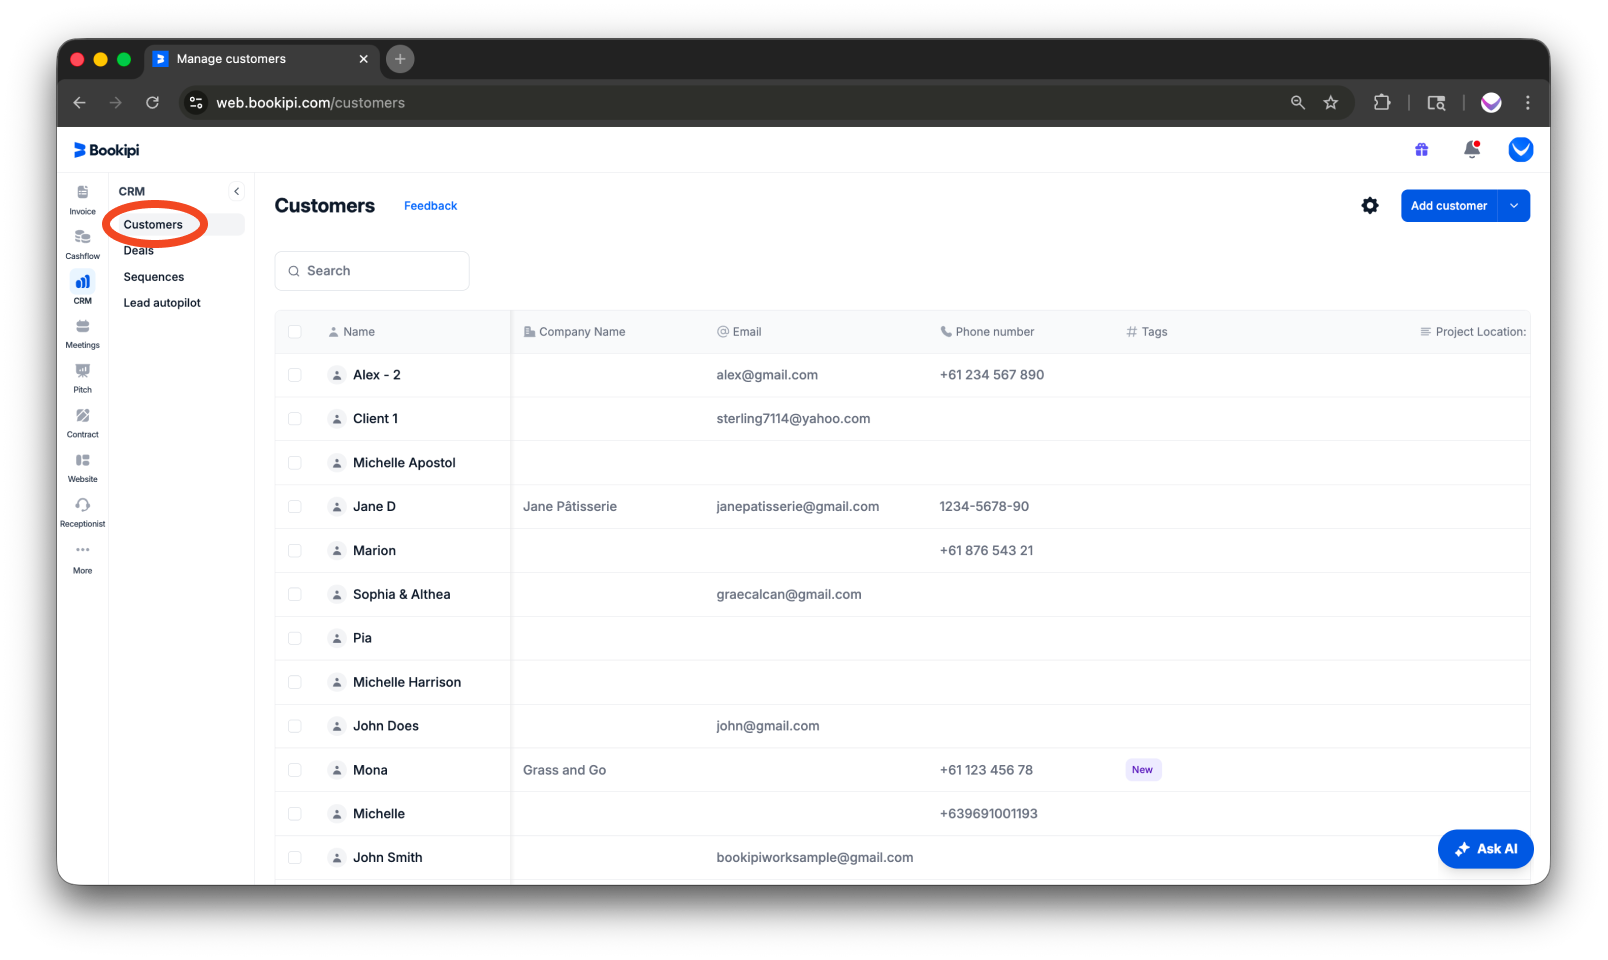
On the left-hand side panel of your dashboard, click ‘CRM’.

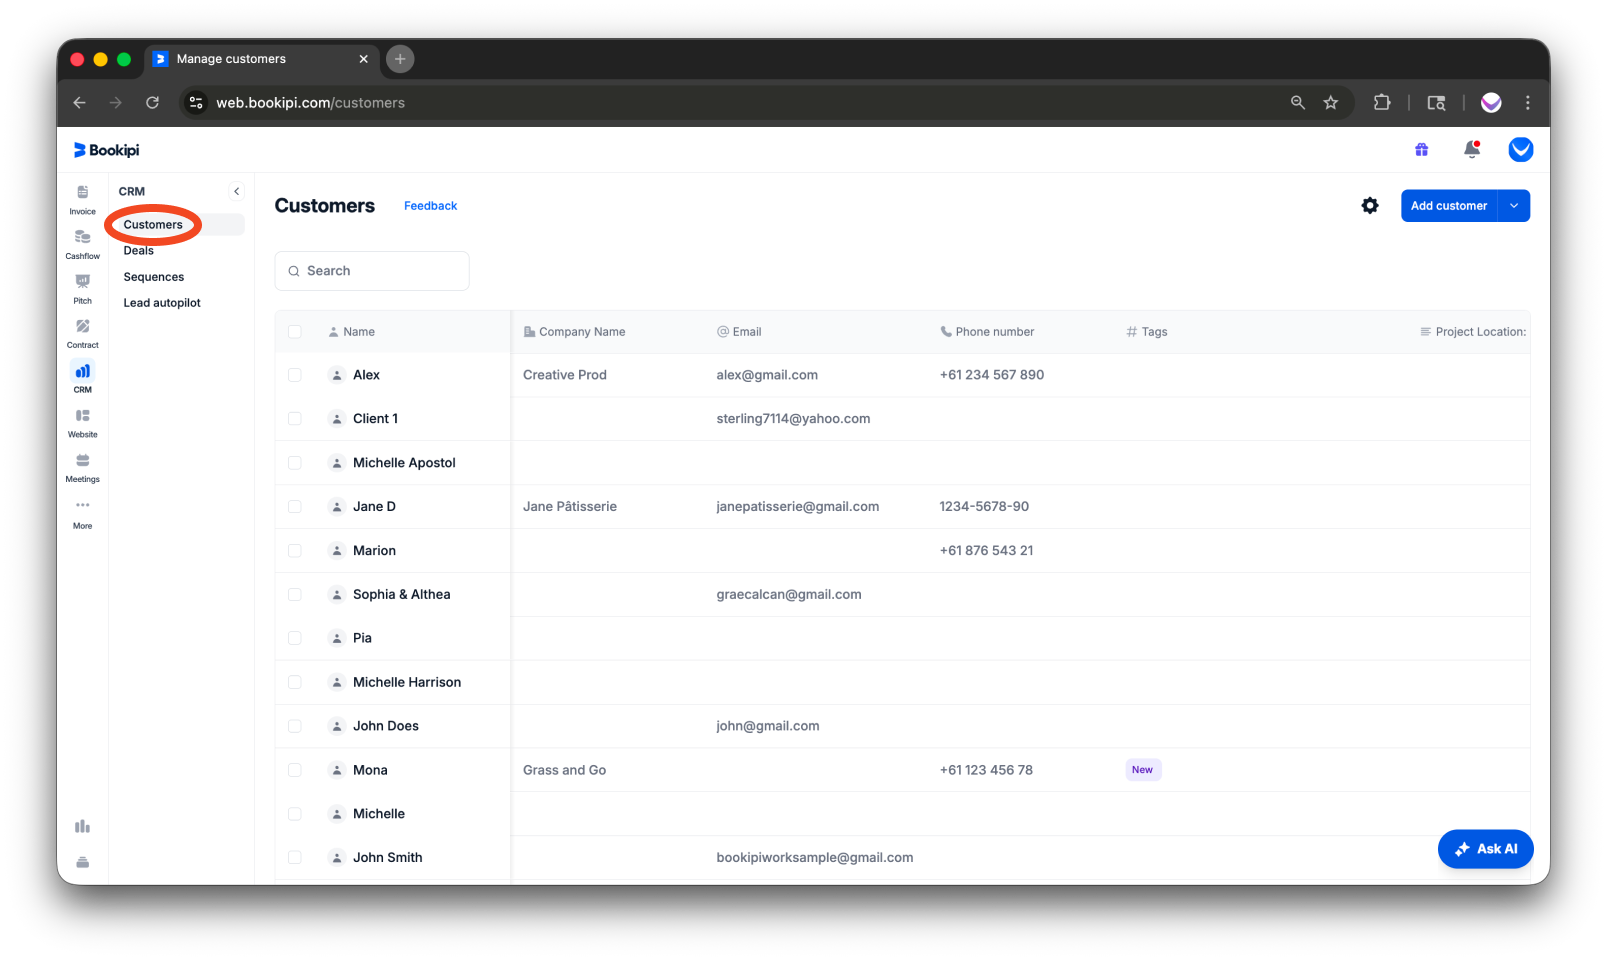
Step 2: Open the ‘Customers’ section
Make sure you are in the ‘Customers’ section within CRM.
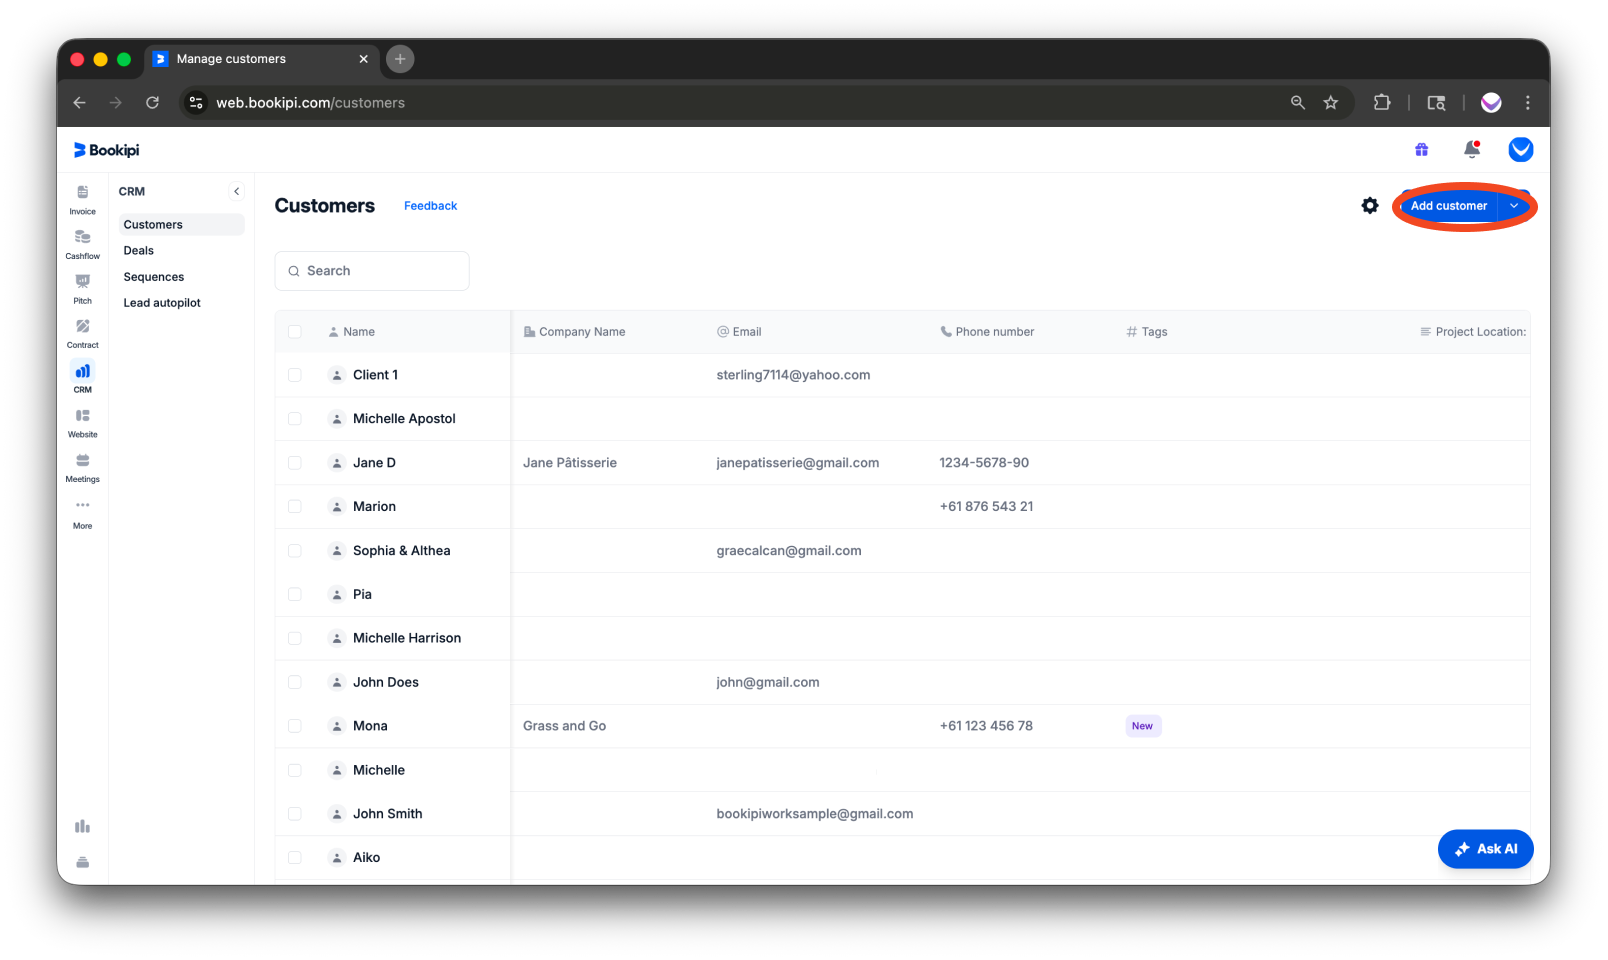
Step 3: Click ‘Add customer’
Click the ‘Add customer’ dropdown button. You will see three options for adding customers.
Step 4: Select ‘Add’
From the dropdown options, select ‘Add’ to manually enter customer details.

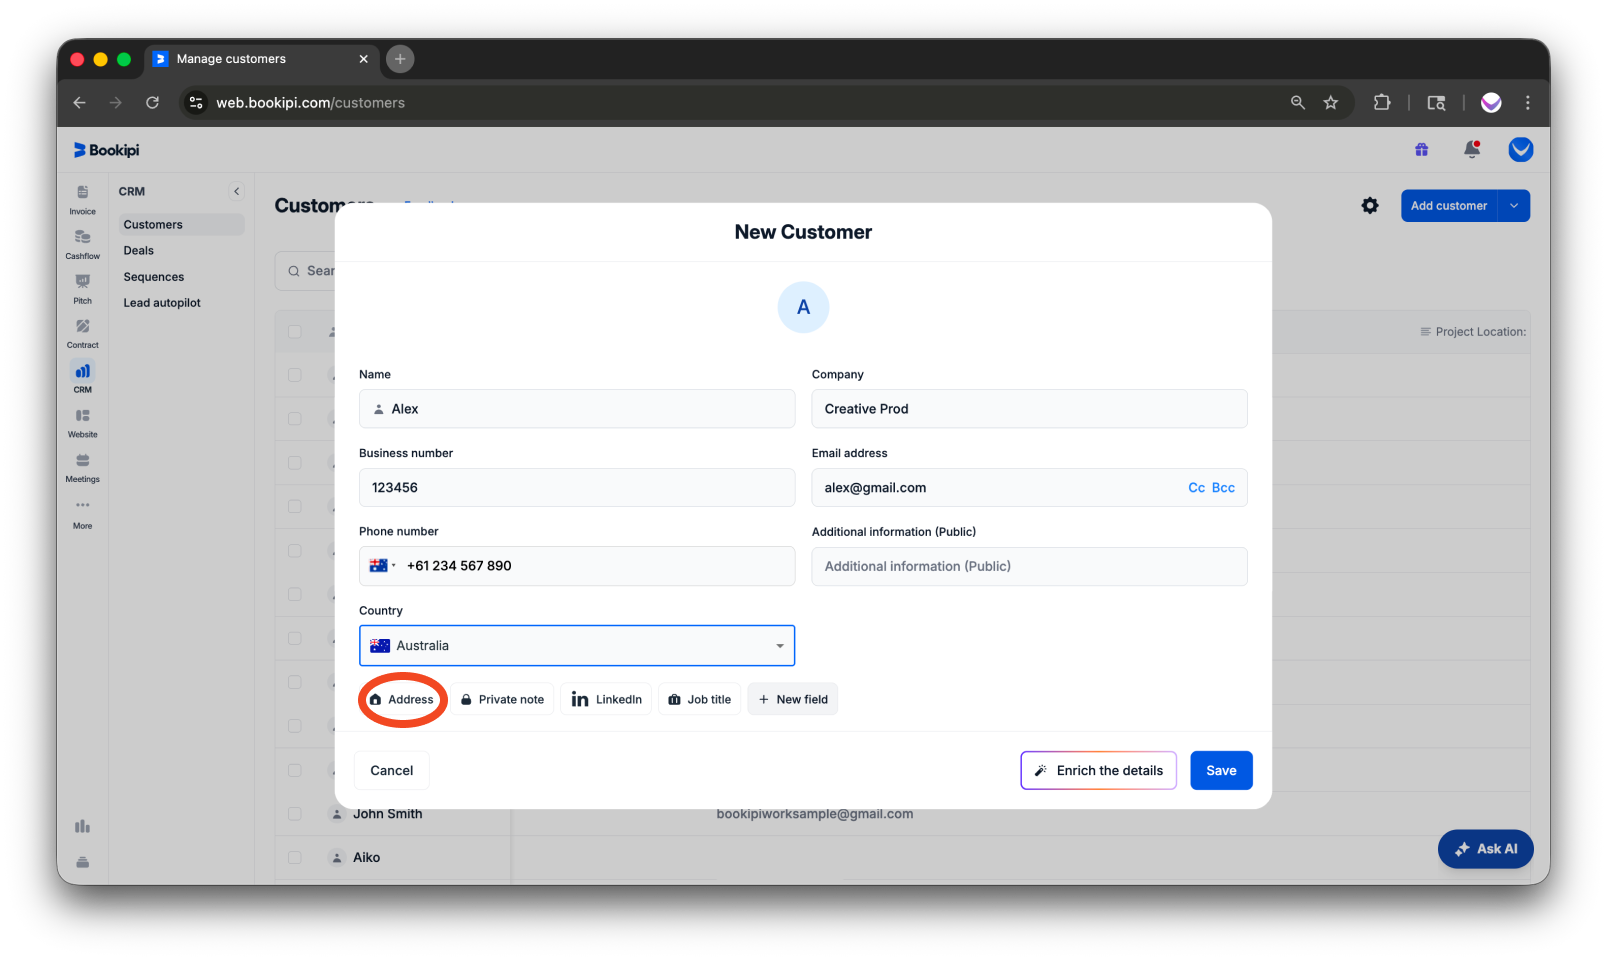
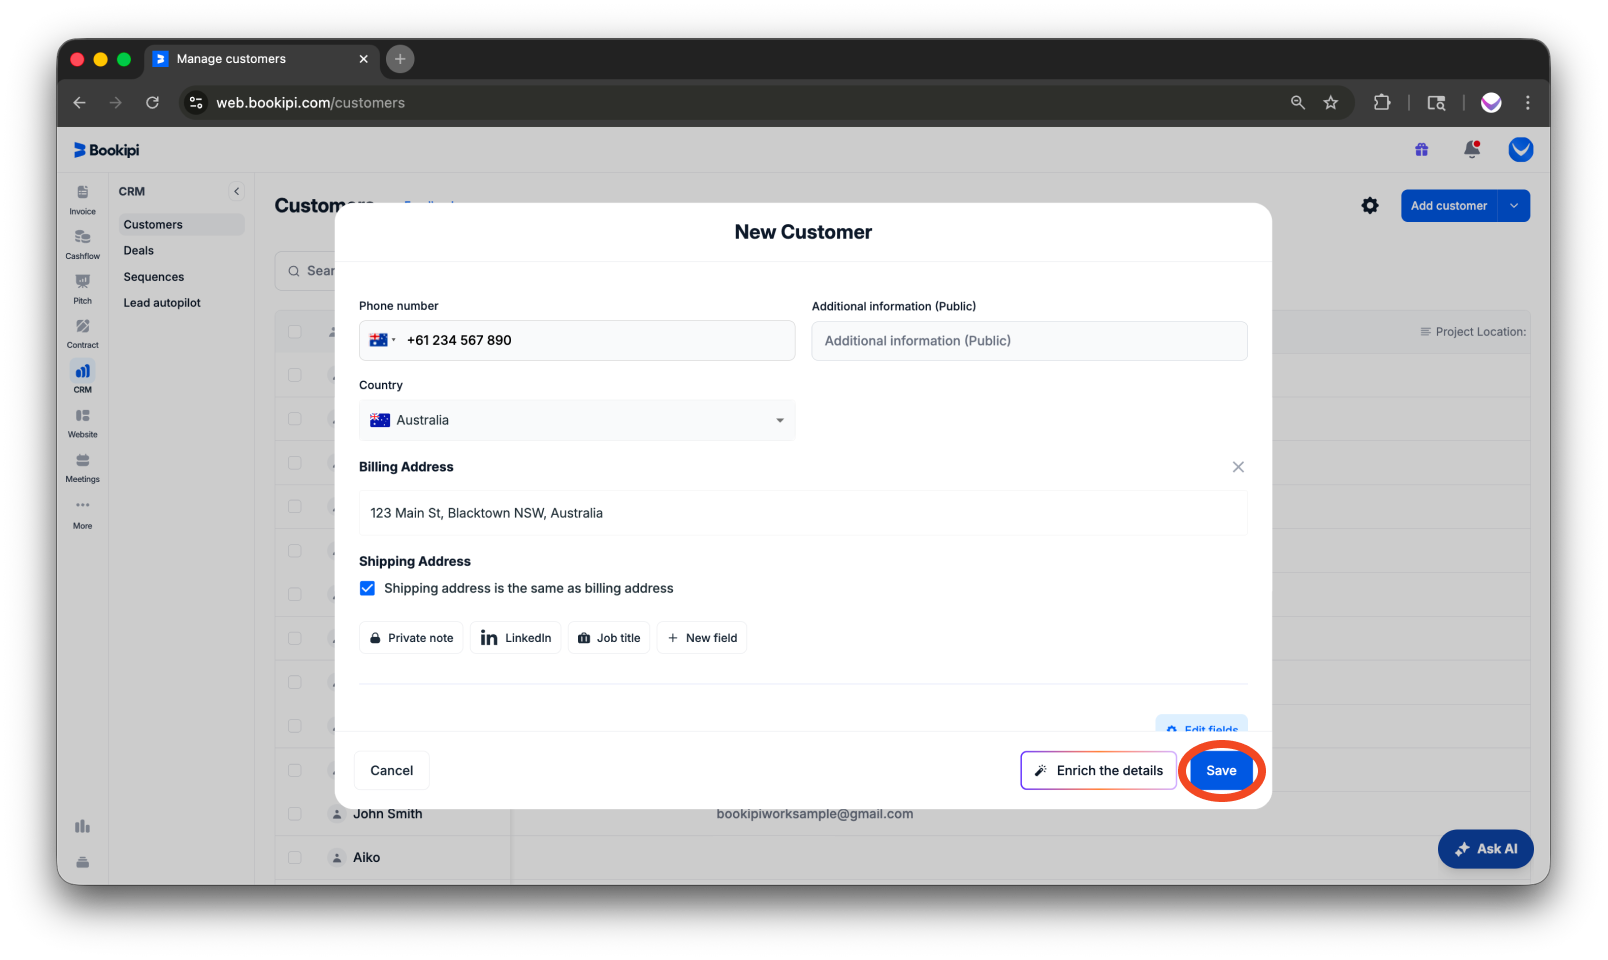
Step 5: Enter Customer Information
Click on each field to enter your customer’s details. By default, you can add Customer name, Company name, Business number, Email address, Phone number, and Additional notes.

You can also expand the additional fields to include Address, Job title, LinkedIn profile (if available), and Private note.
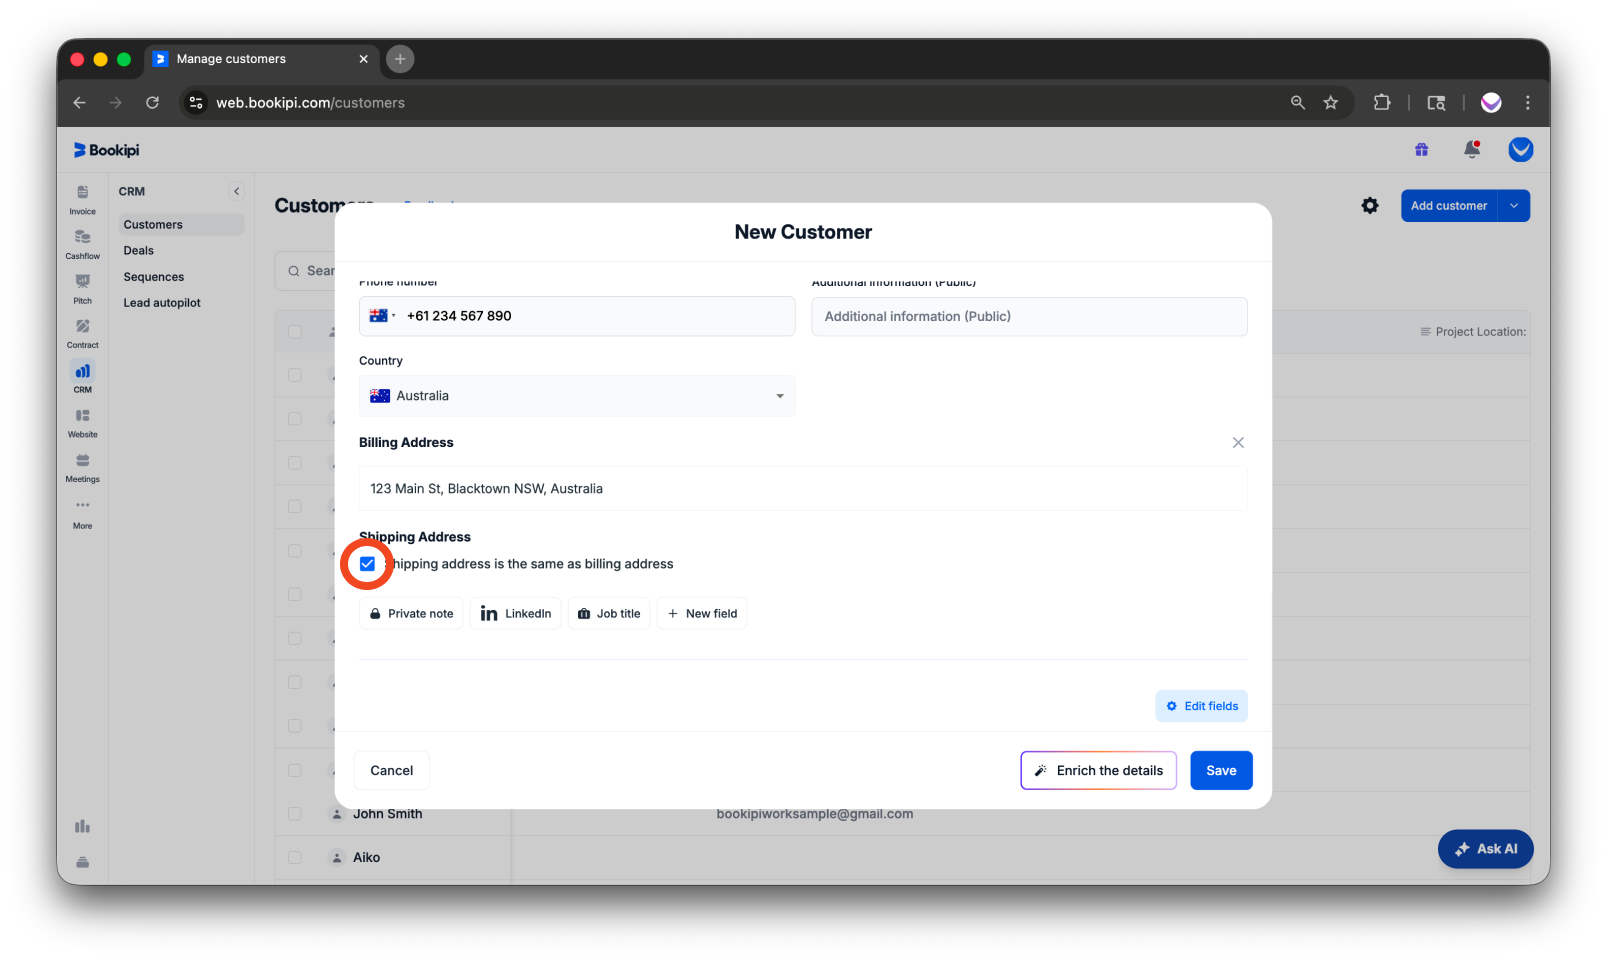
If the shipping address matches the customer’s billing address, tick the ‘Shipping address is the same as billing address’ box. Otherwise, uncheck the box and either search for the customer’s address in the address field or enter it manually.
Step 6: Save the Customer
Once all details are completed, click ‘Save’ at the lower-right corner of the screen.
To edit a customer
Learn how to edit a customer in your list in 6 easy steps.
Step 1: Open ‘CRM’
On the left-hand side panel of your dashboard, click ‘CRM’.
Step 2: Open the ‘Customers’ section
Make sure you are in the ‘Customers’ section within CRM.
Step 3: Select the Customer
From the customer list, select the customer you would like to edit or update.
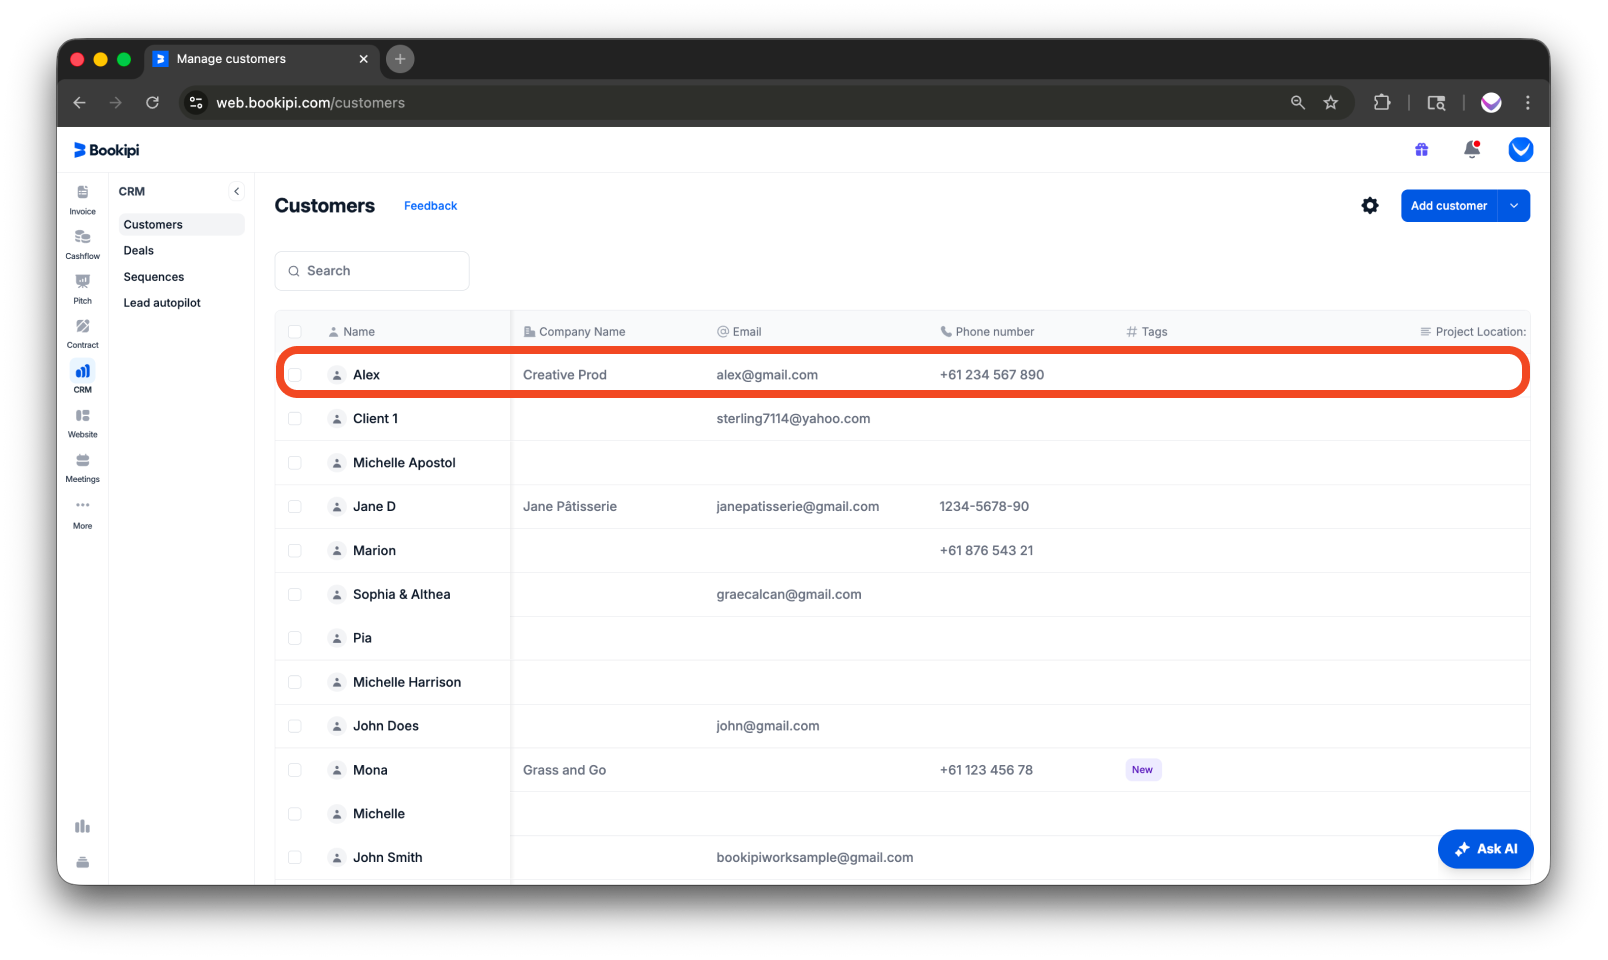
Step 4: Edit Fields Directly
Hover your mouse over any existing field (for example, Company Name). Click the field to edit it directly from the dashboard. You can also click on an empty field (such as Phone number) to add new information.

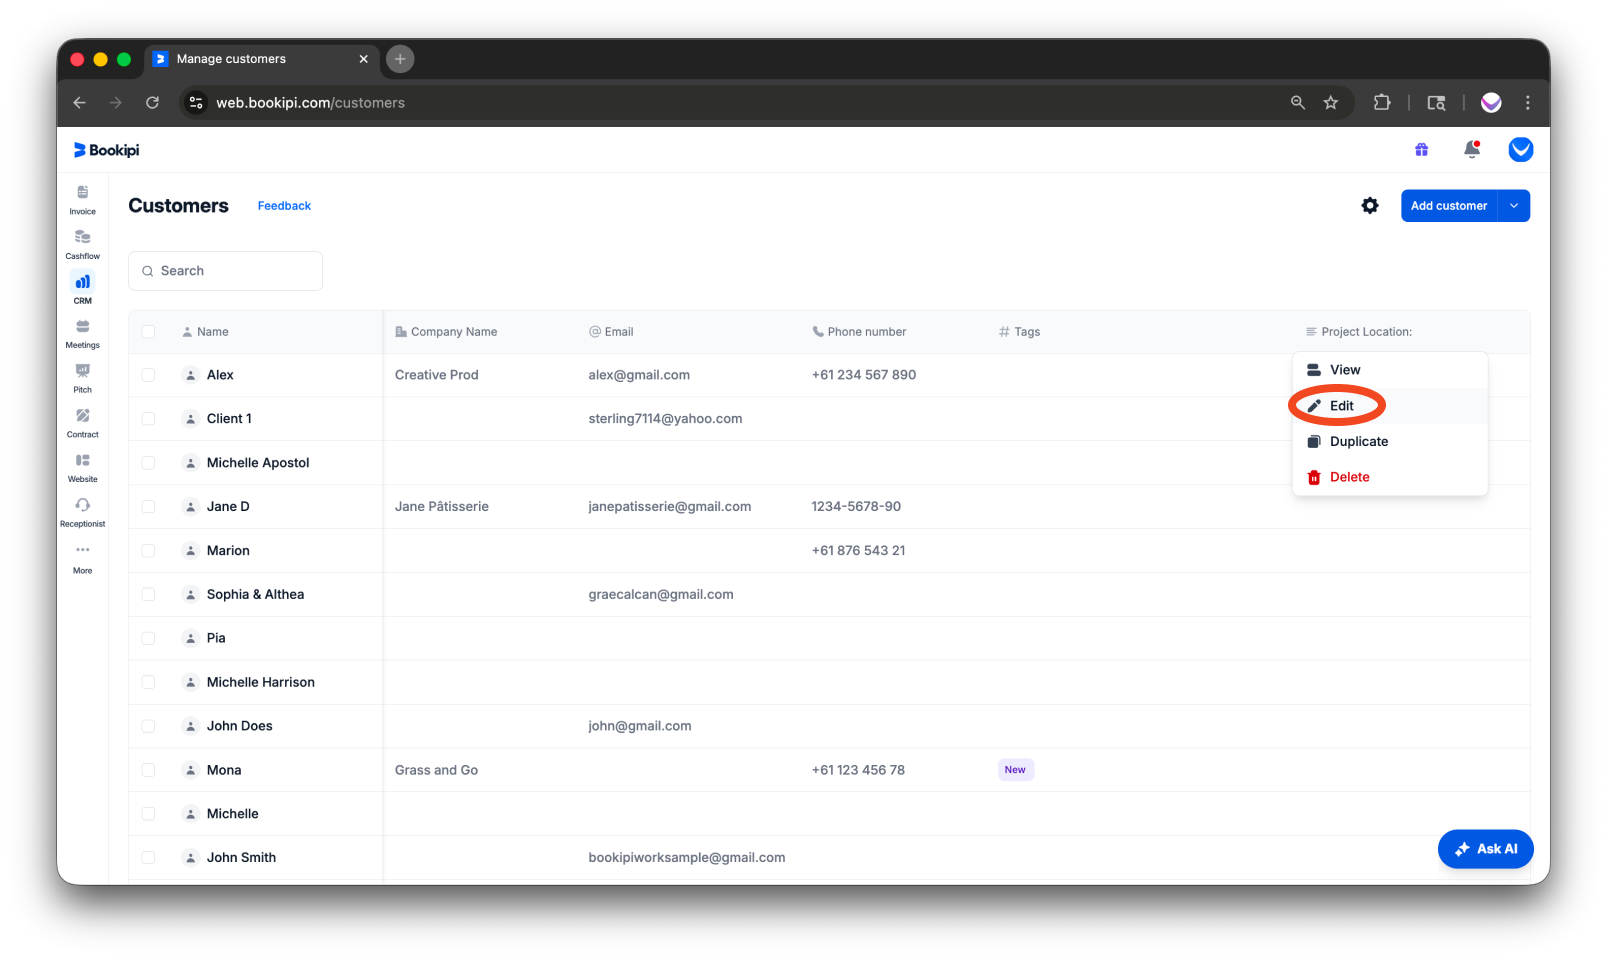
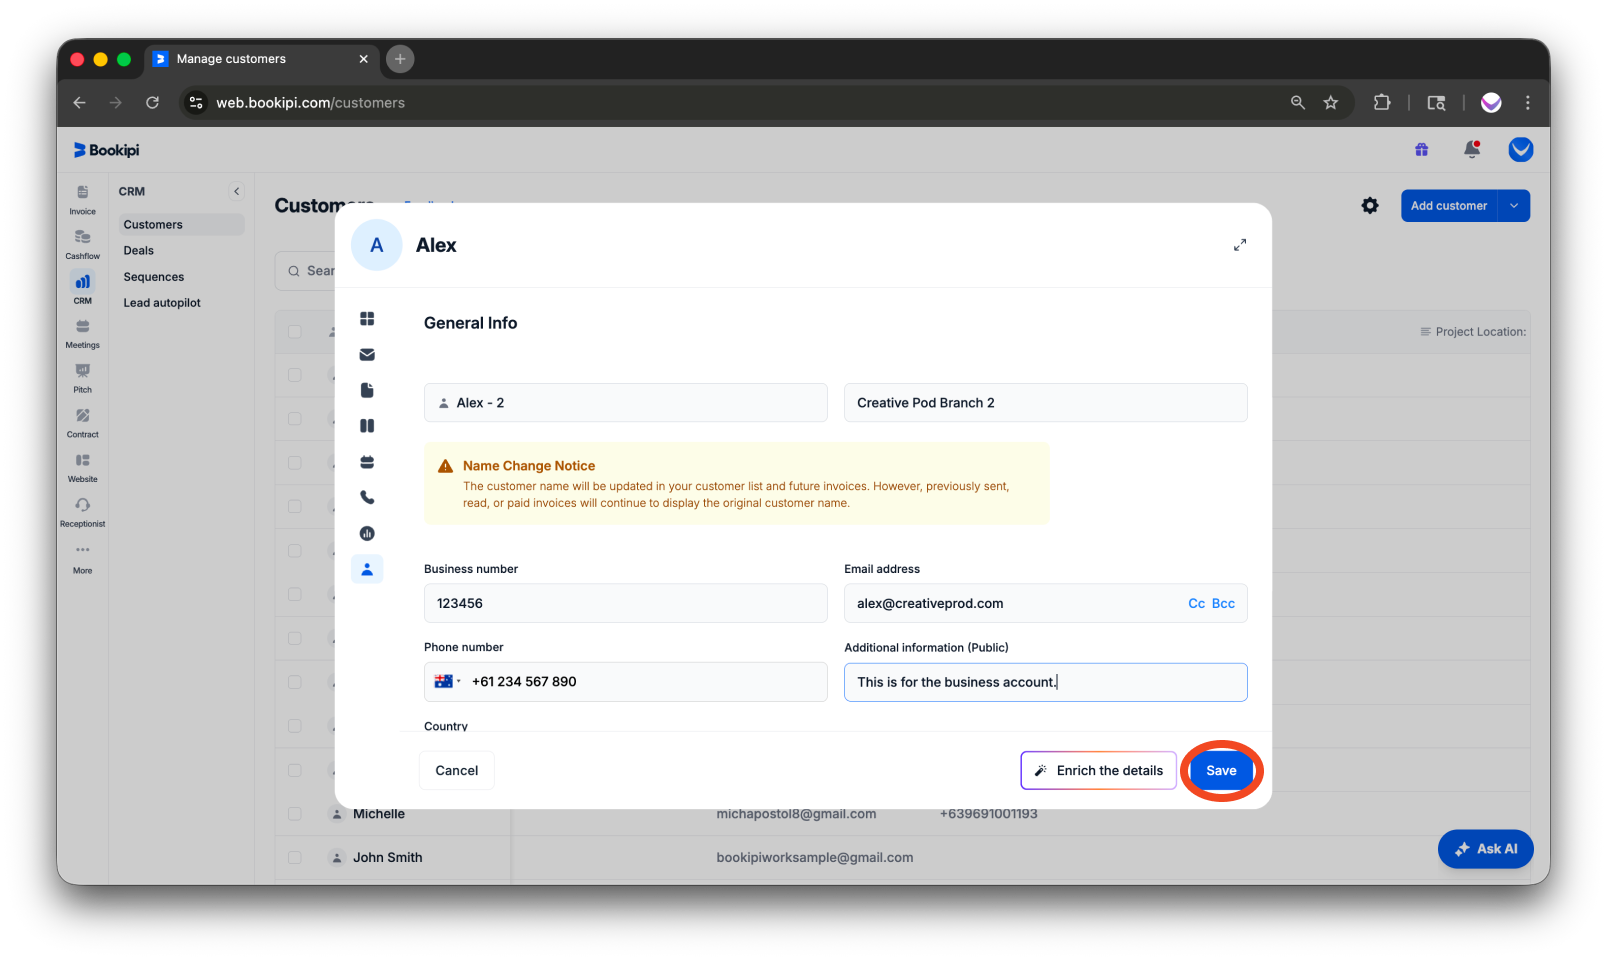
Step 5: Edit/Add Additional Details
If you need to add or update more information, click the vertical ellipsis (⋮) button beside the customer’s name, and click ‘Edit’. This will open editing mode, where you can edit/add other fields and details.
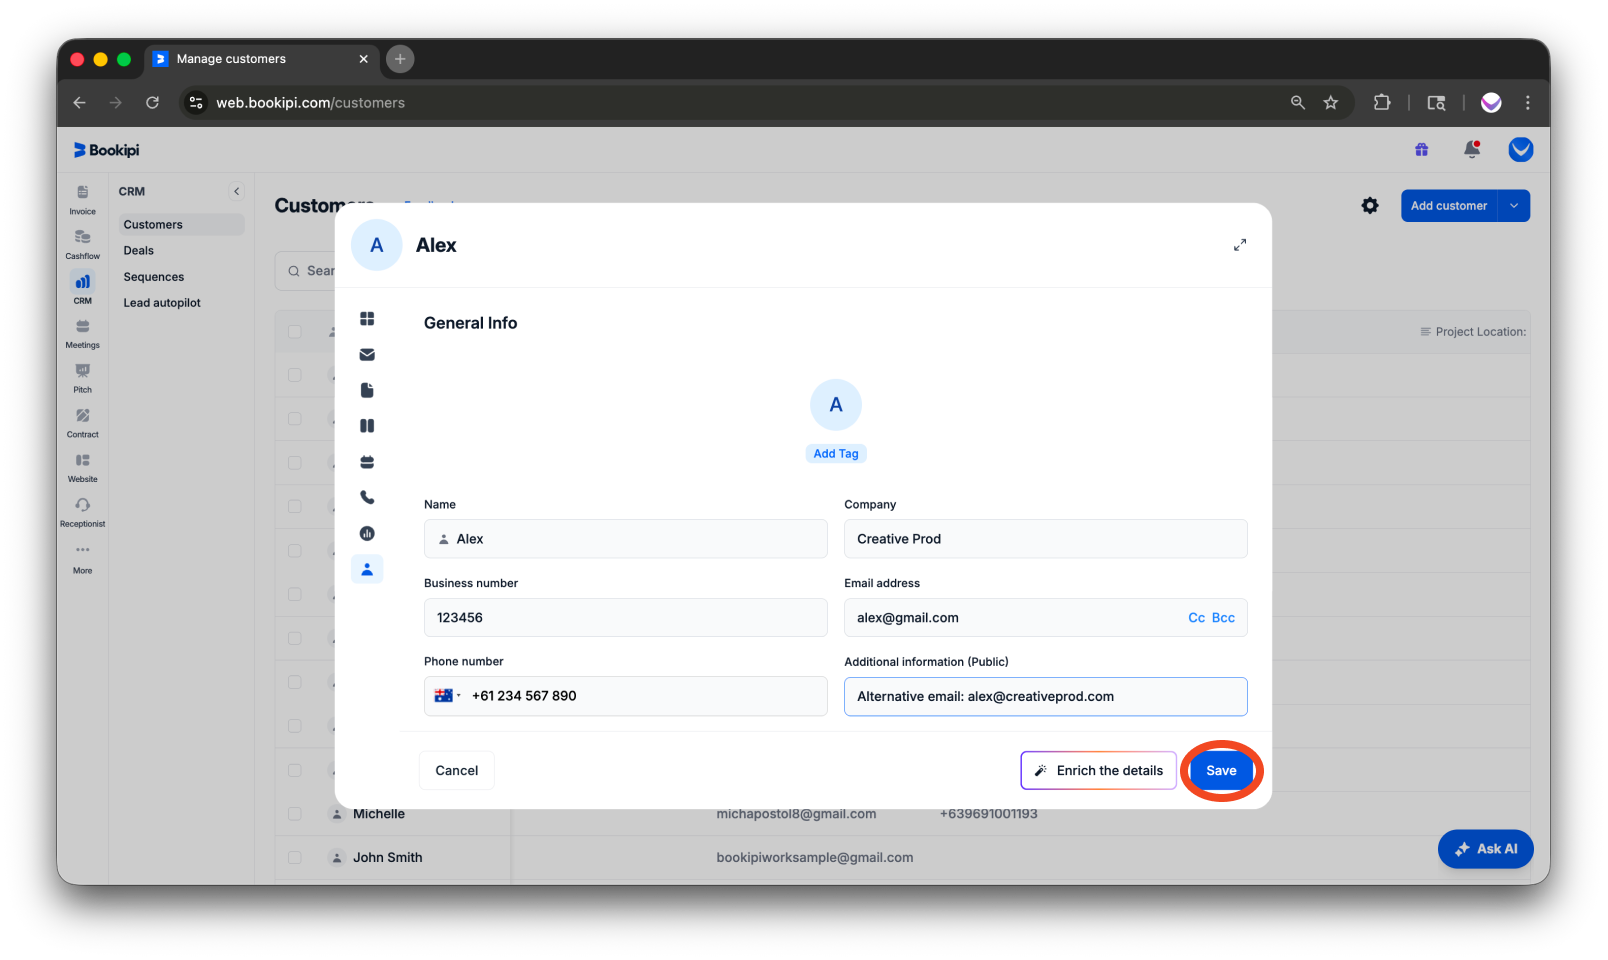
Step 6: Save Changes
Once you’re done making updates, click ‘Save’ to apply and store the changes.
To copy a customer
Learn how to copy a customer in your list in 6 simple steps.
Step 1: Go to ‘CRM’
On the left-hand side panel of your dashboard, click ‘CRM’.

Step 2: Open the ‘Customers’ section
Make sure you are in the ‘Customers’ section within CRM.

Step 3: Select the Customer
Hover your mouse over the customer you want to duplicate.
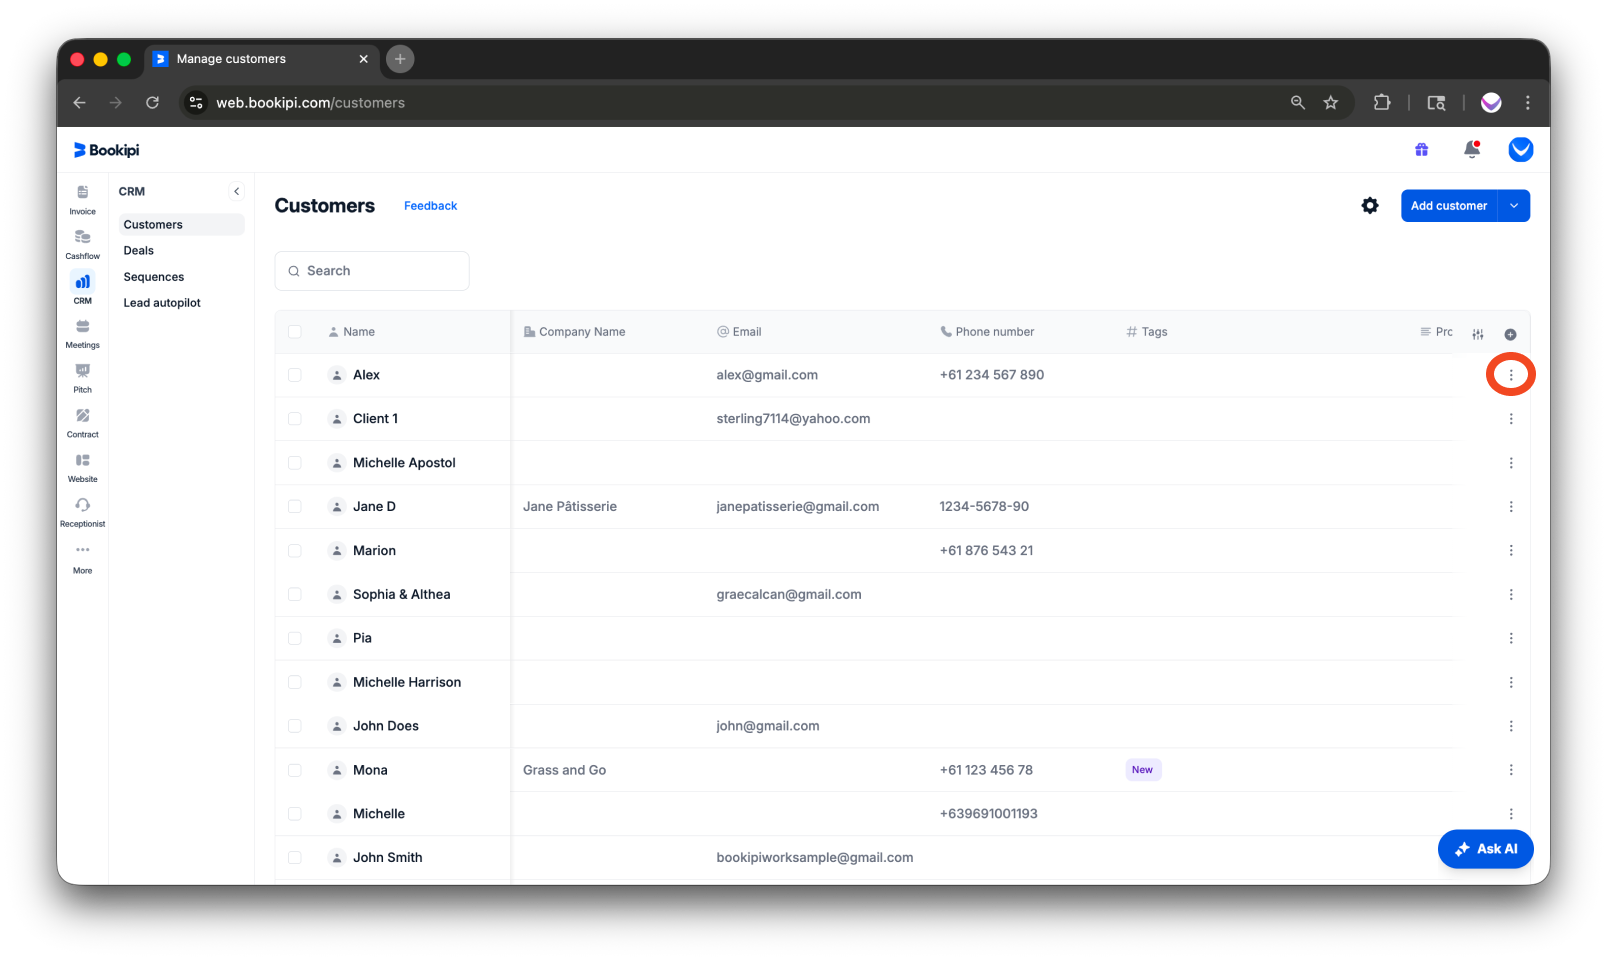
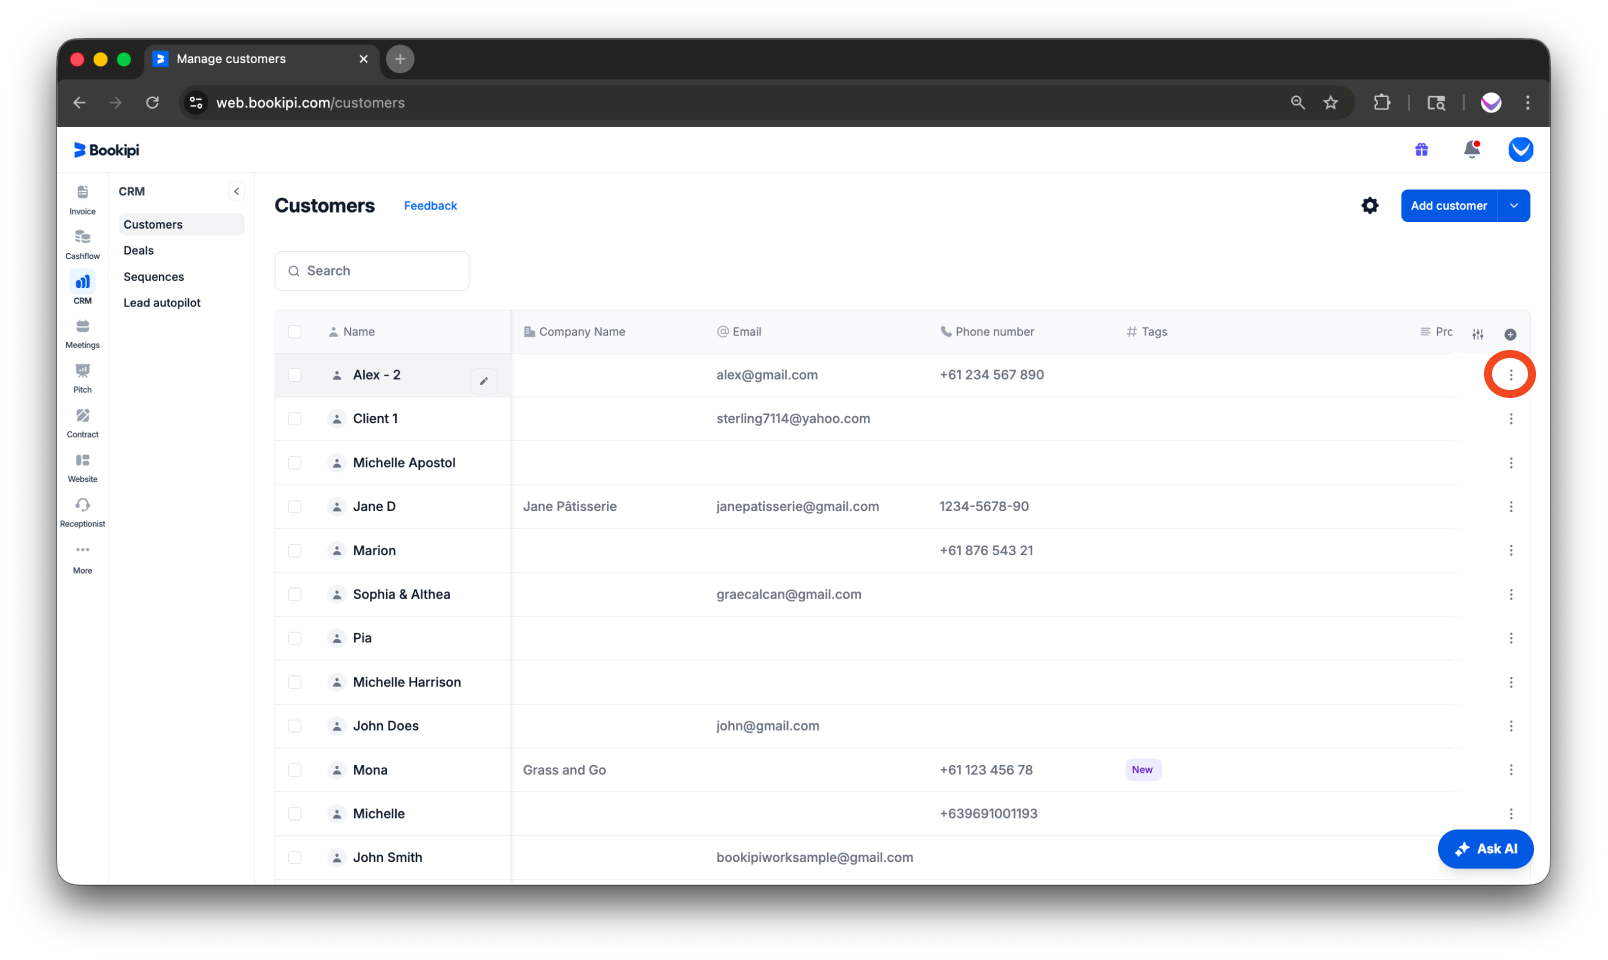
Step 4: Open More Options
Click the vertical ellipsis (⋮) beside the customer’s name to open the options menu.
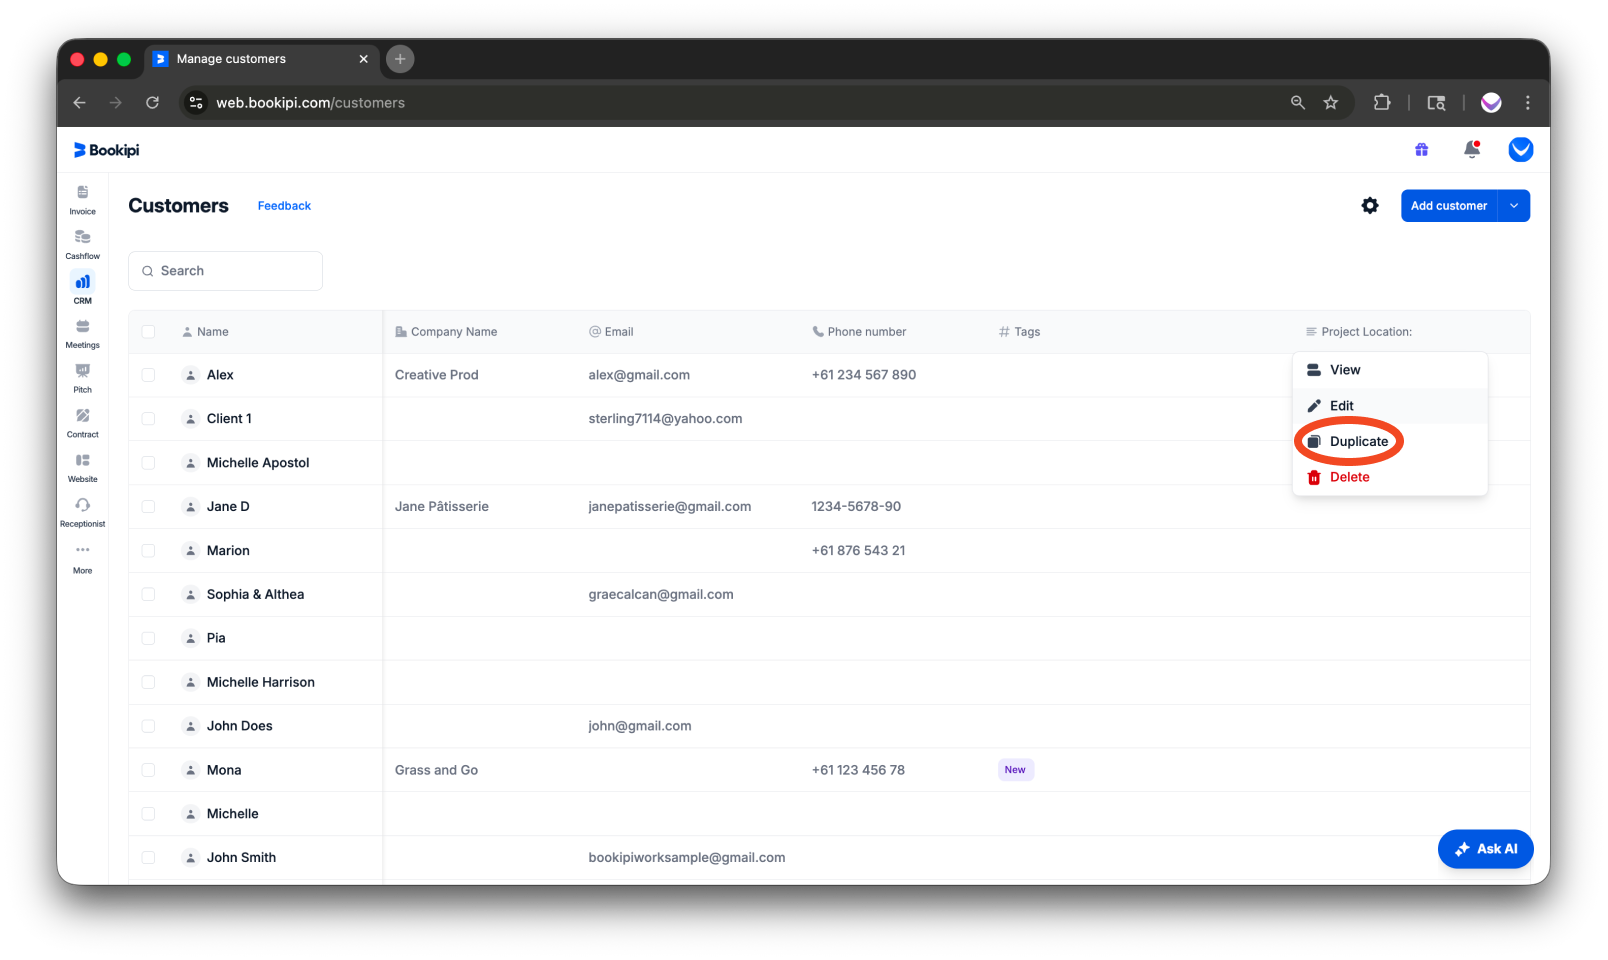
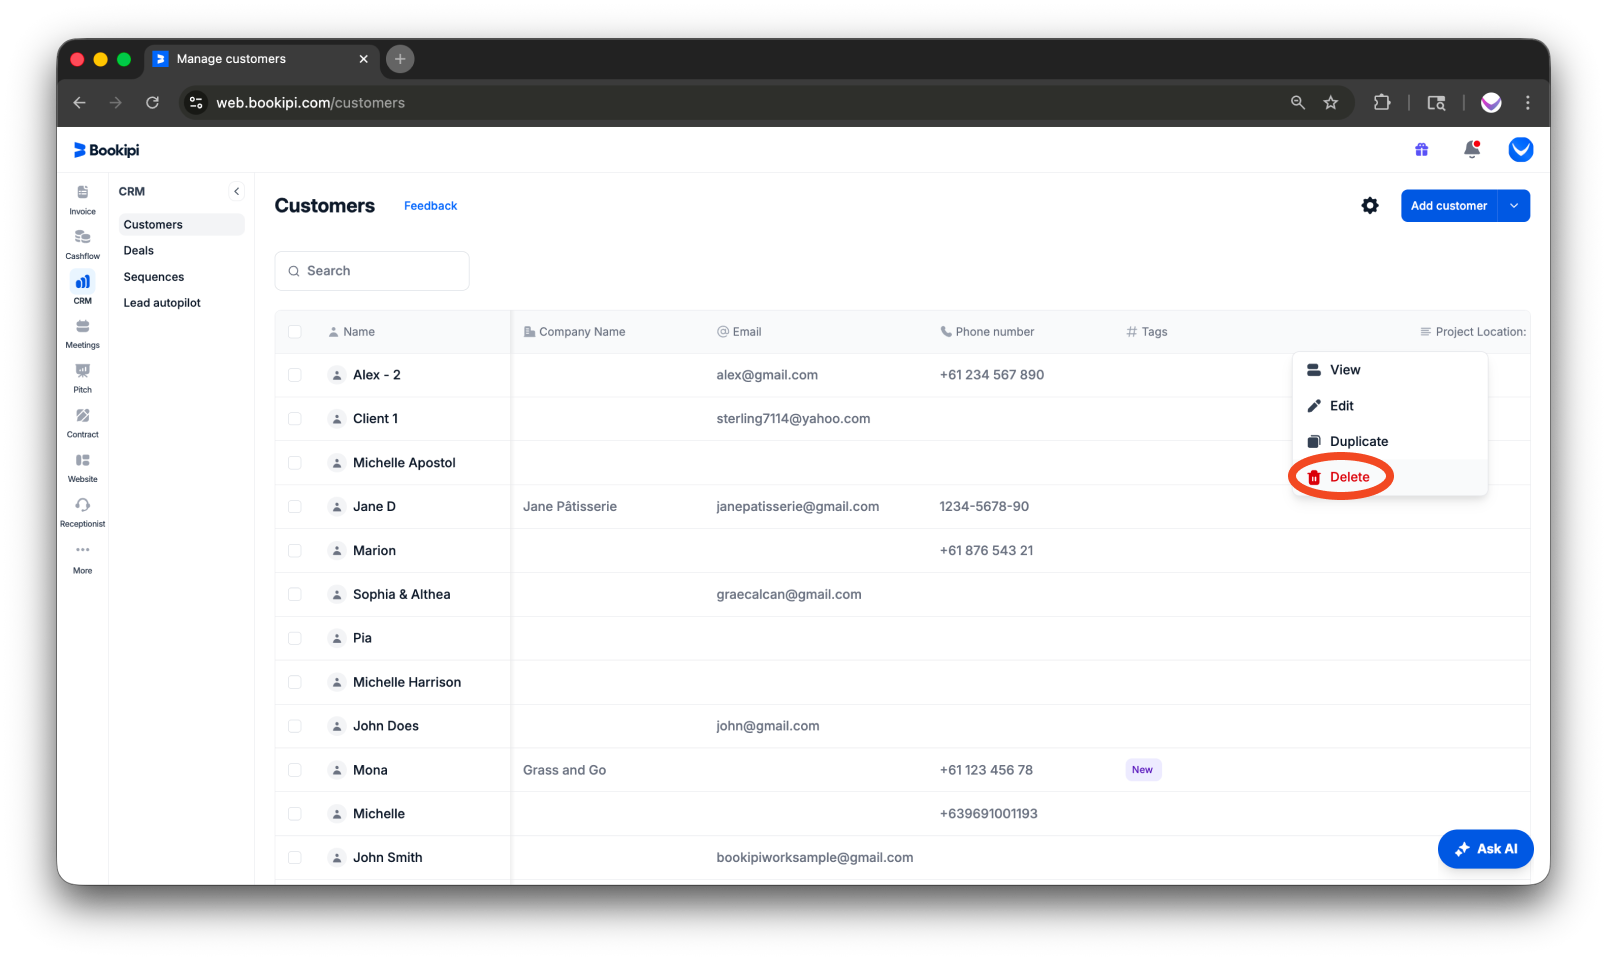
Step 5: Duplicate the Customer
From the menu options, click ‘Duplicate’.
Step 6: Save
Review and edit the details if needed, then click ‘Save’ to confirm.
To delete a customer
Learn how to delete a customer from your list in 5 easy steps.
Step 1: Go to ‘CRM’
On the left-hand side panel of your dashboard, click ‘CRM’. You will be taken to the customer dashboard.
Step 2: Open the ‘Customers’ section
Make sure you are in the ‘Customers’ section within CRM.
Step 3: Select the Customer
Hover your mouse over the customer you want to delete, and click the vertical ellipsis (⋮) beside the customer’s name to open the options menu.
Step 4: Delete the Customer
From the menu options, click ‘Delete’.
Step 5: Confirm Deletion
Click ‘Delete’ again to confirm and permanently remove the customer.
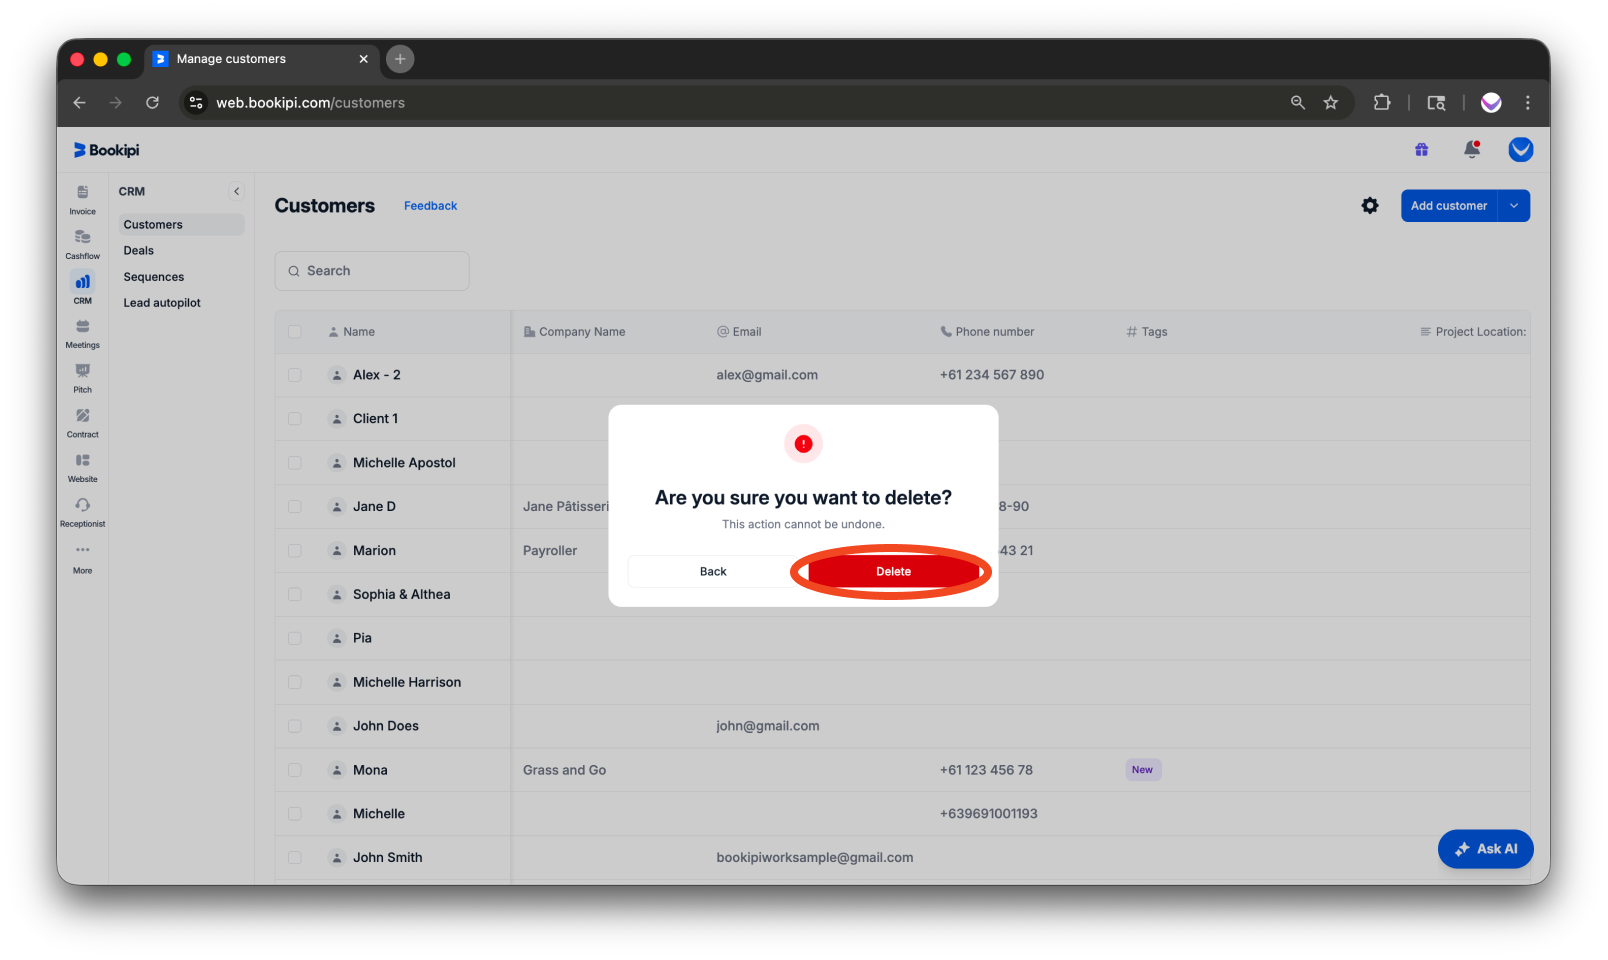
Deleting a customer is permanent and cannot be undone. Any invoices linked to this customer will remain unchanged.
FAQs about how to create, edit, copy, and delete a customer
Q: What is CRM?
A: CRM stands for Customer Relationship Management. It’s a system or tool used to manage and improve interactions with your customers. It helps you store customer information, track sales, and provide better service, all in one place, making it easier for you to build stronger relationships with your customers.
Q: How to search for a specific customer to edit or delete?
You can use the search bar on the upper left part of the customer dashboard. Just ensure to enter a complete word from the customer’s name or email for the search to work properly. Once located, you can select and edit or delete the customer.
Q: Can I delete multiple customers at once?
A: Yes, you can delete multiple customers at once by ticking the checkbox next to their names, selecting the customers you want to delete, and then clicking the ‘Delete’ button at the top of the list to remove them. However, please note that once deleted, this action cannot be undone or restored.
Q: How can I save a customer’s information when there is no save button while adding or editing their record?
A: If you can’t find the save button while saving your customer’s information, it may be due to your screen being zoomed in. Try zooming out to make the save button visible.
Discover more tutorials for Bookipi Invoice on Web v2
Discover more tips on how to get the most out of Bookipi Invoice on Web v2 with our Web v2 guides.
Make sending invoices anytime and anywhere even easier by downloading Bookipi Invoice mobile app and check out our mobile app guides.


