Learn how to create and send a customer statement on Bookipi Invoice mobile app
How to create and send a customer statement
Customer statements are key in support, offering transaction clarity, and encouraging timely payments. They enhance professionalism, aid cash flow, and improve credit control. Additionally, customer statements function as part of a broader reporting capability integral to managing client finances effectively.
Learn how to create a customer statement on the Bookipi Invoice mobile app with these easy steps:
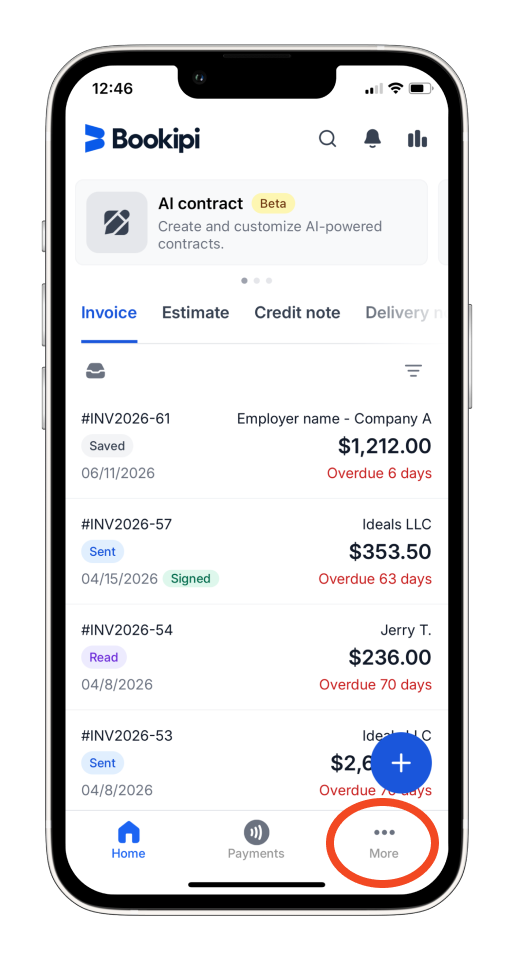
Step 1: Open the menu.
On the Invoice default screen, tap the ‘More’ button located in the bottom right corner.
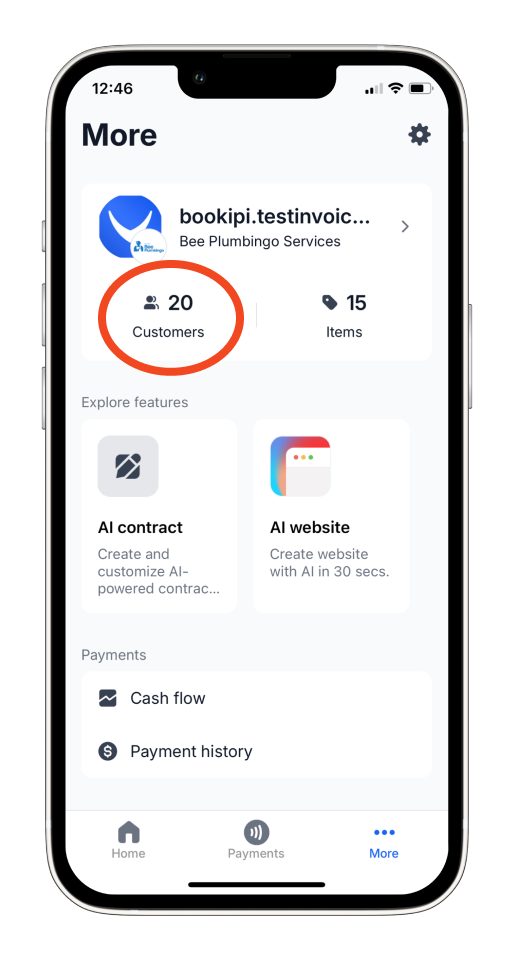
Step 2: Select ‘Customers’.
Tap ‘Customers’ located below your business icon to view your complete customer list.
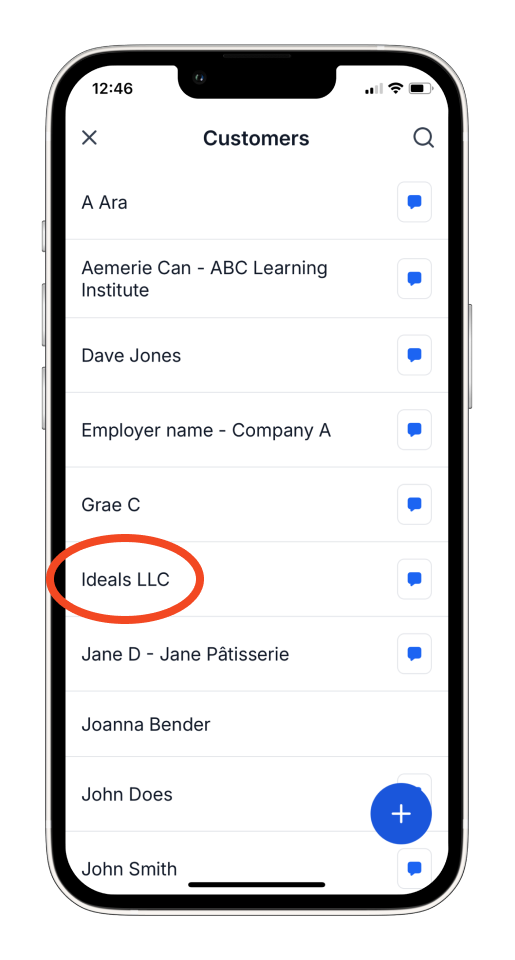
Step 3: Choose a customer.
Select the name of the customer whose statement you want to view.
Step 4: View customer documents.
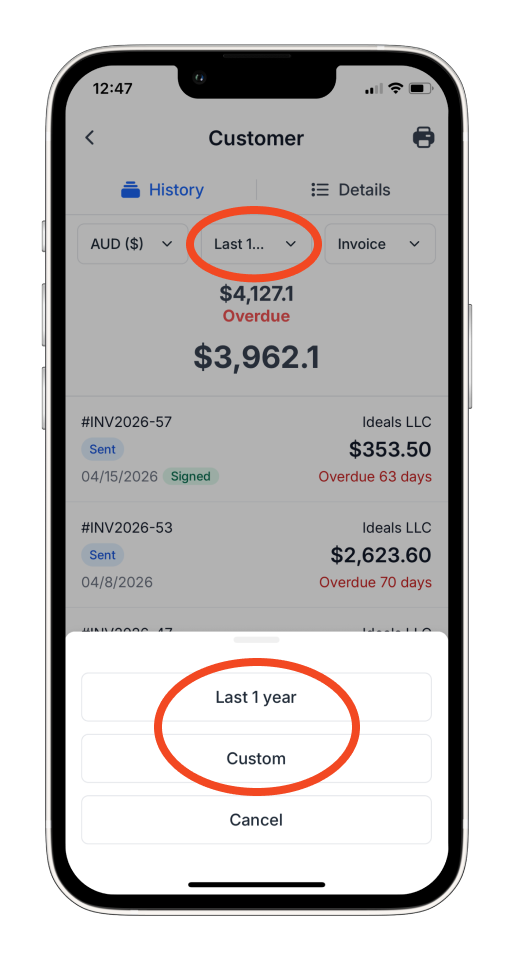
The screen will display the default currency set in your Settings and the date range set to ‘Last 1 year’ by default.
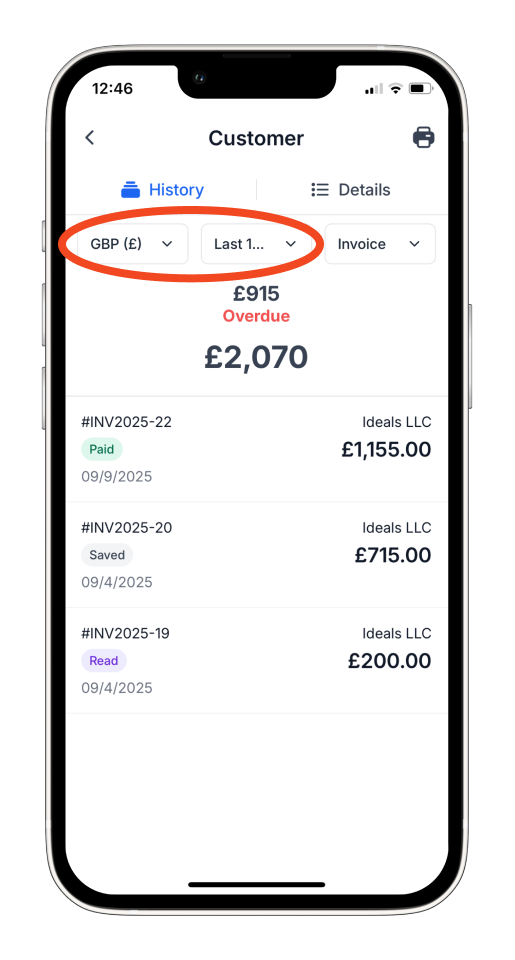
If you use multiple currencies, select the currency used for the customer from the currency drop-down menu.

Then, choose your preferred date range: ‘Last 1 year’ (default) or ‘Custom’ if you want to generate a report for a specific period.
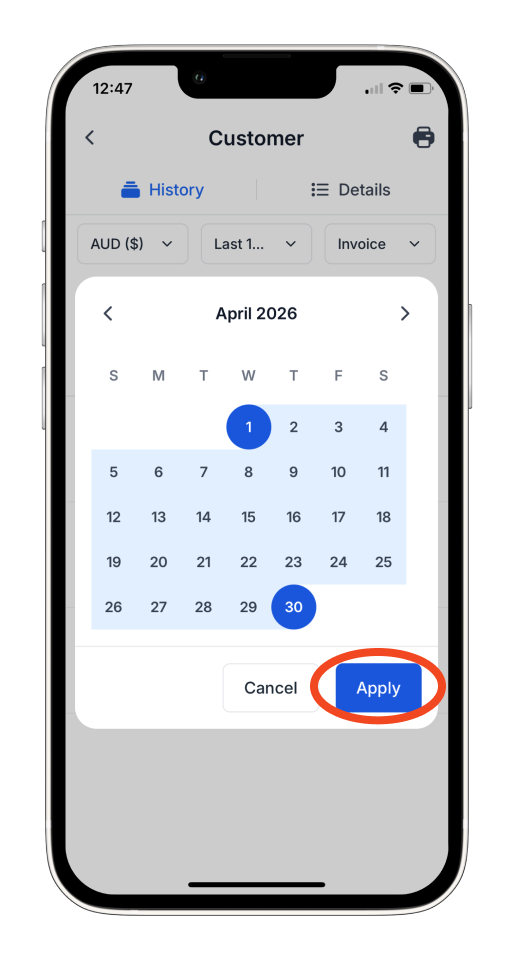
If you choose to customize the date range, select a start and end date from the calendar, then tap ‘Apply’ to confirm.
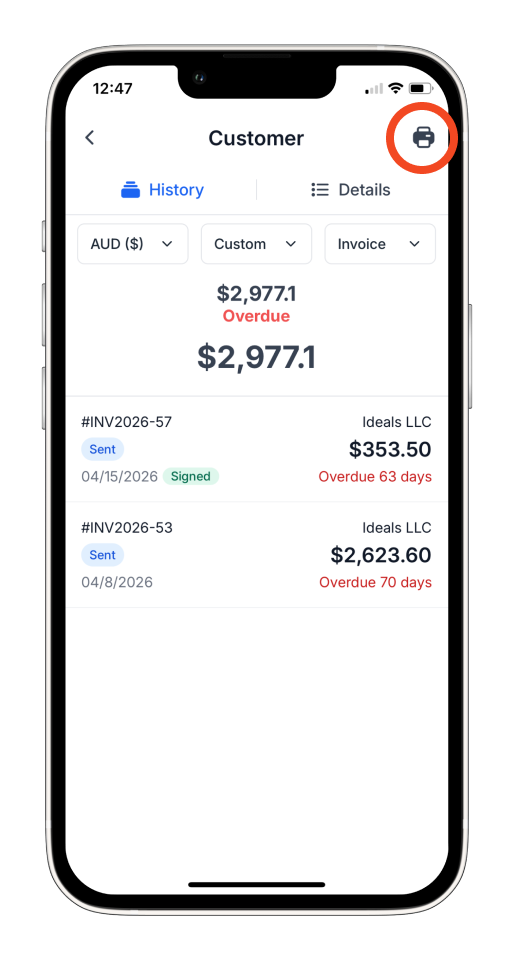
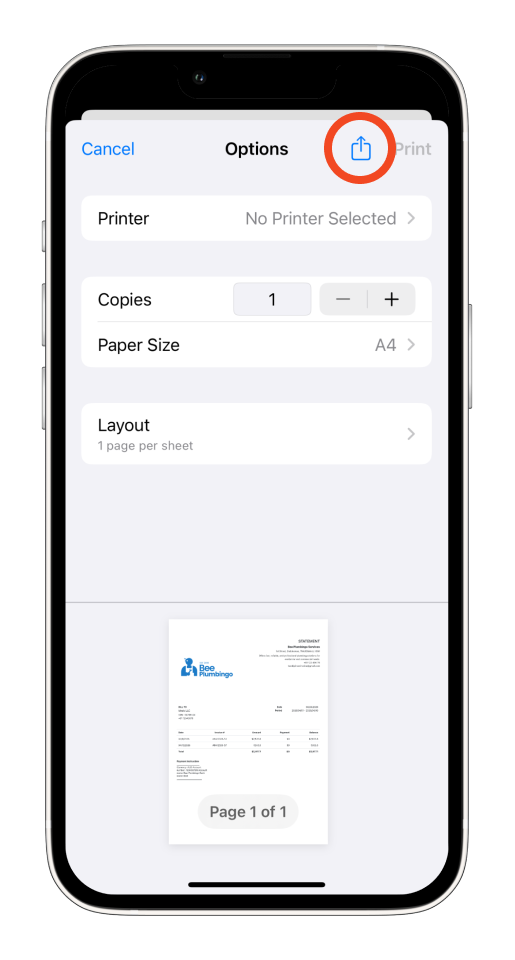
Step 5: Tap the printer icon.
Tap the printer icon at the top right of the screen to print, download, or share your statement.
Step 6: Print, download or send the statement.
To print your statement, select a printer then tap ‘Print’.
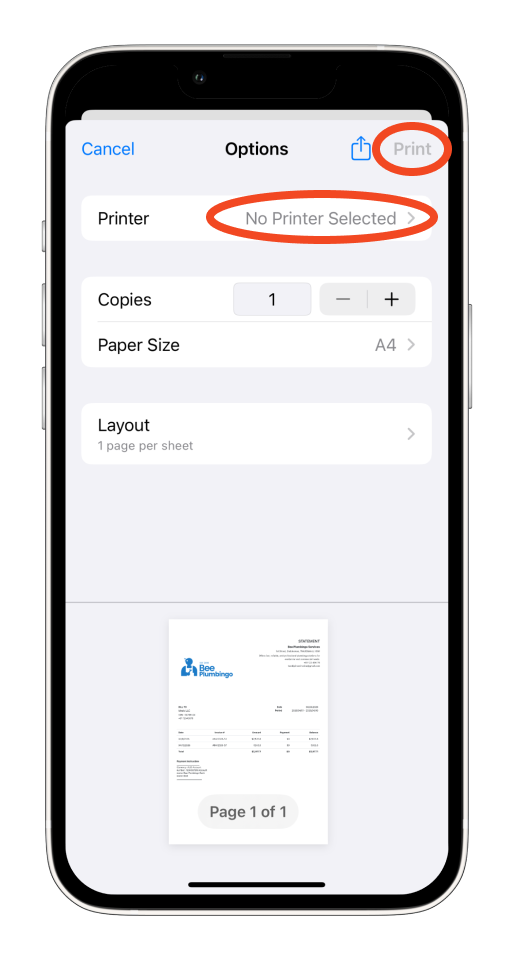
You can also tap the arrow-up icon next to it to download the statement or send it to your customer.
FAQs about how to create and send a customer statement
Q: What is a customer statement?
A: A customer statement is a summary document that provides an overview of all invoices and payments associated with a particular client. It’s a helpful tool to give your clients a clear picture of what’s been billed, what’s been paid, and any outstanding balances.
Q: Can I create a customer statement using the web app?
A: At this time, the customer statement feature is only available on the mobile app. If you’d like to see this functionality added to the web version, we’d love to hear from you! You can share your suggestion or vote for it on our feature request board here: Submit a feature request
Q: What details are included in a customer statement?
A: The statement includes the following information:
-
Invoice numbers and issue dates
-
Amounts billed and paid
-
Payment dates
-
Any outstanding balances
-
The total amount due (if applicable)
Q: Can I save the statement as a PDF?
A: Absolutely! After generating the statement, simply tap the printer icon to save it as a PDF file to your device.
Q: Is it possible to download multiple statements at once?
A: Currently, statements can only be downloaded individually. Bulk downloads are not supported at this time.
Q: I can’t find the option to create a statement. What should I check?
A: If you’re not seeing the option, please ensure the following:
-
You’ve created at least one invoice for the selected client
-
You’re using the latest version of the Bookipi mobile app
-
You’ve selected the client from the Customers tab
Q: Can I regenerate or resend a customer statement?
A: Yes! You can return to the client’s profile at any time to recreate or resend their statement as needed.
Q: Why is the date range not setting correctly when customizing the time period?
A: This may happen if the dates are not selected in the correct order. To set the date range properly, first select the start date of the period, then select the end date.
Discover more tutorials for Bookipi Invoice on the mobile app
Creating and sending invoices is even easier with the Bookipi Invoice mobile app.
Discover more tips on how to get the most out of Bookipi Invoice with our mobile app guides.
You can also subscribe to Bookipi Invoice for unlimited invoices on both the mobile app and the web. For more details, check out our Subscription FAQ.


