How to make invoice reports in Bookipi mobile app
Learn how to create reports in Bookipi Invoice mobile app with our simple tutorials:
Customize your view of Reports
Alternatively, learn how to create a report on the Bookipi Invoice mobile app with our step-by-step video guide below:
How to access and print your reports as PDF
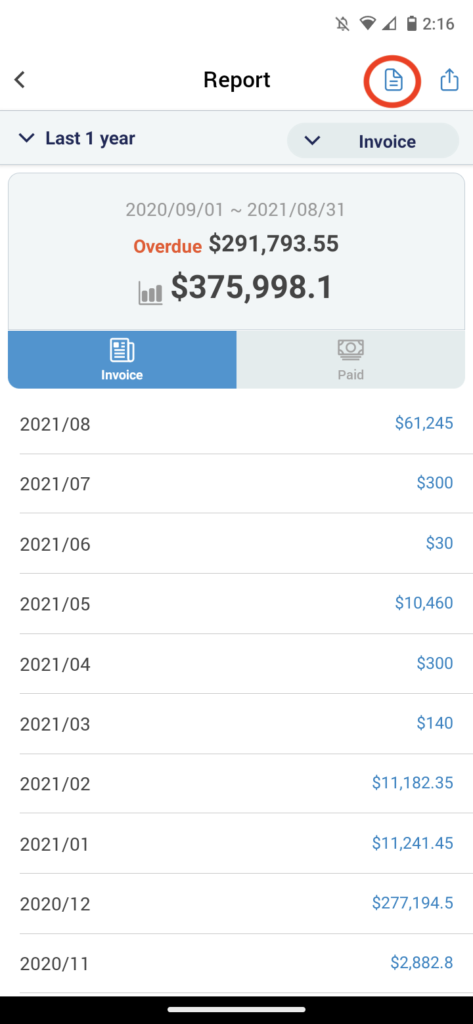
Step 1: Select the Graph icon

Step 2: Select the Document icon
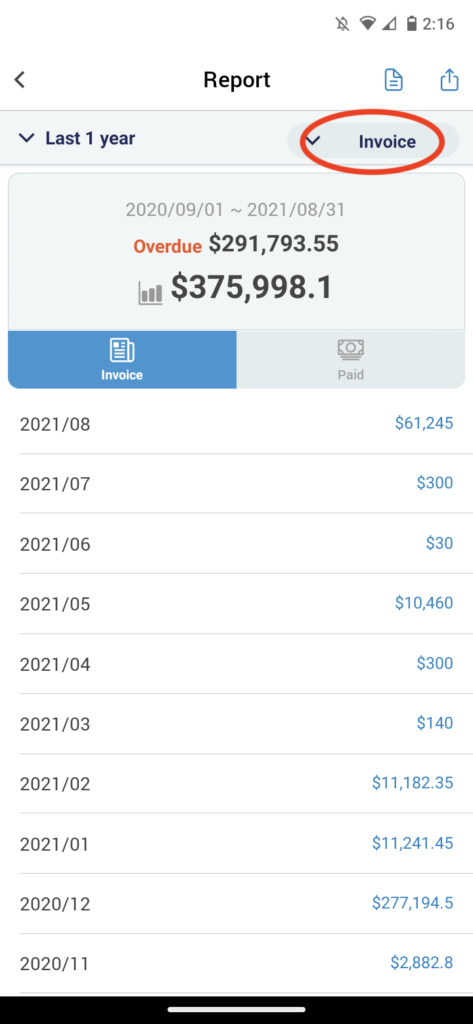
You can download your summary report for the last year
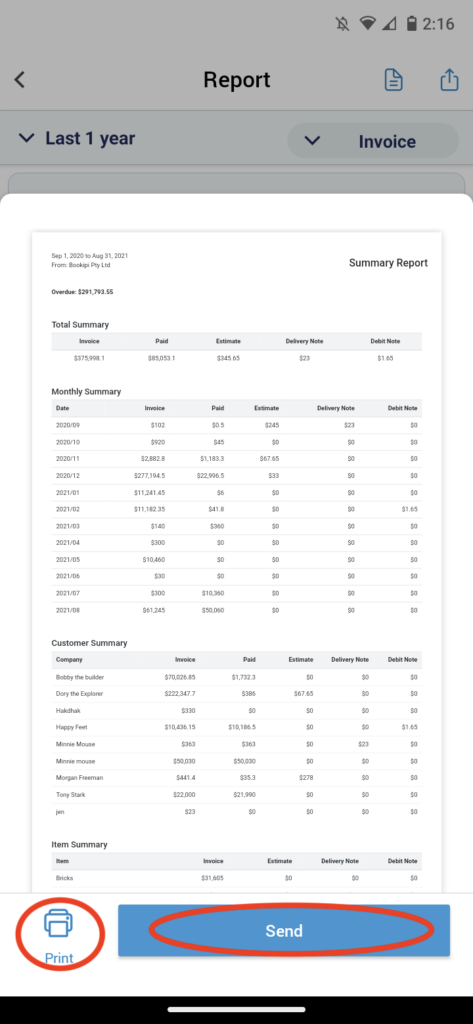
Step 3: Select ‘Print’
Print or download your summary report as a PDF. Alternatively, select ‘Send’ to email the report as a PDF.
How to export your reports as a CSV and send in an email
Learn how to export your reports as a CSV file and easily send it via email with our simple steps below:
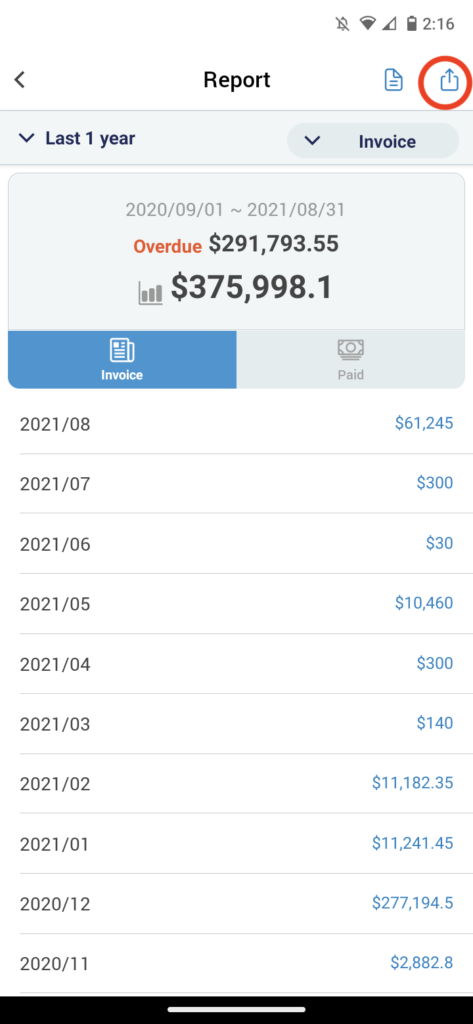
Step 1: Select the Export icon
From the Report screen, select the Export icon
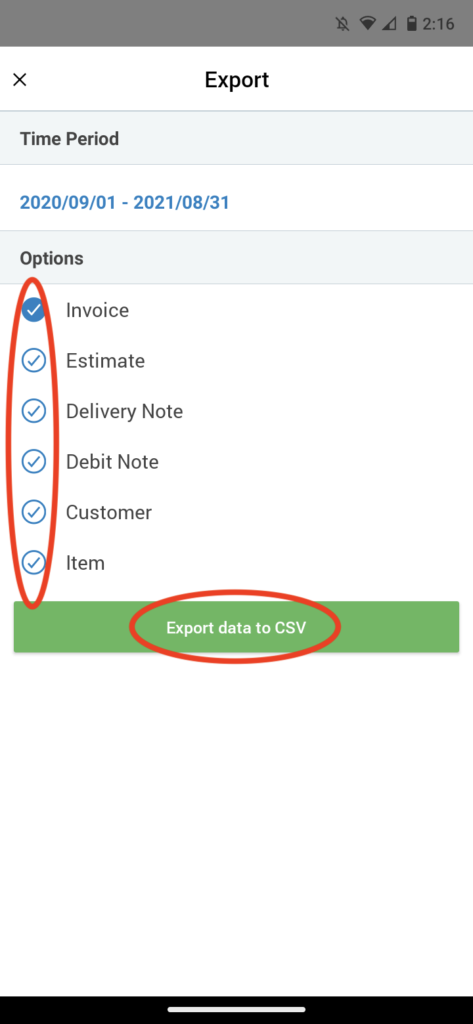
Step 2: Select ‘export data to CSV’
Select the Document type, Customer, or Item you would like to export and select ‘Export data to CSV’.
Step 3: Select the method for sending.
Choose from the list of sending options (Gmail, Outlook). 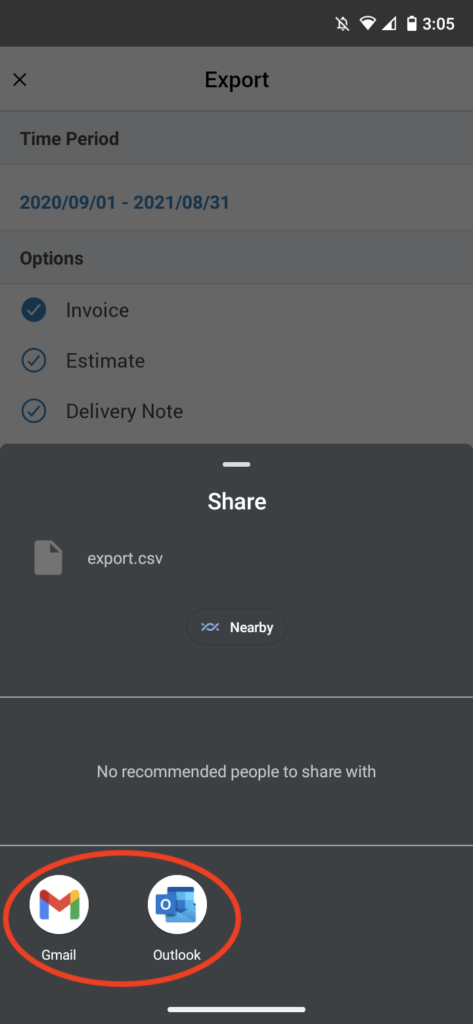
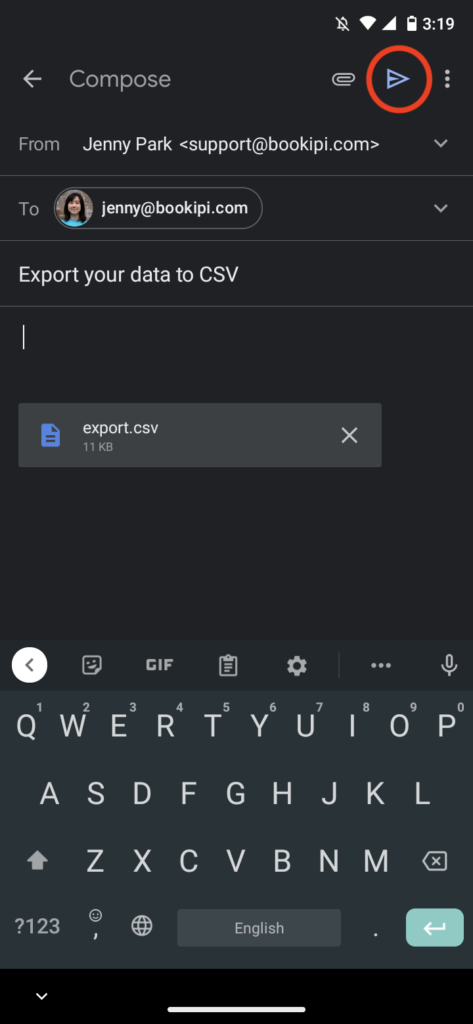
Step 4: Send the email
A new email will be created in your email account with an automatic CSV attachment. Check that the recipient’s email address is correct and click ‘Send‘.
How to customize your view of Reports (by document type, customer, or item)
Learn how to view reports by Document type (invoice, estimates, and more), Customer or Item with our simple steps below:
Step 1: Select ‘Invoice’
From the Reports screen select ‘Invoice’.
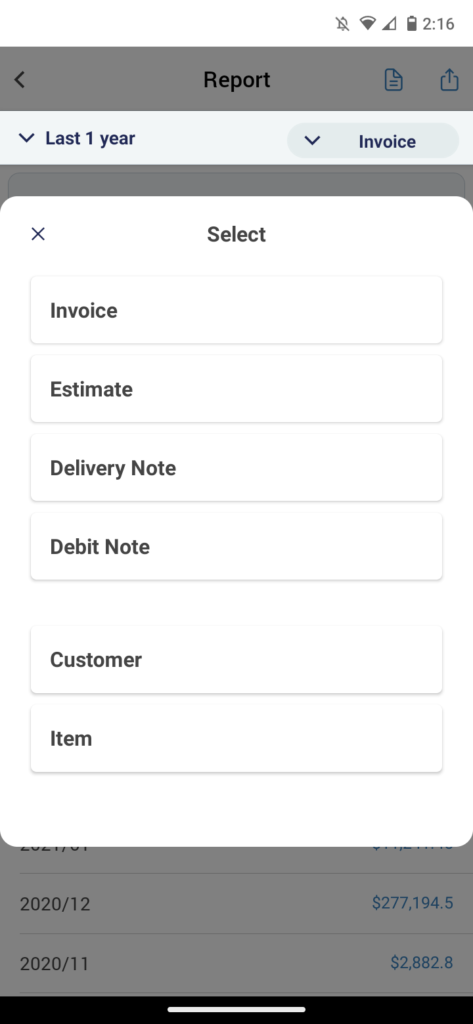
Step 2: Select the Document type, Customer, or Item
Customize how you view your reports. This will not impact summary reports that are downloaded or exported.
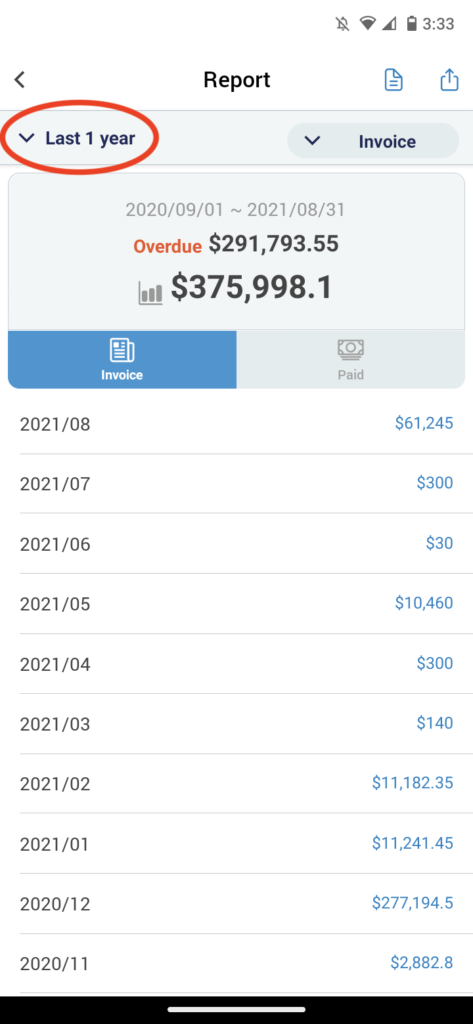
How to customize the time period for your reports
Learn how to view reports for specific dates and customize your time period with our simple steps below:
Step 1: From the Report screen, select ‘Last 1 year’
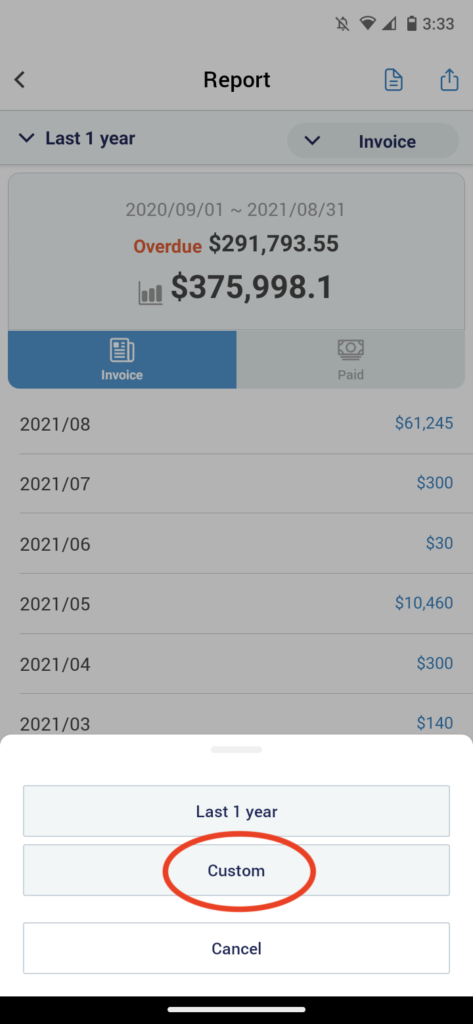
Step 2: Select ‘Custom’.
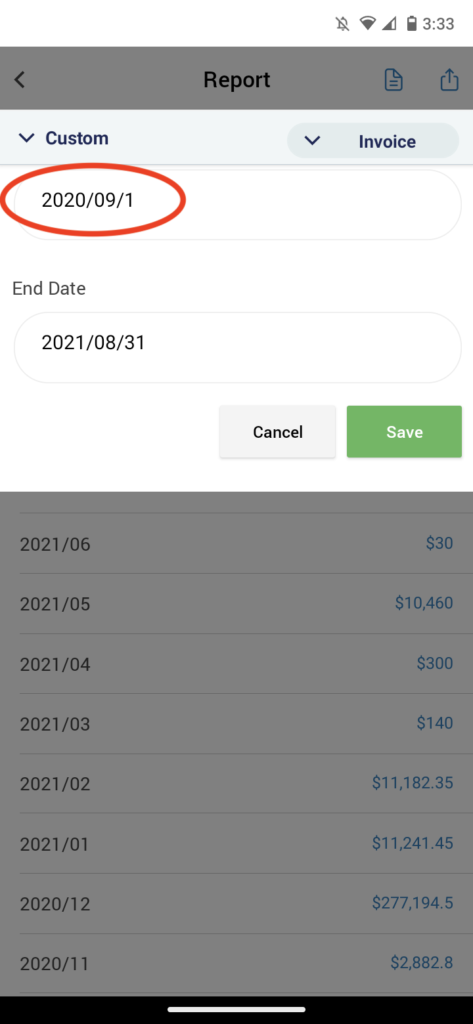
Step 3: Customize the time period for the report
Select the ‘Start Date’ or ‘End Date’ to customize the time period.
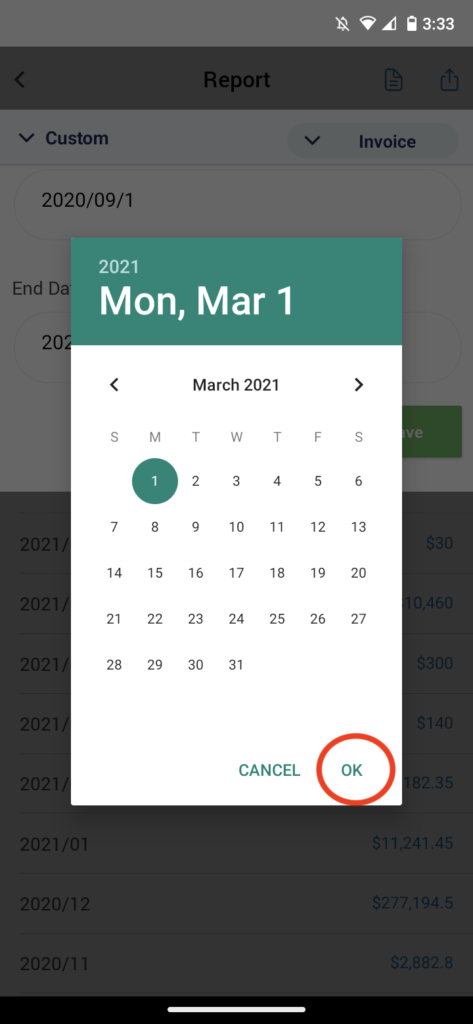
Step 4: Select your preferred dates.
Choose a date range on the Calendar pop-up and select ‘OK’ when you’re ready.
Step 5: Save your changes
Select ‘Save’ to save your changes.
Customizing dates on Reports will also change the date range of summary reports that you download and/or export.
